Special eyepieces (Guiding, Diascope etc.)
-
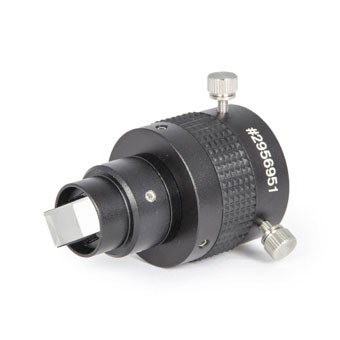
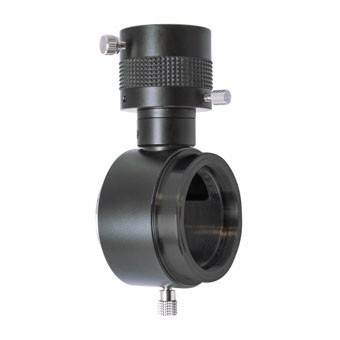
Off Axis Guider for Baader FlipMirror II (BFM-OAG)
Classic Ortho 6mm with Zeiss-Diascope Bayonet
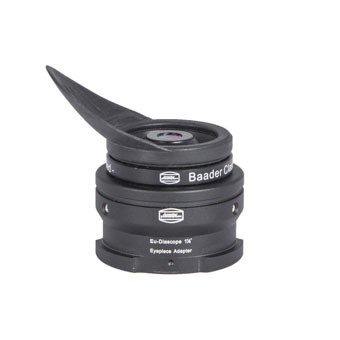
Classic Ortho 6mm with Zeiss-Diascope Bayonet
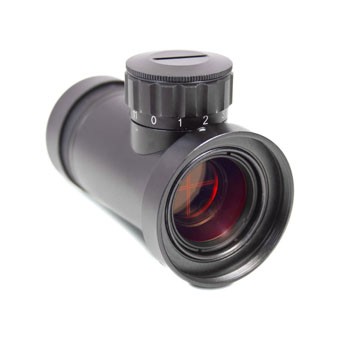
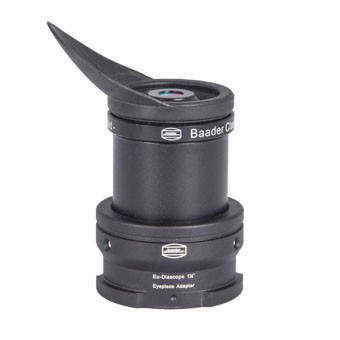
Polaris I – Measuring- and Guiding-Eyepiece, 25mm, T-2, illuminated

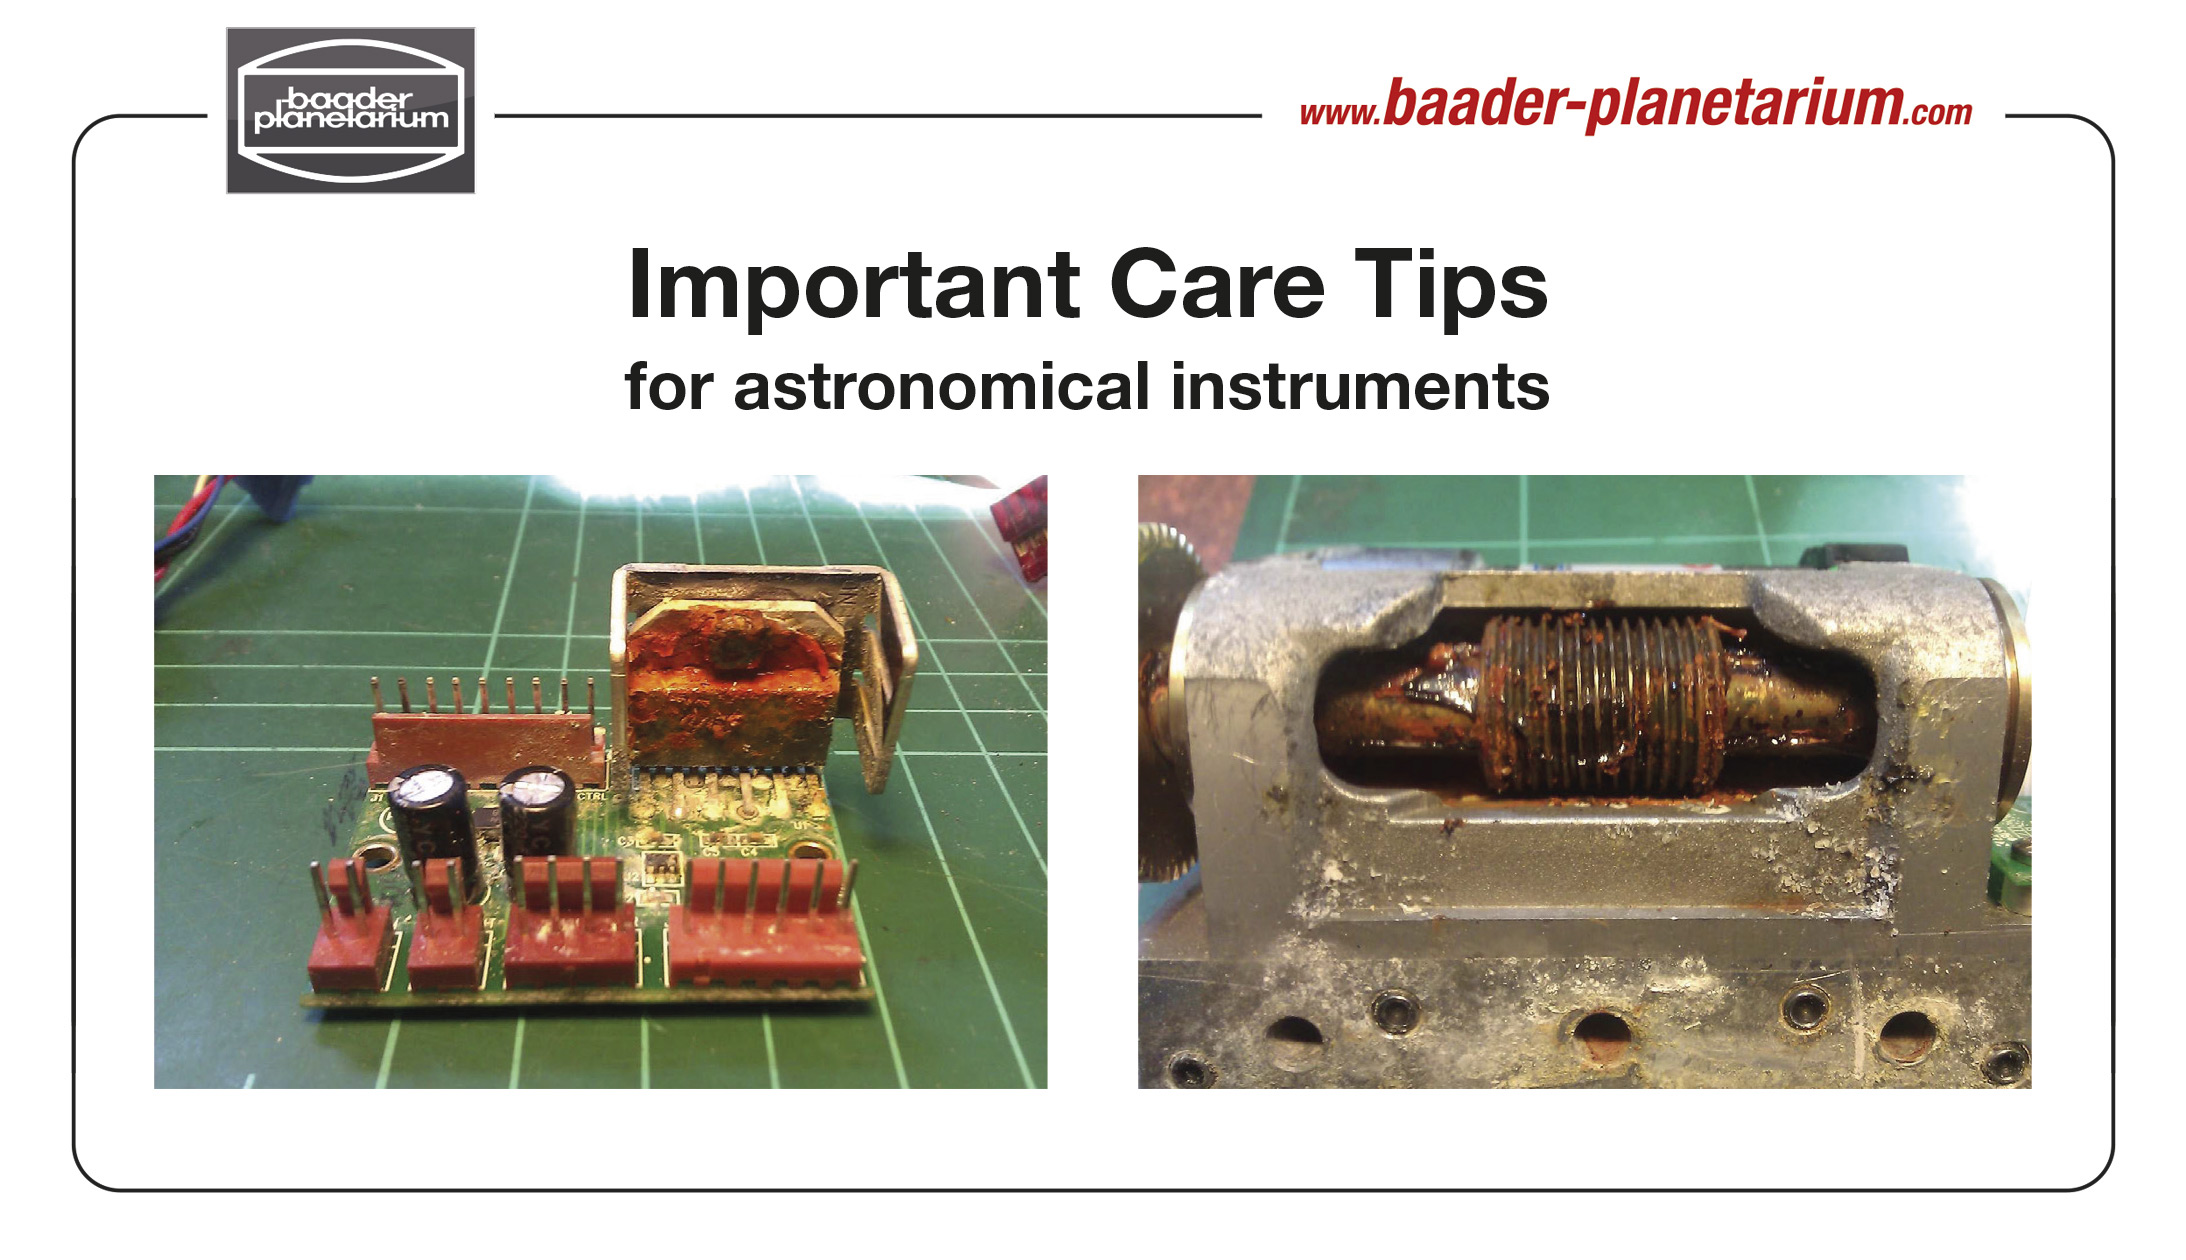
Important Care Tips for astronomical instruments
Please, observe the following guidelines to protect your telescope/mount and avoid damage or even loss of warranty.
-
 Sorry that the micro guide is no longer in productionI have owned one of these for a number of years. I landed here because coincidentally I had just been reading up on the micro guide's history etc. I have just read the comment that the micro guide is no longer in production unless sufficient demand is generated. Well, I have an interest in binary systems and do sometimes use my micro guide for measurement. I find the quality of the eyepiece excellent, of course. However, for anybody remotely considering adding their name to the notify when back in production list, I will add that I use the eyepiece regularly for very accurate polar alignment, i.e. my micro guide is heavily used and I would hate to be without it. Highly recommended.vapourer
 -
 Ordentliches OkularGur geeignet für Planeten und Mondbeobachtung. Zeiss Okulare sind wegen fehlender Punktschärfe nur bedingt geeignet.Max
 -
Baader Micro Guide Okular an Variofinder 10x60 adaptieren:Um das Baader Micro Guide 12.5 mm Okular (#2404300) mit dem Vario-Finder 10x60 verwenden zu können ist ein kleiner Trick notwendig. Da bei dem Micro Guide Okular die Okularblende konstruktionsbedingt weiter hinten (Richtung Okulareinblick) liegt, als z. B. bei den Morpheus Okularen, ist der Auszug des Vario-Finders zu lang, um auch noch „Unendlich“ fokussieren zu können. Wenn man aber das Micro Guide Okular mit der Q-Barlow Linse (#2956185) kombiniert, indem man das Linsenelement der Barlow-Linse in das Filtergewinde des Okulars einschraubt, kann man wieder „Unendlich“ fokussieren und hat noch den Vorteil einer um ca. Faktor 1,3-fach stärkeren Vergrößerung.Jörg Steffan
-
 Baader FlipMirror II nun komplett mit dem Off Axis GuiderGutes Produkt und es wird mit die Möglichkeit geben meinen Leitrohr wieder als Sucher bzw. für Großfeldfotografie zu nutzen. Leider passt bei mir nur ein Okularguider. Da der Fokus relativ kurz ist. Durch ein T2 Gewinde an der Basis des OAG hätte da mann wahrscheinlich mehr Möglichkeiten gehabt in den Fokus zu kommen.Andreas Corente
 -
Messfeldokular orthoskopisch 1.25" beleuchtet mit 45° GesichtsfeldDas Messfeldokular von Baader stand schon lange auf meiner Wunschliste. Aber erst nach Erwerb der Ausrüstung für die Sonnenbeobachtung habe ich es erworben. Es soll zur Durchmessung von Sonnenflecken an meinem Refraktor eingesetzt werden. Dem Okular liegt eine ausführliche Anleitung in Deutsch und Englisch bei und diese zeigt verschiedene Anwendungsmöglichkeiten gut verständlich auf. Für mich eine klare Kaufempfehlung für ernsthafte Beobachtungen.Thomas
-
Off Axis Guiding mit garantierten LeitsternenDer Off Axis Guider wurde zusammen mit dem Baader FlipMirror II Zenitspiegel #2458055 bestellt und trägt eine Alccd-QHY 5III 174 Guidingkamera. Die Lösung für das Neigen des Prismas im Gesichtsfeld führte bisher in meiner Praxis immer zu einem Leitstern. In einem Fall lichtete ich mit f/10 einen Asteroiden in einer recht sternarmen Gegend ab. Dank der Verstellung des Prismas hatte ich hier sicher eine Leitstern gefunden! Mit der Adaption des Guiders am Baader FlipMirror II Zenitspiegel hatte ich anfangs ein paar Startschwierigkeiten. Hier hatte ich anfänglich zu vorsichtig die beiden Madenschrauben, die den Guiderport am Flippmirrorarretieren, festgeschraubt. Nach kurzer Zeit bemerkte ich ein Verkippen der Guidingkamera bzw. des ganzen Off Axis Guiders. Hier darf man ruhig die beiden Schrauben sehr straff anziehen. Sonst wird der Guider nicht fest genug sitzen! Hier wäre m. E. eine Gewindelösung der Schnittstelle angebrachter. Funktionell muss ich in meinem Fall keine Abstriche machen! Der Aufbau bleibt zusammenmontiert größtenteils am Teleskop oder wird als Ganzes in einem Koffer verstaut. Wieder montiert bleibt die Justierung erhalten. Alles ist sehr wertig verarbeitet. Ich kann den Guider nur weiter empfehlen. Ach und alle die, die dem Off Axis Guiding skeptisch gegenüberstehen haben jetzt dazu keinen Grund mehr.Ingo Küttner
-
Sehr gute QualitätIch gebe zu ... ich liebe Ortho-Okulare und besitze einige davon. Ein besonderes Schmuckstück ist seit bald 15 Jahren das Messokular. Positionsmessung eines Sterns ... Bestimmung des wahren Gesichtsfeldes ... Bestimmung der exakten Brennweite eines Teleskops ... all das und noch viel mehr ist möglich. Selbst nach so langer Zeit ist der After-Sales bei Baader hervorragend. Mir ging die Anleitung abhanden ... ein Mail und ich habe innerhalb von 24 Stunden eine PDF-Kopie erhalten. Top!Torsten
-
 25mm Okular mit FadekreuzDas Okular mit LED-Beleuchtung & Doppelfadenkreuz ist in Ordnung und wurde gebrauchsfertig geliefert. Als gewissen Nachteil für Nachführzwecke stellte sich die rote Fadenbeleuchtung heraus, die selbst auf der kleinsten Stufe noch zu hell ist: Durch den Farbfehler des Auges ist entweder das Fadenkreuz oder der Nachführstern nicht fokal. Eine gelbe LED würde Abhilfe schaffen. Wünschenswert wäre ein zentrales Fadenkreuz, da das von dem Doppelfadenkreuz gebildete quadratische Feld für längerbrennweitige Teleskope zu groß ist. und mehrere Bogensekunden betragen kann. Außerdem wäre eine Gebrauchsanleitung ebenfalls wünschenswert.25mm Okular mit Fade
Most Recent Product Questions-
Rated: 0
 5/4/2024 7:05 PM
Baader Wide-T-Ring Canon R (for Canon R bajonet) with D52i to T-2 and S52
5/4/2024 7:05 PM
Baader Wide-T-Ring Canon R (for Canon R bajonet) with D52i to T-2 and S52
You have a lot of documentation on how using this with an eyepiece but none that I can found if I want to directly connect my camera to the eyepiece holder without going through the eyepiece itself.
* In this case is there a minimal extension distance to respect between the camera and the (empty) eyepiece holder? (with eyepiece for full frame hybrid you say 95mm)
* What is the impact of the extension distance on the magnification? (with eyepiece equivalent focal length is Feq=Ftel*(d/Feye-1)
Danke!
Answer rated: 1Adaptation to the eyepiece is pretty straight-forward: To use the maximum aperture, remove the T-thread from the T-ring and insert 2" / S52 Nosepiece # 2958551. Then you can insert it into your eyepiece holder, just like an eyepiece.
You can also use the T-thread of the adapter and use Baader 2" / T-2 (M48) nosepiece with Safety Kerfs # 2458130 or Baader 1¼" T-2 nosepiece with Safety Kerfs # 2458106, if your telescope hasn't got a T-thread (M42x0.75) on its own (some telescope have got one integrated). This is fine for cameras up to APS-C (or MFT, if you want to use the 1¼" nose piece).
For a full frame camera, T-2 can cause vignetting, and you should use the S52 / M48 adapter #2958552 plus Baader M48 extension tube 40 mm / 2" nosepiece with Safety Kerfs #2958640 as adapter to the 2" eyepiece clamp. This way, you can use the full aperture.
The distance between camera and sensor doesn't change the focal length, as you are using the native focal length of your telescope. So, on a telescope with a focal length of 1000mm, the camera sensor has to be placed 1000 mm behind the objective. Only then you'll see a sharp image.
Caution: If you are using a star diagonal, you should remove it for photography. A 2" star diagonal is approximately 10-11 cm long, so you may need a mechanical extension to reach focus without it, if the focuser doesn't extend enough. We have extension tubes for T-2 (e.g. Baader T-2 / 40 mm Extension Tube # 1508153); for M48, you can stack e.g. some M48 extension tube 40 mm / 2" nosepieces #2958640.
The backfocus of your telescope or the camera adaptation in general should be mentioned in the manual of our telescope. If you can insert an eyepiece without a star diagonal into your focuser and see a sharp image, you probably don't need an additional extension.Answer by: Baader Web Team (Admin) on May 6, 2024 9:55:00 AMRated: 1 4/27/2024 6:29 AM
Baader S52 dovetail Camera-Adapter for Wide-T-rings (optical height: 2 mm)
4/27/2024 6:29 AM
Baader S52 dovetail Camera-Adapter for Wide-T-rings (optical height: 2 mm)
My Baader S52 adapter included a a thin shim ring approx 0.5mm thick. Does this shim need to be installed to maintain the optical length of 13mm?
Answer rated: 1The optical height of 13mm is only the UFC filter base. As soon as you add an additional adapter, such as the S52 camera adapter with an optical height of 2mm, the optical height changes accordingly to 15mm. This height is always without the 0.5mm thick intermediate ring. This is only required if you need particularly precise backfocus requirements and you are missing 0.5mm for perfect backfocus, for example. Otherwise, please always use the adapters without additional intermediate rings.Answer by: Baader Web Team (Admin) on Apr 30, 2024 9:29:00 AMRated: 0 4/23/2024 12:24 AM
2" BDS-RT Baader Diamond Steeltrack Focuser
4/23/2024 12:24 AM
2" BDS-RT Baader Diamond Steeltrack Focuser
Is there one that will fit the Celestron Omni 120 xlt. Thank you for your response.
Answer rated: 1For the OMNI 120XLT refractor we unfortunately doesn´t have an adapter. Only those adapters are available, I´m sorry:
https://www.baader-planetarium.com/en/catalogsearch/result/?q=rt-adapter&___from_store=de
Answer by: Baader Web Team (Admin) on Apr 23, 2024 10:14:00 AMRated: 0 4/21/2024 7:18 AM
Glasspathcorrector 1:1,70 for Baader-Binoviewer with T-2 thread (MaxBright II® and MaxBright®)
4/21/2024 7:18 AM
Glasspathcorrector 1:1,70 for Baader-Binoviewer with T-2 thread (MaxBright II® and MaxBright®)
I managed to get the focus with my hershel baader and my TS-Optics RFT 6" f/5.9 refractor , but I am forced to take the glasspath of my barlow VIP and put it on my bino and the super it works.
I would like to know which glasspath to take to have the same magnification factor but no more. I use it with a pair of panoptic 24 MN and I would like to keep the entire disc in the bino.
THANK YOU FOR YOUR REPLY
Answer rated: 0The Glasspathcorrector 1:2,60 for Baader-Binoviewer # 2456317 is very similar the Barlow lens in the VIP barlow with only a slightly different optical design to achieve the colour correction. You can install it the same way as the lens element of the VIP and should get the same magnification.
Depending on the version of your Herschel prism, there may be even shorter adaptations, so that you can use lower magnifications - we have recently (spring 2024) updated the manual of our Herschel wedge # 2956510 to better show the use with old and new models of our Herschel wedge.Answer by: Baader Web Team (Admin) on Apr 22, 2024 9:18:00 AMRated: 2 4/19/2024 12:06 AM
Baader Tripod Adapter Flange for Celestron CGX / CGX-L
4/19/2024 12:06 AM
Baader Tripod Adapter Flange for Celestron CGX / CGX-L
I am interested in the CGX-L tripod adapter, # 2451118.
1. Do you ship to the USA?
2. Price in $$ ?
Answer rated: 3We are very sorry, we do not ship to the US directly. But we have a distributor there, please contact www.alpineastro.comAnswer by: Baader Web Team (Admin) on Apr 19, 2024 9:32:00 AM