Product Questions and Answers
Do you have a question about this product? Then we would like to ask you to first look through the existing questions and answers, most likely your question has already been answered and you will get the desired information much faster this way. Your question is not listed? Then please click on the button "Ask a question".
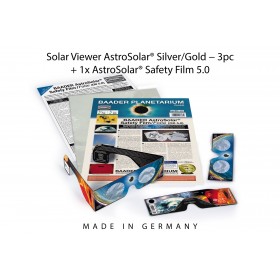
I have also bought your AstroSolar Safety Film and will use it in front of the C8".
Is this enough for imaging of the sun or will it be too warm and harm my equipment?
Friends of mine have said that it is also needed to add an extra IR filter to reduce the heat, but this is something I haven't read from you in Baader. Maybe it's some amateur's ideas without the correct knowledge.
I have bought many things from you and think you are one of the best optic manufacturers in the world. I really trust your skills and your products.
So before I start imaging the sun, it's better to ask you for good advice instead of destroying my equipment. :-)
Regards,
Bo Sundin aus Schweden
- Description
-
Details
 Baader Narrowband Filers in sizes 1¼", 2", 50.4mm and 50x50mm
Double Stacked Solar Continuum Filter - For Visual and Photographic Observations of the Sun
Ensures highest contrast in the photosphere of the sun. The filter works as a monochrometer - suppressing the effects of the atmospheric turbulence and results in images that are significantly sharper. Owners of SCTs and refractors will benefit as red and blue wavelengths are completely excluded, with the transmission area peaking at 535nm where telescope optics are sharpest and free from chromatic aberrations.
Important Information for Solar Observing
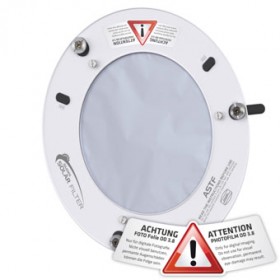
The Solar Continuum Filter may be used for purely VISUAL observation ONLY in conjunction with the Baader Herschel Prism or with the Baader AstroSolar Safety Film (ND 5.0).
The combination of AstroSolar Photo Film (ND 3.8) and Solar Continuum filter is used exclusively for photography of the sun at high magnifications. This combination is highly apt to capture the finest solar surface detail and granulation at extremely high magnification while enabling ultra-short exposure (measured in milliseconds) in order to freeze atmospheric turbulence.
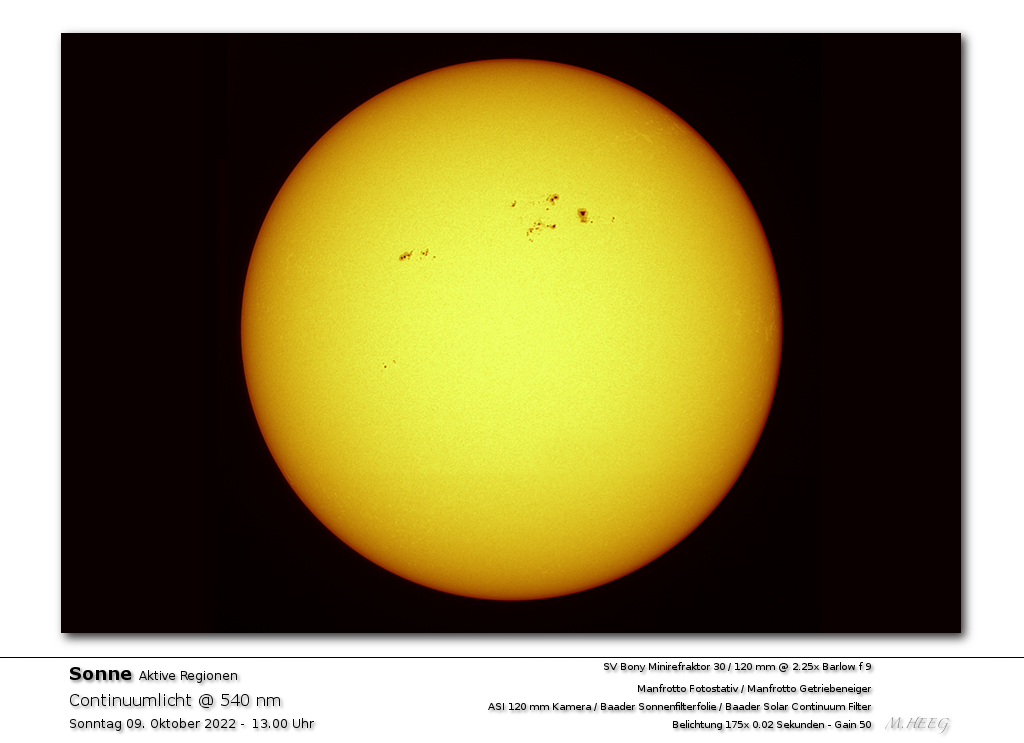
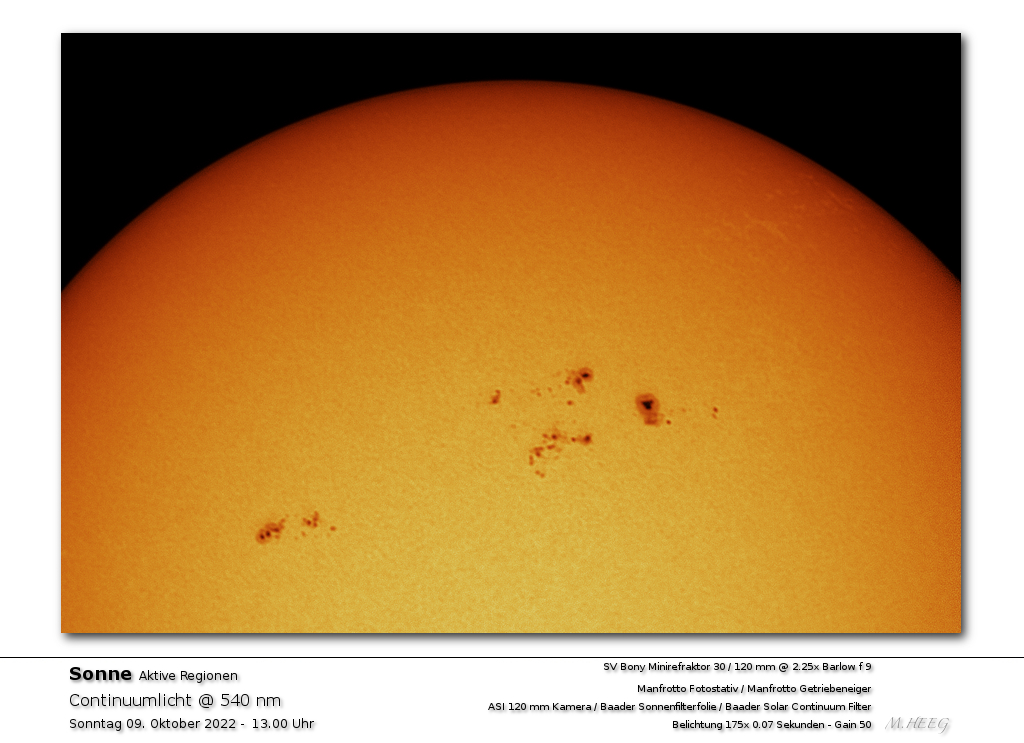
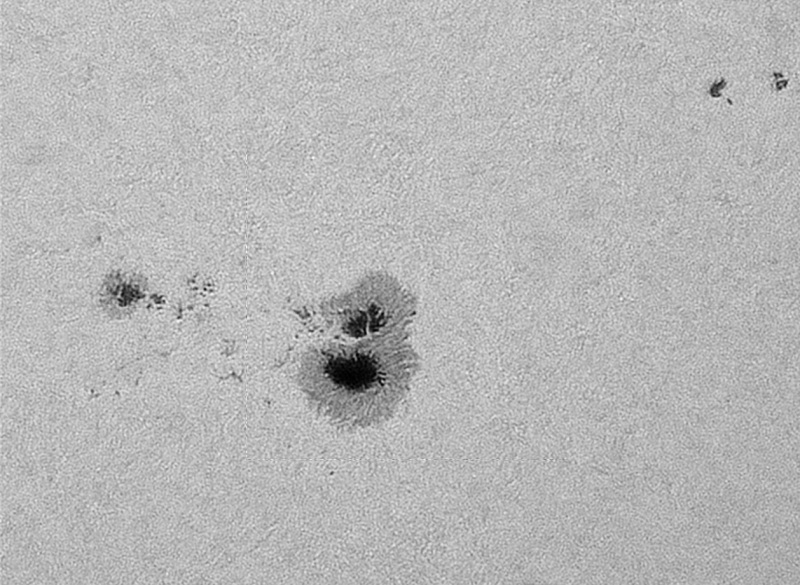
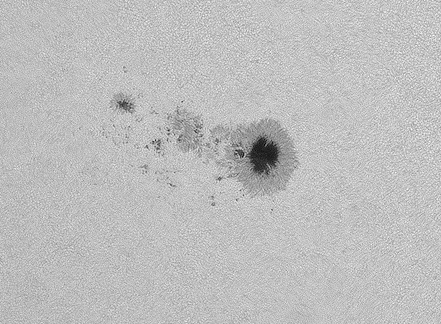
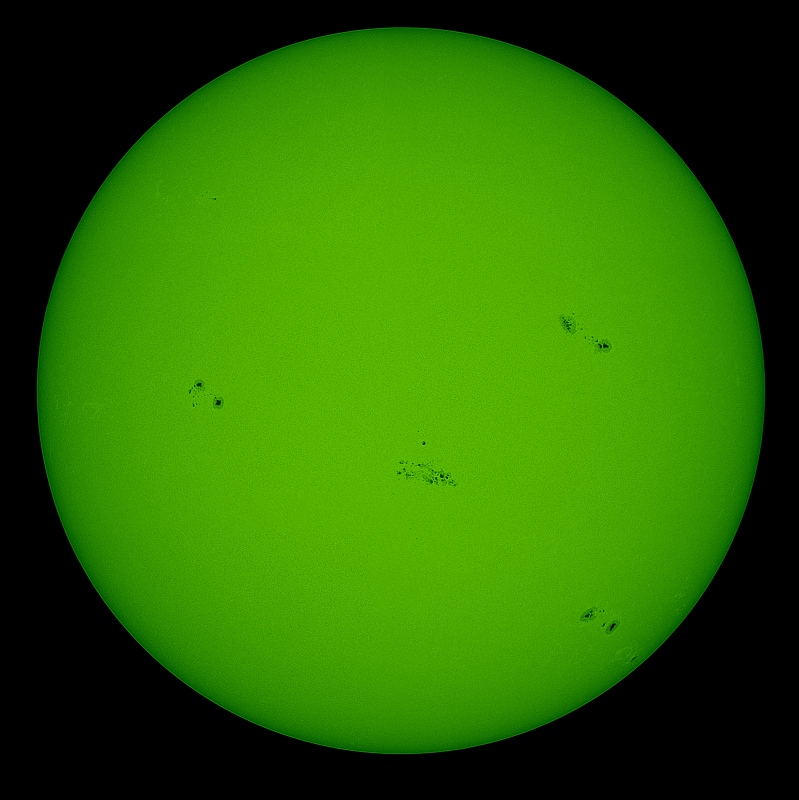
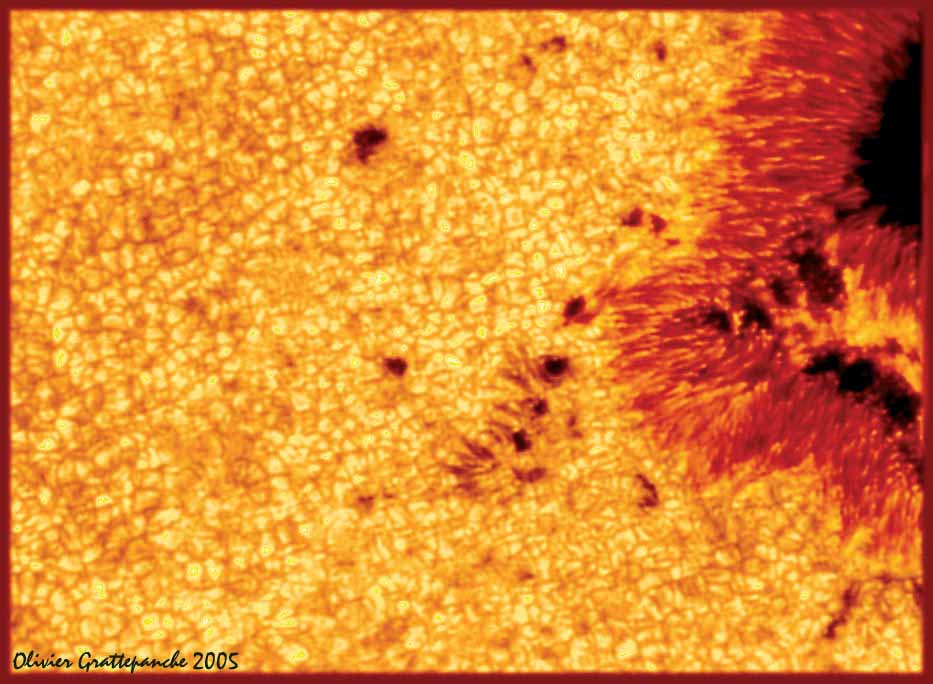
Customer Examples:
Three sample images, taken by Olivier Grattepanche. Mr Grattenpanche writes:
Instrument: "TSC 225 Schmidt-Cassegrain from TAKAHASHI, NJP160 mount, F/40 with 2X Big Barlow Tele-vue, NGFs focuser, and of course your incredible Baader Astrosolar filter D:3.8, IR cut filter and Continuum filter"
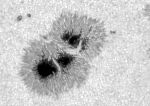 VestaPro with 1/3" black and white sensor ...
 ... 800 frames stacked with IRIS ...
 ... Colors were added afterwards for aesthetical purpose

Related Articles
-
November 17, 2021Tips for Choosing an Energy Rejection Filter...
The purpose of an Energy Rejection Filter is to prevent as much solar energy as possible from entering the telescope in the first place and thus avoid excessive heating of... -
September 27, 2017APF-R : Absolute Point of Focus
APF-R goes online as official plugin in Adobe Photoshop Christoph Kaltseis is a Photoshop expert and an experienced astrophotographer. In recent years, he has developed APF-R (Absolute Point of Focus),... -
July 28, 2022Review: visual usage of the Baader RGB-B...
March 2021: The idea behind the visual use of blue filters from RGB palettes is that they have much higher transmittances in the blue value and steeper curve slopes than... -
December 19, 2019HALOS – viewed without prejudice
The moment you insert any type of filter into the optical setup, which consists of your specific camera, the appropriate flattener/reducer or coma corrector and the telescope, the filter becomes... -
July 1, 2015Information about Baader Filters and Filtercells
About Baader Filters The variety of uses for filters in amateur astronomy has considerably increased during the last decade, enabled by both more accurately manufactured optical accessories, and, above all, by the “digital revolution“.... -
August 7, 2023Baader CMOS Optimized Filters: Unleashing the Full...
What do you look for in an astronomical filter? Everyone has different requirements and goals and with a myriad of filters available today; how do you choose the right filters...


Additional Information
| Technical Data not yet specified | Please choose product variant from dropdown above to see technical data of your chosen product |
|---|
FAQ
-
Please click on title to open or open/close all FAQs
-
HALOS – viewed without prejudice
What do you look for in an astronomical filter? Everyone has different requirements and goals and with a myriad of filters available today; how do you choose the right filters to unleash the full potential of Astrophotography?
In this blog our customer Ian Aiken gives some high level advice on what to look for when choosing a filter, coupled with reasoning why he choose the Baader's CMOS-Optimized LRGB and Ultra Narrowband f/2 filters, along with example LRGB and SHO images taken with these filters on his Celestron RASA 11 from his Bortle 7 suburban location.

New CMOS-optimized Baader filters
Blog Post by Ian Aiken:
I live in the North East of England in the United Kingdom, which experiences a temperate maritime climate characterized by mild summers and cool winters. Cloudiness can vary throughout the year and it feels like I only get 20 usable clear nights per year at my Bortle 7 location during the 6 months where astronomical darkness actually occurs. I've been an Astrophotographer for over 20 years and I've had all kinds of telescopes, mounts, filters (including Optolong, Astro Hutech, Chroma, Baader) and cameras (Atik, QHYCCD, ZWO, Canon) in this time, for both planetary and deep sky photography. Financially, I've learnt the hard way through fine tuning my current collection to something which supports my sky conditions, budget, time, and imaging goals.
Currently I own a Skywatcher EQ8 mounted in my roll off roof observatory. On this I have a RASA 11 with Baader UFC, QHY268M camera and Baader's CMOS-Optimized LRGB and Ultra-Narrowband f/2 filters.
Here are the factors I've considered when choosing my filters:
- Price:
Assess the price of the product in relation to its features, quality, and performance. Is the price reasonable and competitive compared to similar products in the market? Consider whether the product offers significant advantages or unique features that justify its price.
In my opinion, Baader filters are absolutely value for money. They've kept the price competitive and performance high. A set of Baader filters costs a little more than a single Chroma. Chroma are good, but did not feel value for money in comparison (Baader 2" LRGB set ~ € 500 vs. Chroma LRGB ~ € 2.238). - Quality:
Examine the quality of the product. Does it meet your expectations in terms of durability, craftsmanship, and overall build quality? A product that is well-made and built to last will provide better long-term value.
Baader CMOS-Optimized filters come with Baader Planetarium's Life-Coat technology. Baader warrant the coatings for the life of the filter guaranteeing that the coatings will not peel, flake or physically degrade and they have no issues with you cleaning the filters with fine optical cleaning equipment. You can see the build quality is high, the coatings look durable, and I can understand how Baader can offer such a life time warranty. I don't think anyone else offers this. - Performance:
Evaluate how well the product performs its intended function. Does it deliver the expected results or fulfil your requirements? Consider its efficiency, accuracy, reliability, and any additional benefits it provides compared to alternative options.
I'm going to post some images later in this blog, and you can judge the quality for yourself. Yes, there were initial problems with halos and these have been resolved. I haven't had any issues that I am concerned about. Halos can be a real pain, and it's not always the filter that causes this (most cases it is not the filter). Reflections can occur in your imaging system and could be caused by a number of factors: including spacing between optical elements; distance to CMOS camera; the CMOS camera front window itself etc. You have to spend time to understand your entire optical system and its individual nuances. - Features and Specifications:
Review the features, specifications, and capabilities of the product. Are there any unique or advanced features that differentiate it from competing products? Determine whether these features are essential to your needs and whether they justify the price.
I opted for high-speed ultra-narrowband to match with my RASA 11. This was based upon my needs (explained a bit further below). In terms of features, what stood out was the features integrated into the filters to help prevent reflections and halos. For instance:
- Reflex-Blocker - with coatings to reduce halos caused by my imaging system.
- Parfocal - this helps to not have to refocus so much during a filter change. As a filter change is manual on my RASA 11 with the Baader UFC system, it means less movement with my motorised focuser and I am back to imaging quicker (and the focuser isn't off on some mission to reach focus by going further out of focus, which can happen when using an SCT type design).
- Blackened edges - again to help reduce reflections in my imaging system, lots of mirrors and glass = high potential for reflection
- Sealed Coating Edge - each filter is coated individually and not cut from a sheet. This is probably why they will last forever, and Baader are able to offer Life-Coat warranty.
- Brand Reputation and Customer Reviews:
Research the brand's reputation and customer reviews of the product. Look for feedback from other customers who have used the product to gain insights into its performance, reliability, and customer satisfaction. Positive reviews and a strong brand reputation can indicate better value for money.
Baader Planetarium have been in business since 1966. I've never experienced any poor customer care from dealers or Baader directly (I admit, I've not really had any issues either, with exception of one issues with the early Baader Steeltrack software which was swiftly resolved by Baader themselves). As a family run business, I feel they are passionate with what they do, and want to do the right thing at the right price, making astronomy accessible to all budget types, and truly are Aiders in Astronomy (this is their slogan).
- Longevity and Future Compatibility:
Consider the product's longevity and future compatibility. Will it remain relevant and usable for a reasonable period? Assess whether the product is upgradable or compatible with future advancements or technologies to ensure its value over time.
I have the older Baader 2" CCD filters which are in the same condition that I purchased them in. I have no concerns about the longevity of the Baader CMOS Optimised filters, especially backed by the Life-Coat warranty. 2" filters are going nowhere, and while the sensors on modern CMOS cameras are getting larger, I cannot see the need to upgrade anytime soon. I've been using 2" filters for the past 20 years.
- Warranty and Customer Support:
Evaluate the warranty offered by the manufacturer and the availability of customer support. A reliable warranty and responsive customer support can provide additional value by offering peace of mind and assistance in case of any issues or defects.
Baader offers Life-Coat, a lifetime warranty on their CMOS-Optimized filters (providing used and handled correctly). As a family run business operating for over 50 years, Baader are trustworthy and offer great customer support.
- Personal Needs and Preferences:
Finally, consider how well the product aligns with your specific needs, preferences, and intended use. Different products may cater to different requirements, so it's essential to choose one that best suits your circumstances and priorities.
What did I choose?
I decided on the Ultra Narrowband High-Speed filters on my RASA 11. Why? Well, the reasoning may surprise you. While the filters are excellent value for money, my garden backs onto other gardens and my neighbours have lots of LED lights lit, especially on weekends when it's not windy, the moon is not out, and the sky conditions are good. You can picture the challenges already. Also, there are trees which do not belong to me which get in the way. I work full time, and have two small children, time is limited. I'm middle-aged, but not retired, so I cannot stay up all night imaging into the early hours. So, I went for a RASA for high speed imaging, reducing my imaging time significantly. While I may image across multiple nights, I don't need to. It just works for my current situation. The Baader filters are brilliant on the RASA 11, and I'm able to produce some excellent results (see further in the blog) even with all my challenges.
I hope the above helps you make a decision on what filters would be good for your needs. Baader Planetarium has a really nice tool to help you match which filters would be best for your imaging system. At time of writing you can access this tool: Baader Narrowband-/Highspeed Filter Selector
Example of Astrophotography taken with Baader CMOS Optimized Filters
I could talk about how tight the stars are (they are), how the filters have much more contrast than their predecessors (they do), but this can still be very subjective and influenced by sky conditions. My skies aren't great, they really aren't, and I have to battle with all the other issues living in a suburban environment. These images were also shot in reasonably poor conditions with thin haze. I also have to point out that I don't spend a massive amount of time processing my images. I think partly, if you capture good data you can produce a good image. You don't, in my opinion, need to push an imagine in processing so that it looks so bright and colourful. To me this looks over processed, and I prefer the darker looking style images with simple histogram and curves transformations. There's the disclaimers out of the way.
My workflow consists of using PixInsight to Calibrate, Stack, Automatic Background Neutralisation, BlurXterminate, NoiseXterminate, and maybe StarXterminate. I may use TGV Denoise post stretching but haven't on these examples. I simply use the ScreenTransferFunction (STF) in PI applied to the Histogram, and a hint of Curves Transformation before exporting off into a PNG/JPG. There's probably so much more I could do, but I don't. Oh, I nearly forgot. I do use PhotometricColorCalobration in PixInsight, which applies a white balance to the image.
NGC 7023 - The Iris Nebula 2 hour integration from Bortle 7 sky
NGC 7023, also known as the Iris Nebula, is a captivating and visually striking celestial object located in the constellation Cepheus. This reflection nebula lies approximately 1,300 light-years away from Earth, and its unique features have made it a favourite target for amateur and professional astronomers alike. The Iris Nebula gets its name from the distinct shape and appearance of its central region, which resembles an iris or an eye. This prominent feature is created by a dense cloud of interstellar dust, which scatters and reflects the light emitted by nearby stars. The dust particles in the nebula also create intricate dark filaments, adding to its overall visual allure. At the heart of NGC 7023 lies a young star cluster, illuminating the surrounding gas and dust with its intense radiation. This interaction gives rise to the vibrant hues of blue and yellow seen in many astro photographs of the nebula.
Imaging System: QHY286M CMOS Camera mounted on RASA 11 with Baader UFC.
Filters: Baader CMOS Optimised LRGB
Mount: Skywatcher EQ8
Exposure Details: 30 x 60 seconds each channel (LRGB). Total 2 hours integration time from Bortle 7 skies.
NGC 7023 - Baader UV IR CMOS-Optimized used for Luminance in LRGB image. 
NGC 7023 - Baader R CMOS-Optimized 
NGC 7023 - Baader G CMOS-Optimized 
NGC 7023 - Baader B CMOS-Optimized 
NGC 7023 - LRGB with Stars (I'm not sorry for not pushing the colour on this) 
NGC 7023 - LRGB reduced Stars 
NGC 7023 - LRGB without Stars 
NGC 7023 - LRGB without Stars (OK - I pushed the colour saturation a little!) NGC 7635 - The Bubble Nebula 17 Hour Integration from Bortle 7 Sky
NGC 7635, famously known as the Bubble Nebula, is a captivating and visually stunning emission nebula located in the constellation Cassiopeia. Its unique structure and distinct appearance have made it a popular target for both amateur and professional astronomers. The Bubble Nebula derives its name from the spherical bubble-like structure at its center, which is created by the powerful stellar wind and radiation emitted by a massive, hot, and young central star. This star, known as BD+60 2522, is estimated to be several times more massive than our Sun and emits intense ultraviolet radiation, which ionizes the surrounding hydrogen gas. The ionized gas then emits light, creating the striking reddish glow seen in images of the nebula.
Imaging System: QHY286M CMOS Camera mounted on RASA 11 with Baader UFC.
Filters: Baader CMOS Optimised 3.5/4nm f/2 Ultra Highspeed (Ultra-Narrowband) filters.
Mount: Skywatcher EQ8
Exposure Details: Ha: 354x60s, SII: 121x60s & 104x120s, OIII: 175x120s. Total ~17 hours integration time from Bortle 7 skies.Don't ask why the varying exposure! I'd also like to collect more data on SII and OIII in due course given it's about half of what I planned and need. You can tell by the images more is needed. Maybe next time, right? Astrophotography is for life not just for Christmas, or something like that…
I mixed the combination using PixelMath in PixInsight.

NGC 7635 - Baader f/2 3.5nm Ha CMOS-Optimized 
NGC 7635 - Baader f/2 4nm OIII CMOS-Optimized 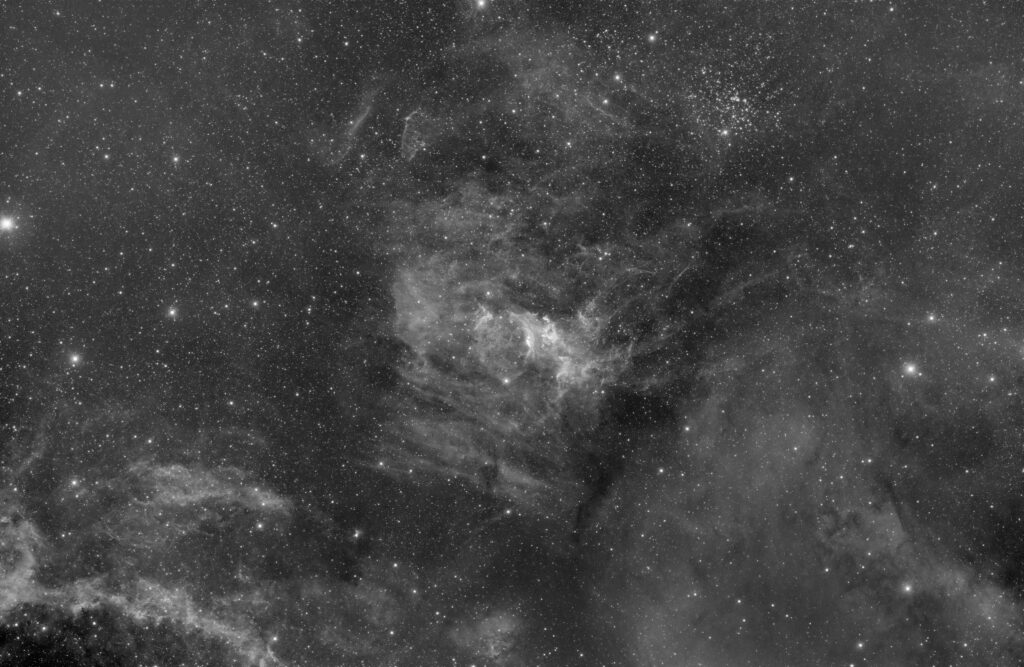
NGC 7635 - Baader f/2 4nm SII CMOS-Optimized 
NGC 7635 - RGB/SHO Combination with Stars 
NGC 7635 - RGB/SHO Combination with Reduced Stars 
NGC 7635 - RGB/SHO Combination without Stars 
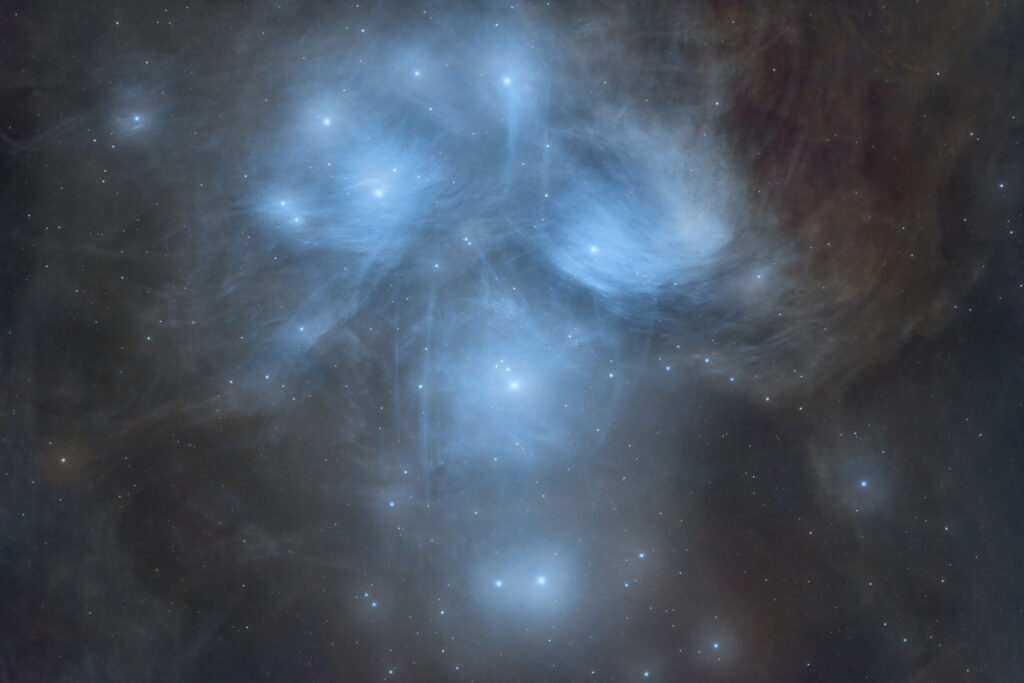
NGC 7635 - RGB/SHO Combination Crop And finally to finish off, M45 taken with Baader CMOS-Optimized LRGB on same kits as above.

M45 taken with Baader CMOS-Optimized LRGB - Price: