The moment you insert any type of filter into the optical setup, which consists of your specific camera, the appropriate flattener/reducer or coma corrector and the telescope, the filter becomes part of this unique optical system. And every optical system is different because many products from different manufacturers are involved. All optical surfaces interact with each other in some way. One possibility is that coatings of the camera reflect unwanted light back into the telescope and onto all optical elements in front of the filter.
If there is no other optical surface that will reflect the light back to the filter a second time, then it is perfect. There are no halos other than residual halos or scattering, which are unavoidable, depending on the filter design. That's what we mean by our slogan "no halos, no ghosting, no reflections" on our product pages. A filter rarely produces halos itself, which are created inside the filter by internal reflections (this happened to us once in 2015, but we replaced all of these filters). Because the moment there are other surfaces near the filter, it is much more likely that light will be reflected from one of those surfaces, creating halos that may not be removable.
There are so many combinations of camera (windows), field flatteners, correctors, etc., that it is common for "halo-free" filters to be involved in halo production in some unfortunate cases - but not guilty themselves. The RASA optics set a good example.
Small cause - big effect The anti-reflective coatings of the camera windows of different manufacturers differ slightly. Shown here are two cameras from different manufacturers, the left one reflects more in the green spectral range, the right one more in the blue spectral range. These small differences are responsible for the fact that the photos taken with the left camera in combination with OIII filters show strong halos, while with the right camera and the same filter halos will appear hardly noticeable.
In contrast to broadband RGB filters, narrowband filters reflect much more of the relevant spectral wavelengths near the emission lines. At the same time they produce a much darker sky background. Therefore, they are much more involved when halos occur. It is also no contradiction that cheaper, wider band filters show less halos. Because the narrower the filter, the longer the exposure time, the better the contrast. And all this increases the chances of stronger halos around more stars in the field.
We know from customers that the windows in front of the chips of certain camera models are more likely to produce halos than other cameras. And some more inexpensive flattener/reducer/correctors are also more often involved in the problem. A third problem is the lack of space to adjust the distances between the optical elements only slightly - as is the case with almost all primary-focus mirror systems. RASA and Hyperstar are also good examples here.
To find the source of the reflections, you can try turning the filter around so that the (more reflective) front is no longer facing the light source, but the camera sensor. It can help by chance that the reflection of another wavelength range from the other filter surface simultaneously reduces the halo appearance. Try this with unmounted filters. Very large overlapping halos are indications of reflections from distant surfaces. If the halos are closer to the edge of the image and eccentric to the star, they are likely caused by a curved surface such as a lens, e.g. from a flattener in front of the filter.[br]
C11 Hyperstar + ASI 1600 mm w/o filter, 60s exposure| © A. Bringmann.
Veil Nebula NGC 6960 with bright star Cyg52, single subframe
C11 Hyperstar + ASI 1600 mm, Baader f/2 OIII filter, 60s exposure | © A. Bringmann
But: Are Halos really terrible? We notice that at the time of the Culimation of certain objects such as the Horsehead Nebula IC 434 or the Veil Nebula NGC 6960, there are especially many "Halo Complaints". The reason is quite simple: it is impossible to extract the image information of the nebula without halos if there is a bright star in the field that produces a strong halo even without a filter.
This fact and this appearance of the object is widely accepted - and it doesn't look any worse than the spikes on the photos taken with Newton reflectors. Some APO photographers even add artificial spikes to their photos.
Even photos from professional observatories show halos because they are unavoidable (not of concern) when a big field is main emphasis - and nobody hides the haloed results. More information can also be found in the document: Problems with filters can have the strangest Causes
If you send us your photo with a halo and give us detailed information about the optical setup (camera, reducer, flattener, corrector, filter, telescope with aperture ratio and all their manufacturers and positions) we might find a clue to find the source for the halo. But most likely you can't get rid of it - unless you are using an extensive image processing like our customer Andreas Bringmann, as described in the PDF Halos - no problem!
Using the Baader FlipMirror II Star Diagonal (BFM II) at the Telescope
The [product sku="2458055"] is not only an accessory for professional users, but much more: It is a helpful tool for every amateur astronomer – especially for astrophotography.
First of all, the BFM II is designed to completely replace your standard star diagonal, so that you can keep observing as usual, just like with every good star diagonal. But the BFM II gives you much more options. You can create – from the beginnig, or step-by-step – your own system for photography and keep it always ready-for-use at your telescope. This will save you a lot of time and nerves. In the next months, we want to show some of the many options of this new product here.
In this article we will cover spectroscopy.[br]
[br]
Benefits of the FlipMirror II for spectroscopy
Spectroscopy is one of the most instructive areas of astronomy. Besides professionals, spectroscopy is also interesting for schools, as it allows real data to be obtained and analysed. With the [product sku="2458550"], Baader Planetarium as licensee of the Max-Planck-Institute for Extraterrestrial Physics in Garching has developed a compact and easy to use slit spectrograph, which is popular not only in the education sector.
The BFM-II can be firmly threaded and aligned to the DADOS
With the [product sku="2458055"], the DADOS can be mounted permanently on a telescope, which can still be use visually without reconfiguration. Especially on permanently installed devices, it is very helpful if all parts can remain on site and are securely screwed together. So nothing can get lost, even if several people are working on one telescope.
C14 + BFM-II + DADOS + DSLR + Guiding-Camera on DADOS (w/o calibration lamp)
The fixed thread connection of the BFM-II also enables maximum torsional stiffness and shortest optical tube lengths. This prevents tilting, even with long attachments. Of course, it can also be used with standard 2" barrels.
The typical configuration is that the DADOS uses the straigt beam of light. All the necessary connections are thus available in the system for convenient operation:
- The upper part of the BFM-II is used e.g. for a cross-hair eyepiece
- The DADOS is connected straight at the rear port. The spectrograph has a port for an autoguider or a cross-hair / guiding eyepiece as well as another port for the camera recording the spectrum (or for an eyepiece to evaluate the spectrum qualitatively).
- The lower AUX-port of the BFM-II is usually used to connect an autoguider via the [product sku="2956951"]. Since this Off-Axis-Guider is not needed with the DADOS, a calibration lamp can be connected instead. When the mirror is in the light path of the telescope, the light from the calibration lamp is directed into the DADOS when it is connected to the rear port. To avoid stray light, you should place the dust cover on the lens of your telescope. On simple spectrographs without their own guiding port, of course an autoguider can also be attached here.[br]
The light from a calibration lamp can be directed to the spectroscope via the mirrored back of the hinged mirror
With the help of the BFM-II, all possibilities of the DADOS can be used comfortably. An adaptation for the [product sku="2458590"] of the DADOS is in preparation. For other calibration lamps you may have to make your own adaption, which can then be attached to the three M3 screw holes (radius 15mm) of the AUX-port.
Space-saving adaptation of the DADOS to a CPC1100HD. A second camera can be mounted at the rear port
If the spectrograph is already calibrated in advance, it is of course also possible to attach it to the upper connection instead of the eyepiece. This eliminates the possibility to calibrate it at the telescope, but it can be combined with a larger camera at the rear port. This is interesting if the visual view of the object is to be documented in real time with a full-format DSLR. We implemented this setup for school operation on a CPC1100 (see picture on the right). This also avoids the problem that the DADOS would bump into the fork base.
For smaller cameras up to APS-C it makes more sense to connect the regular camera to the upper T-2 connector for reasons of weight distribution.
Of course the FlipMirror II can also be used with many other spectrographs like the [product sku="2458600"].
Using the Baader FlipMirror II Star Diagonal (BFM II) at the Telescope
The [product sku="2458055"] is not only an accessory for professional users, but much more: It is a helpful tool for every amateur astronomer – especially for astrophotography.
First of all, the BFM II is designed to completely replace your standard star diagonal, so that you can keep observing as usual, just like with every good star diagonal. But the BFM II gives you much more options. You can create – from the beginnig, or step-by-step – your own system for photography and keep it always ready-for-use at your telescope. This will save you a lot of time and nerves. In the next months, we want to show some of the many options of this new product here.
In this article we cover planetary imaging.[br]
[br]
What are the benefits of the FlipMirror II for planetary photography?
The [product sku="2458055"] with two M48/T-2-ports is a great tool to make imaging the planets easier. Here, we'd like to show you two possible fields of application.
1. Observe and take photos
The basic purpose of the FlipMirror II Switch easily between eyepiece and camera.
Attach a camera to the back side of the BFM II and an eyepiece on its top. So it is easy to center a planet on the small chip of a camera module – and with the turn of a single knob, you can switch between "photography" and "visual observing". There is no need to replace the camera with the eyepiece again and again! Just set both camera and eyepiece once to the same focus point, and the coarse focussing is history: If you can see the planet in the center of your eyepiece, you'll see it with the camera, too. Much too often, the de-focussed image of the planet is so large that you can't recognize it at all on the display after switching from the eyepiece to the camera. Take a cross-aim eyepiece to center and focus the planet in both eyepiece and camera. This way, it is much easier to hunt the planets in a telescope without perfect tracking, too – if you have ever tried to photograph the planets with a Dobsonian, you'll be amazed!
Not too mention that the camera is placed in the main focus of your telescope, and the function of the FlipMirror II as star diagonal is only used for a comfortable viewing position when looking through the eyepiece.
Of course, you can also use the [product sku="1905131"] and if necessary [product sku="1905130"] to bring camera and eyepiece into the same focus position whenever you use it – but then, still, the orientation of the camera changes whenever you remove it from the focuser. And at which telescope is there ever enough place to put something down? With the FlipMirror II, everything is exactly where you need it - at the telescope!
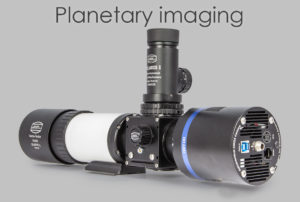
The FlipMirror II, configurated for professional planetary imaging: A monochrom camera at the straight-through light path, and a colour camera at the upper port
2. Hi-Res planetary photography with two cameras
The FlipMirror II is perfect to solve a problem which every photographer of the planets must face: If you use a colour camera, you don't have the highest possible resolution, because of the Bayer Matrix – 50% of the pixels are sensitive for green and 25% each for red or blue. For the best resolution, it would be nice to take e.g. a hi-res image of Jupiter in monochrome for luminance and combine it with the image of an RGB-camera to add colour. But for this you need to switch between two cameras, and you need time to connect, focus and operate them. This would be no problem if Jupiter wouldn't rotate around its axis in only ten hours – more than twice as fast as our Earth rotates.
If you capture several sequences qith a video module and have to wait for good seeing between the sequences, this may take half an hour or so. During this time, Jupiter keeps rotating, and the images can't be stacked any longer. But if you have a colour camera at one port of the FlipMirror II and a monochrome camera at the other port, you don't waste any time on switching the camera, orientating it and so son. You can switch between both cameras in an instance, and the chances for good results are much better than if you have to waste time for exchanging the cameras in your single focuser.
There is one more intersting option for advanced planetary photographers: If you photograph in UV or Methane on a regular base, you know how hard it is to focus the dim image. If you attach two cameras with the same focus plane to the FlipMirror II, you can use the one for monochrome or RGB-images also to quickly focus the second camera. So, even hard areas of observation get better accessible.
RASA 8 – The family is complete – First Impressions
Here is a firsthand report by Christoph Kaltseis about his work with the RASA 8 and an ATIK Horizon colour camera.
On the ATT fair I was asked by the company Baader if I'd like to test the newly announced RASA 8" - Rowe-Ackermann Schmidt Astrograph (#822252 € 2.195,-) . I've been using both the RASA 11" - Rowe-Ackermann Schmidt Astrograph (#822250, € 4495,-) and the larger RASA 36cm - Rowe-Ackermann Schmidt Astrograph (#822251) successfully for some time now. So I know the system of the Rowe-Ackermann-Schmidt-Astrographs very well and know the potential of these optics. So I didn't have to think twice before agreeing to a test.
[br]
What can be said "Out-of-the-box" about the RASA after the first couple of clear nights?
1. The OTA is small (when compared to the RASA 11) and easy to handle
It can be used easily on a smaller mount and is a true High Speed System at a very interesting price tag. If desired, it can be used in mobile setup, too!!
Because of the integrated air cooling system with ventilation slits and a fan the RASA 8 can be cooled down to the air temperature very fast. I rarely keep the fan running during exposures.
So, everything happened very fast on the day the RASA 8 arrived at my house: The parcel arrived at my home at 5pm, and at 8pm it was already set up on my mount under clear skies, ready for use. It was easy to balance the compact telescope in RA and Dec. This is a good thing, because you have to be very careful with such a fast telescope. Otherwise, the autoguider can cause elongated stars, if the guider "wobbles".
2. Attaching the camera is a bit odd, as with all RASAs.
I always follow the rule: First attach the adapters and check if everything is correct, then attach the camera.
I take care of the orientation of the camera in-house, so that there is no wasted time or bad surprises later on the field. I used the [product sku="2459117"] to attach the Atik Horizon Color CMOS to the telescope. The orientation of the camera can be easily adjusted by loosening the grub screws on the UFC – but I prefer to do this at a table rather than directly on the RASA 8 when it is on the mount. The result: Sits, fits and doesn't move! For f2, everything has to fit tight ad precise.
I led the cables away from the camera with some offset to reduce the spikes to a level where they don't disturb much. I also used a heating tape directly in front of the RASA 8, where I could fix the cables and where I expected a little help against the expected dew. The ATIK Horizon is a perfect match for theRASA 8, which illuminates an image circle of 22 mm. The pixel-resolution is 1,97 arc-seconds, at 400 mm focal length and f2.
3. 1st Light: Focus, image quality, stability and temperature behaviour
At the beginning of the night I chose Arcturus as the first alignment star: Select, goto, center and focus on the chip. As usual, the star is pre-focused and the focus knob is turned counterclockwise so that the mirror is always moving upwards in the same direction.
Then I had to select a weaker star in the field to fine focus with MaxIm DL and FWHM + brightness. That was easy and quickly fitted so well that I could say the focus was 99% right. The missing percent is due to air turbulence. The image was very good all over the field – joy, oh joy! It was as easy as you can wish for.
The second alignment star was Vega. Here I repeated the procedure and only had to refocus a little bit because Arcturus was high in the sky while Vega was about 45° above the hotizon. I turned the focus knob back clockwise and then back into focus. My practical tip: First move it three to four times half a turn back before you finally focus. The mirror shifting was very low, and I can't tell if it was the RASA or the mount, because I also put my hand on the RASA. But the image quality after a 10 seconds exposure was the same as with Arcturus -> Perfect!
4. Take the images
The first object was M13. It was high up in the sky, and after 30 seconds its center was almost overexposed. Okay: Do the final fine focusing in MaxIm DL and start the exposure series.
My Tip: Always focus at the object, and do this as described above! Once the mirror was beyond the perfect focus, move it back a good way and approach the perfect focus again!
- Keep on running… that's the thing. Dithereing was done every 6-8 images.
- The seeing was between 2,4 and 3,2“, because of very instable weather conditions.
- Temperature shift was very small, the focus stability very good. (But it was summer, so it didn't cool down too much during the night!)
- 400 mm focal length and 8 ich aperture deliver a surprisingly good resolution, which shows in the images. So it really is worth taking three more minutes for focussing instead of just saying "Should be good enough!"
- In terms of central obstruction, the RASA 8 is better than the other currently available fast systems. The image quality is very good, if you focus correctly.
This image of M13 shows the capability of the RASA:
First Light - Out of the Box: M13 with RASA 8 - June 4th, 2019 - 58 minutes with Baader UFC filter changer and Atik Horizon Color CMOS camera. I took this image during the astronomical twilight(!): It is the result of 58 single shots of 60 seconds exposure time each. I've never seen such a deep image with less than one hour exposure time. I only calibrated the subframes in MaxIm DL and stacked them in PixInsight. These are the raw data, without sharpening or other image editing.
Note to the image of M13: The Atik Horizon was operated with Gain 3 and Offset 17. Temperature -15°C. Note: 180 seconds at f2 are equal to 360 seconds (12 minutes) at f2.8, or 720 seconds (12 minutes) at f4, or 1440 seconds (24 minutes) at f5.6! AND the GAIN of the ATIK was set only to 3, which is very low – at Gain 8 t 12, the necessary exposure time would be even shorter, and very interesting for narrowband imaging with the f2 Highspeed filters at 3-5 min exposure time!
Thoughts, conclusion, and (why) RASA 8?! (The conclusion of my first night with the RASA 8)
Camera and heating strip work together to avoid dew on the optics. Contrary to my fears, this worked very good! The heat of the working camera acts like a second heater. But heat and ventilation of the camera do not cause noticable problems for the seeing; it is much more important to focus carefully and have a good tracking!
I always use the sky to aquire flatfield images (sky flats). This was no problem as always – if the sky is really clear! Gradient(s) which are caused by other exposures at the sky, will impair the image during stacking – better flatfields REALLY improve the final images!
One advantage of the closed OTA of the RASA is that no dust can reach the mirror. And the Schmidt corrector plate can be cleaned very easily!
I know from professional telescopes in Chile that even a thin layer of dust can decrease contrast and the amount reflected light measurably. This can lower the transmission by 10% or more, and the light scattering causes a weak contrast. The result is a flat image, lacking depth.
This brings up the question: What do I want? What i the use of a high-end system with perfect optical surfaces, if dust brings it to the level of a standard telescope? And to be honest, at least I prefer cleaning a Schmidt corrector to cleaning a mirror (which I have to remove from the OTA to do so).
The mirror surfaces of the RASA 8 are high-end – and stay so. Celestron has got many years of experience in producing these optics, and who invented it? The RASA is a worthy successor of the Schmidt-camera, with was invented by the German optician Bernhard Schmidt in the years around 1930.
USING THE RASA 8 is really fun, it delivers great single shot images and very deep stacked images "in (almost)" no time – be it with colour or monochrome cameras! Also, it is extremely portable and keeps its collimation.
Please note: A manual for collimation (if required) can be found on celestron.de as PDF: Collimation of a Celestron RASA
Of course, you can now say: „But colour cameras have a (so much) lower resolution than monochrome cameras!“ Well, than you need to read the second paart of this test, too. There I'll describe how the RASA 8 worked with a monochrome camera.
There is just one more question which has to be answered – but if I am allowed to keep it has to be discussed with my wife...
Before the sales launch of new high-end telescopes, the first models go to experienced testers who check them for their possibilities and weaknesses. We asked Michael Jäger, one of the most successful comet hunters and photographers, to test the RASA 8" - Rowe-Ackermann Schmidt Astrograph. Such a fast telescope with short focal length and large field of view is perfect especially for sky surveillance.
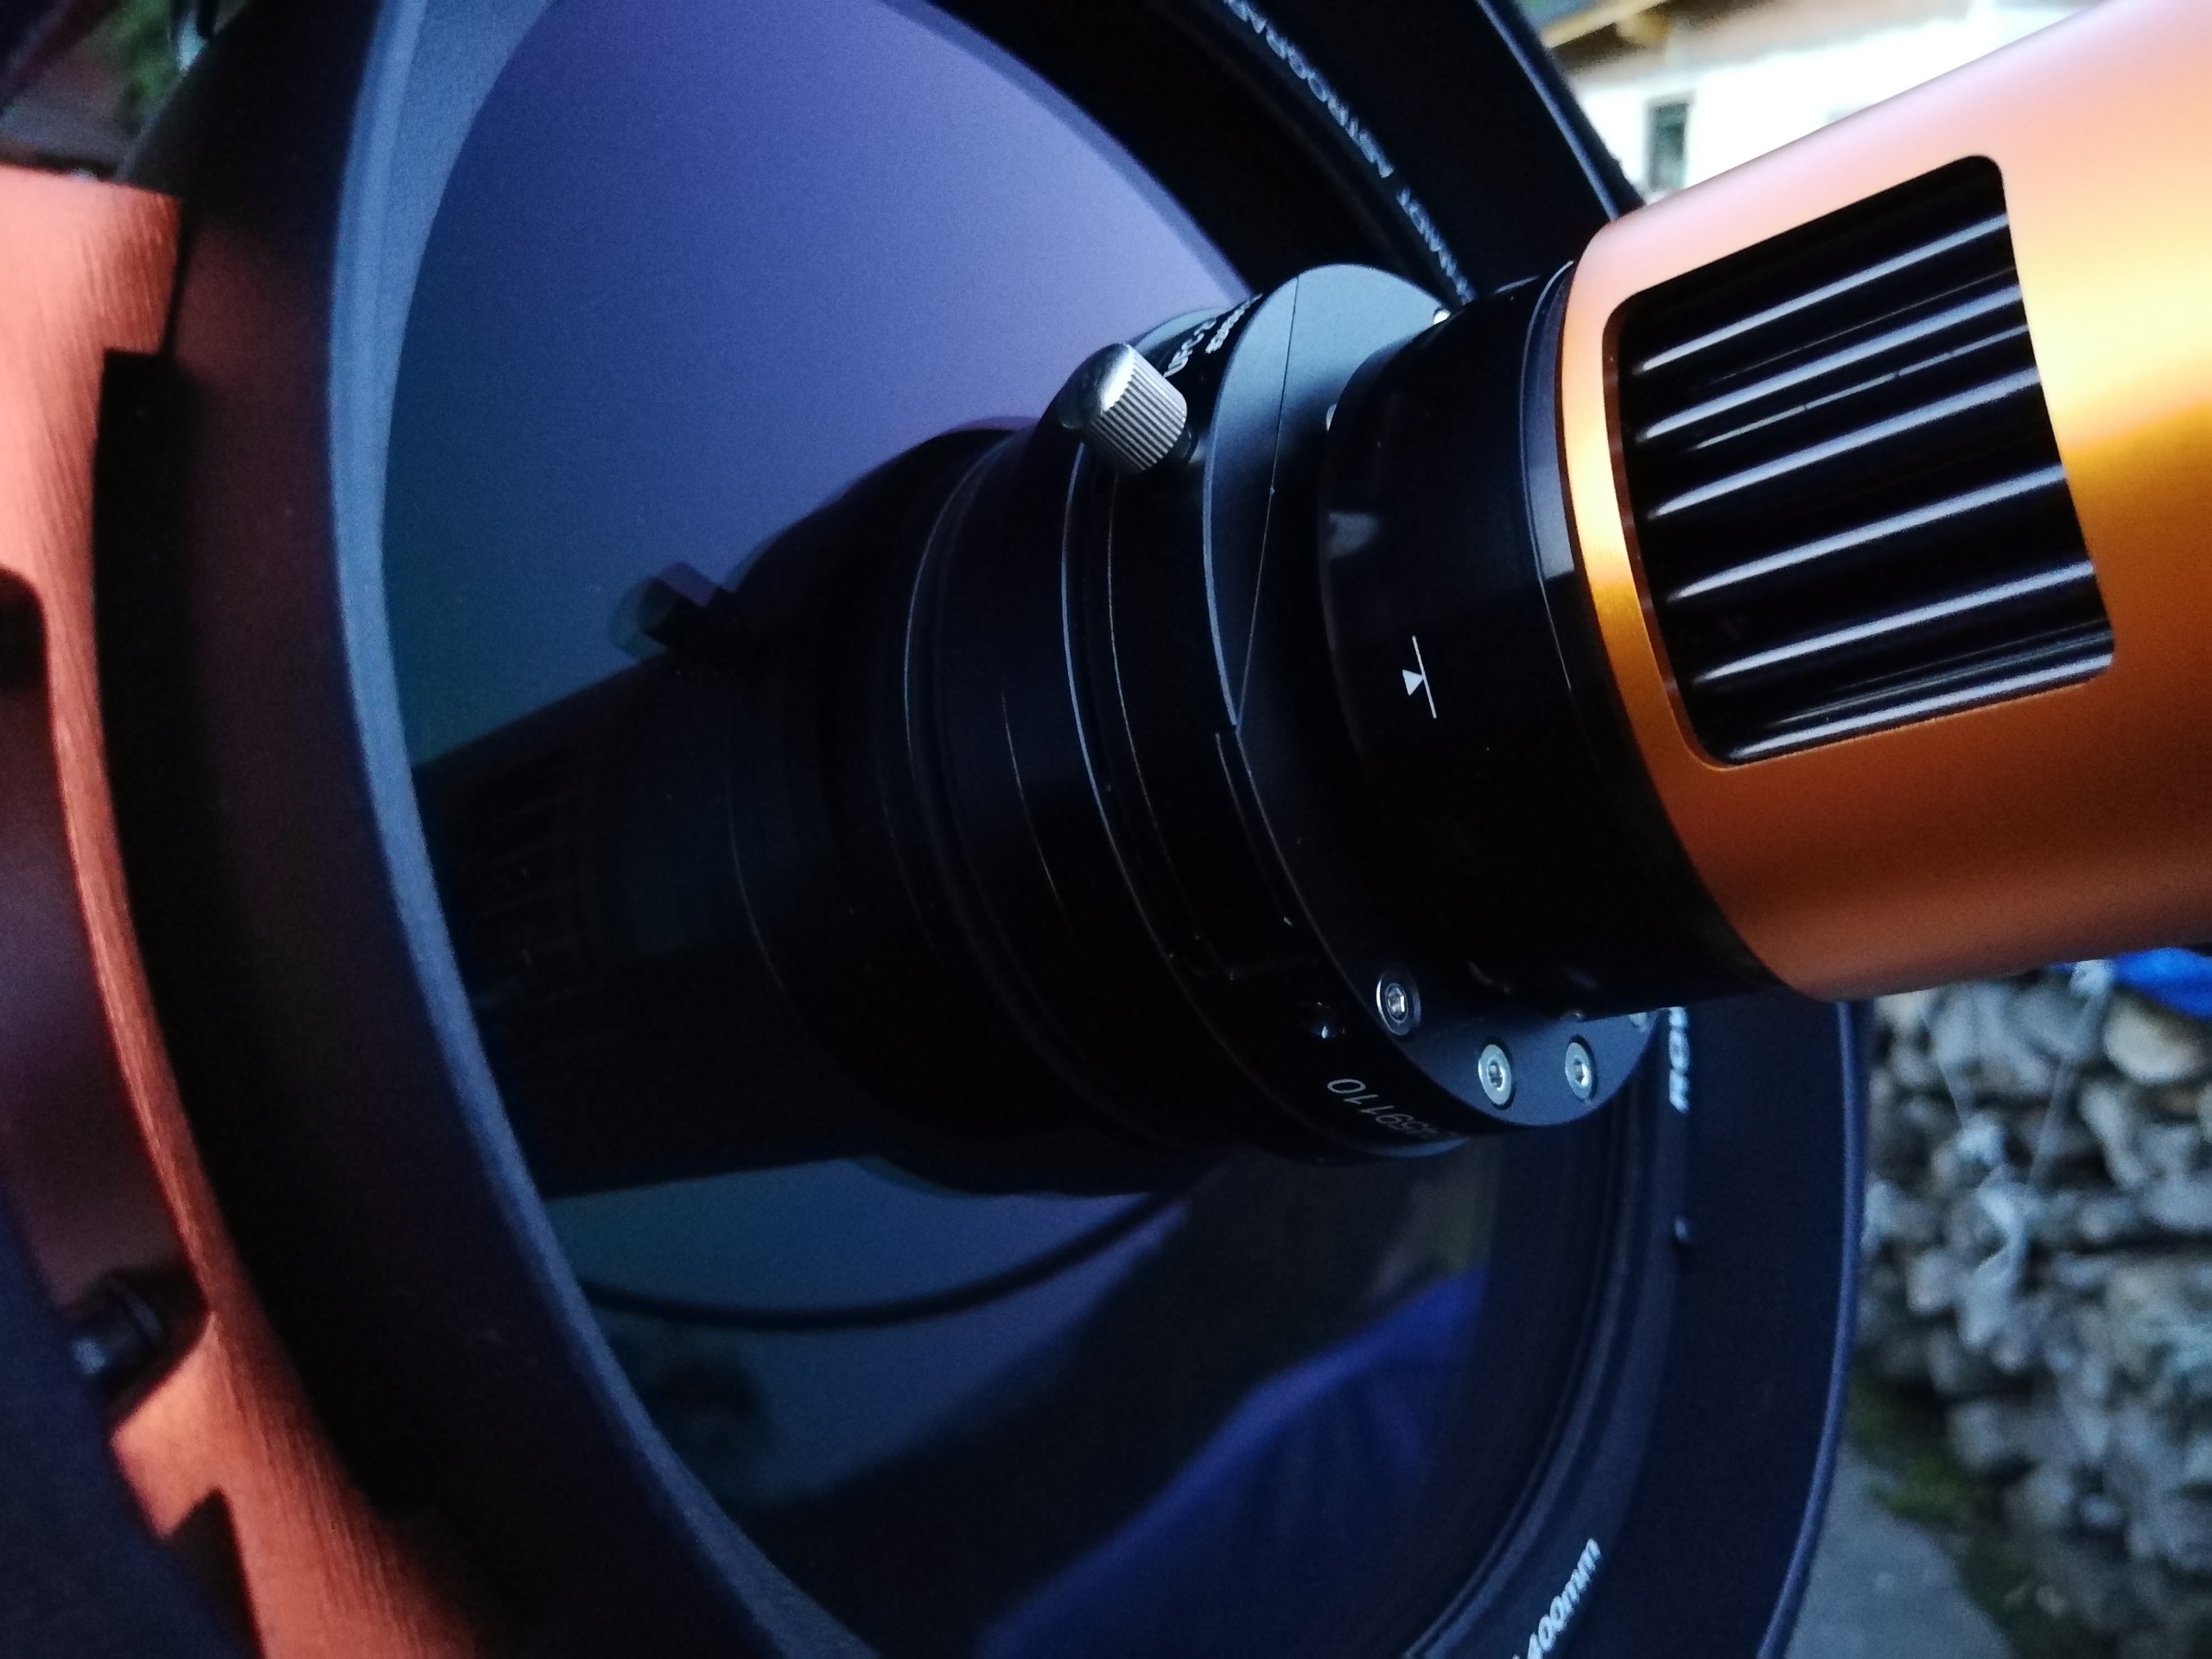
Together with the telescope, Michael Jäger also received a filter changer which was fitted to the RASA 8: The [product sku="baaderfcct" style="imgleft"] lets you use filters as well as collimate filter and camera to the light path of the telescope.

[product sku="2458382"]
First tests with a
7 nm CCD H-alpha-Filter which he already owned produced images with sharp stars all over the field, without distortions, but the RGB-images showed some colour-shifting. Typical filters are designed for f-ratios of about f/4 and slower; such a fast astrograph like the RASA needs special filters like the
f/2 Highspeed-Filters or the Ultra-Narrowband-filters, which can handle the wide angle of the incoming rays of light.
[br]
These filters were not yet available for his first tests, but the colour shift is no problem with a monochrome camera. Thus, Michael Jäger could easily create a mosaic of the North America Nebula (NGC 7000) and the Pelican Nebula (IC 5070/5067) with nine segments, each with exposure times of 30-40 minutes. All in all, he used an exposure time of five hours. All he needed to do to create the final image was simply rotate the single frames, so that they fittet together.
North America Nebula NGC 7000 with RASA 8, 9 segments each with 40min exposure time combined to a final image. With Baader Highspeed H-alpha filter and FCCT
Not only the distortion-free field is impressive, which made it easy to combine the mosaic, but also the relatively short exposure time beause of f/2. A telescope with f/2.8 would need twice as long to gather the same amount of light, and f/4 would double the time again.
Too much theory? Just take a look at the image of the Pelican Nebula by Richard Galli on www.nightpixels.net. For this image, full twelve hours of gathering light were necessary – with a Apogee Alta U16000 and 3nm filter at a 300/2,8 camera lens which was stopped down to f/3.3.
Just compare the images!
[br]
Another small experiment of Michael Jäger with the RASA 8:
NGC 7000 with RASA 8, ca. 1 hour exposure time. With Baader Highspeed 7nm H-alpha filter and CCD camera.
In front of the Schmidt corrector plate is a protective glass, which is held in place by small ring which is screwed on. Just for fun, I removed this ring and connected an old Sigma 6303 (10x10 cm body) with the help of this 2" thread. So, I could even use a filter changer.
The 27,5x17,5mm-sensor is not especially small and shows a field of 4x2,5 degrees when used with the RASA. It is a fact: The telescope provides an almost flat field with very little vignetting for an image circle of 25mm. Only when you leave this image circle, you see the effects of the smaller corrector.
After a rough collimation you can already estimate that the large field of view of this telescope can really be used completely.
So, even cameras with an APS-H sensor (28x18mm) should work, although only APS-C with 22,5x15mm is recommended. I was surprised that the stars didn't suffer too much from the large obstruction.
[br]
RASA 8 with Sigma 6303, the camera (10x10 centimetres) blocked a large part of the telescope.
[br]
Aufnahme vom 7. August 2019 von Michael Jäger
Aufnahme vom 7. August 2019 von Michael Jäger
An image with 10x4 minutes Blue, 10x3 minutes Green and 4x6 minutes Halpha 3,5 nm (Highspeed-Filter).
This way, the dust is toned down a bit, and the structures are better to see, although the focal length is quite short. The only problem is that the large camera body causes some halo around bright stars, which needs to be removed digitally. .
For this image I left some of the halo near the star at the top; in the original file it is quite bright
[br]
The Baader FlipMirror II (BFM II) in action
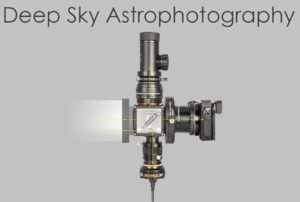
The [product sku="2458055"] is not only an accessory for "experts" but also a useful tool that makes the work of every amateur astronomer – especially the astrophotographer – easier. First and foremost, the BFM II is designed to fully replace your standard star diagonal so that you can continue to observe as normally with any good star diagonal. But with the BFM II you also have the freedom to create your own photo system immediately – or step by step – and have it ready for immediate use on the telescope.This saves a lot of time and nerves. We would like to introduce to you the countless possibilities of this new product in several blog posts in loose order. We start with the field of application for which there is certainly the most interest: Deep Sky Astrophotography.[br]
[br]
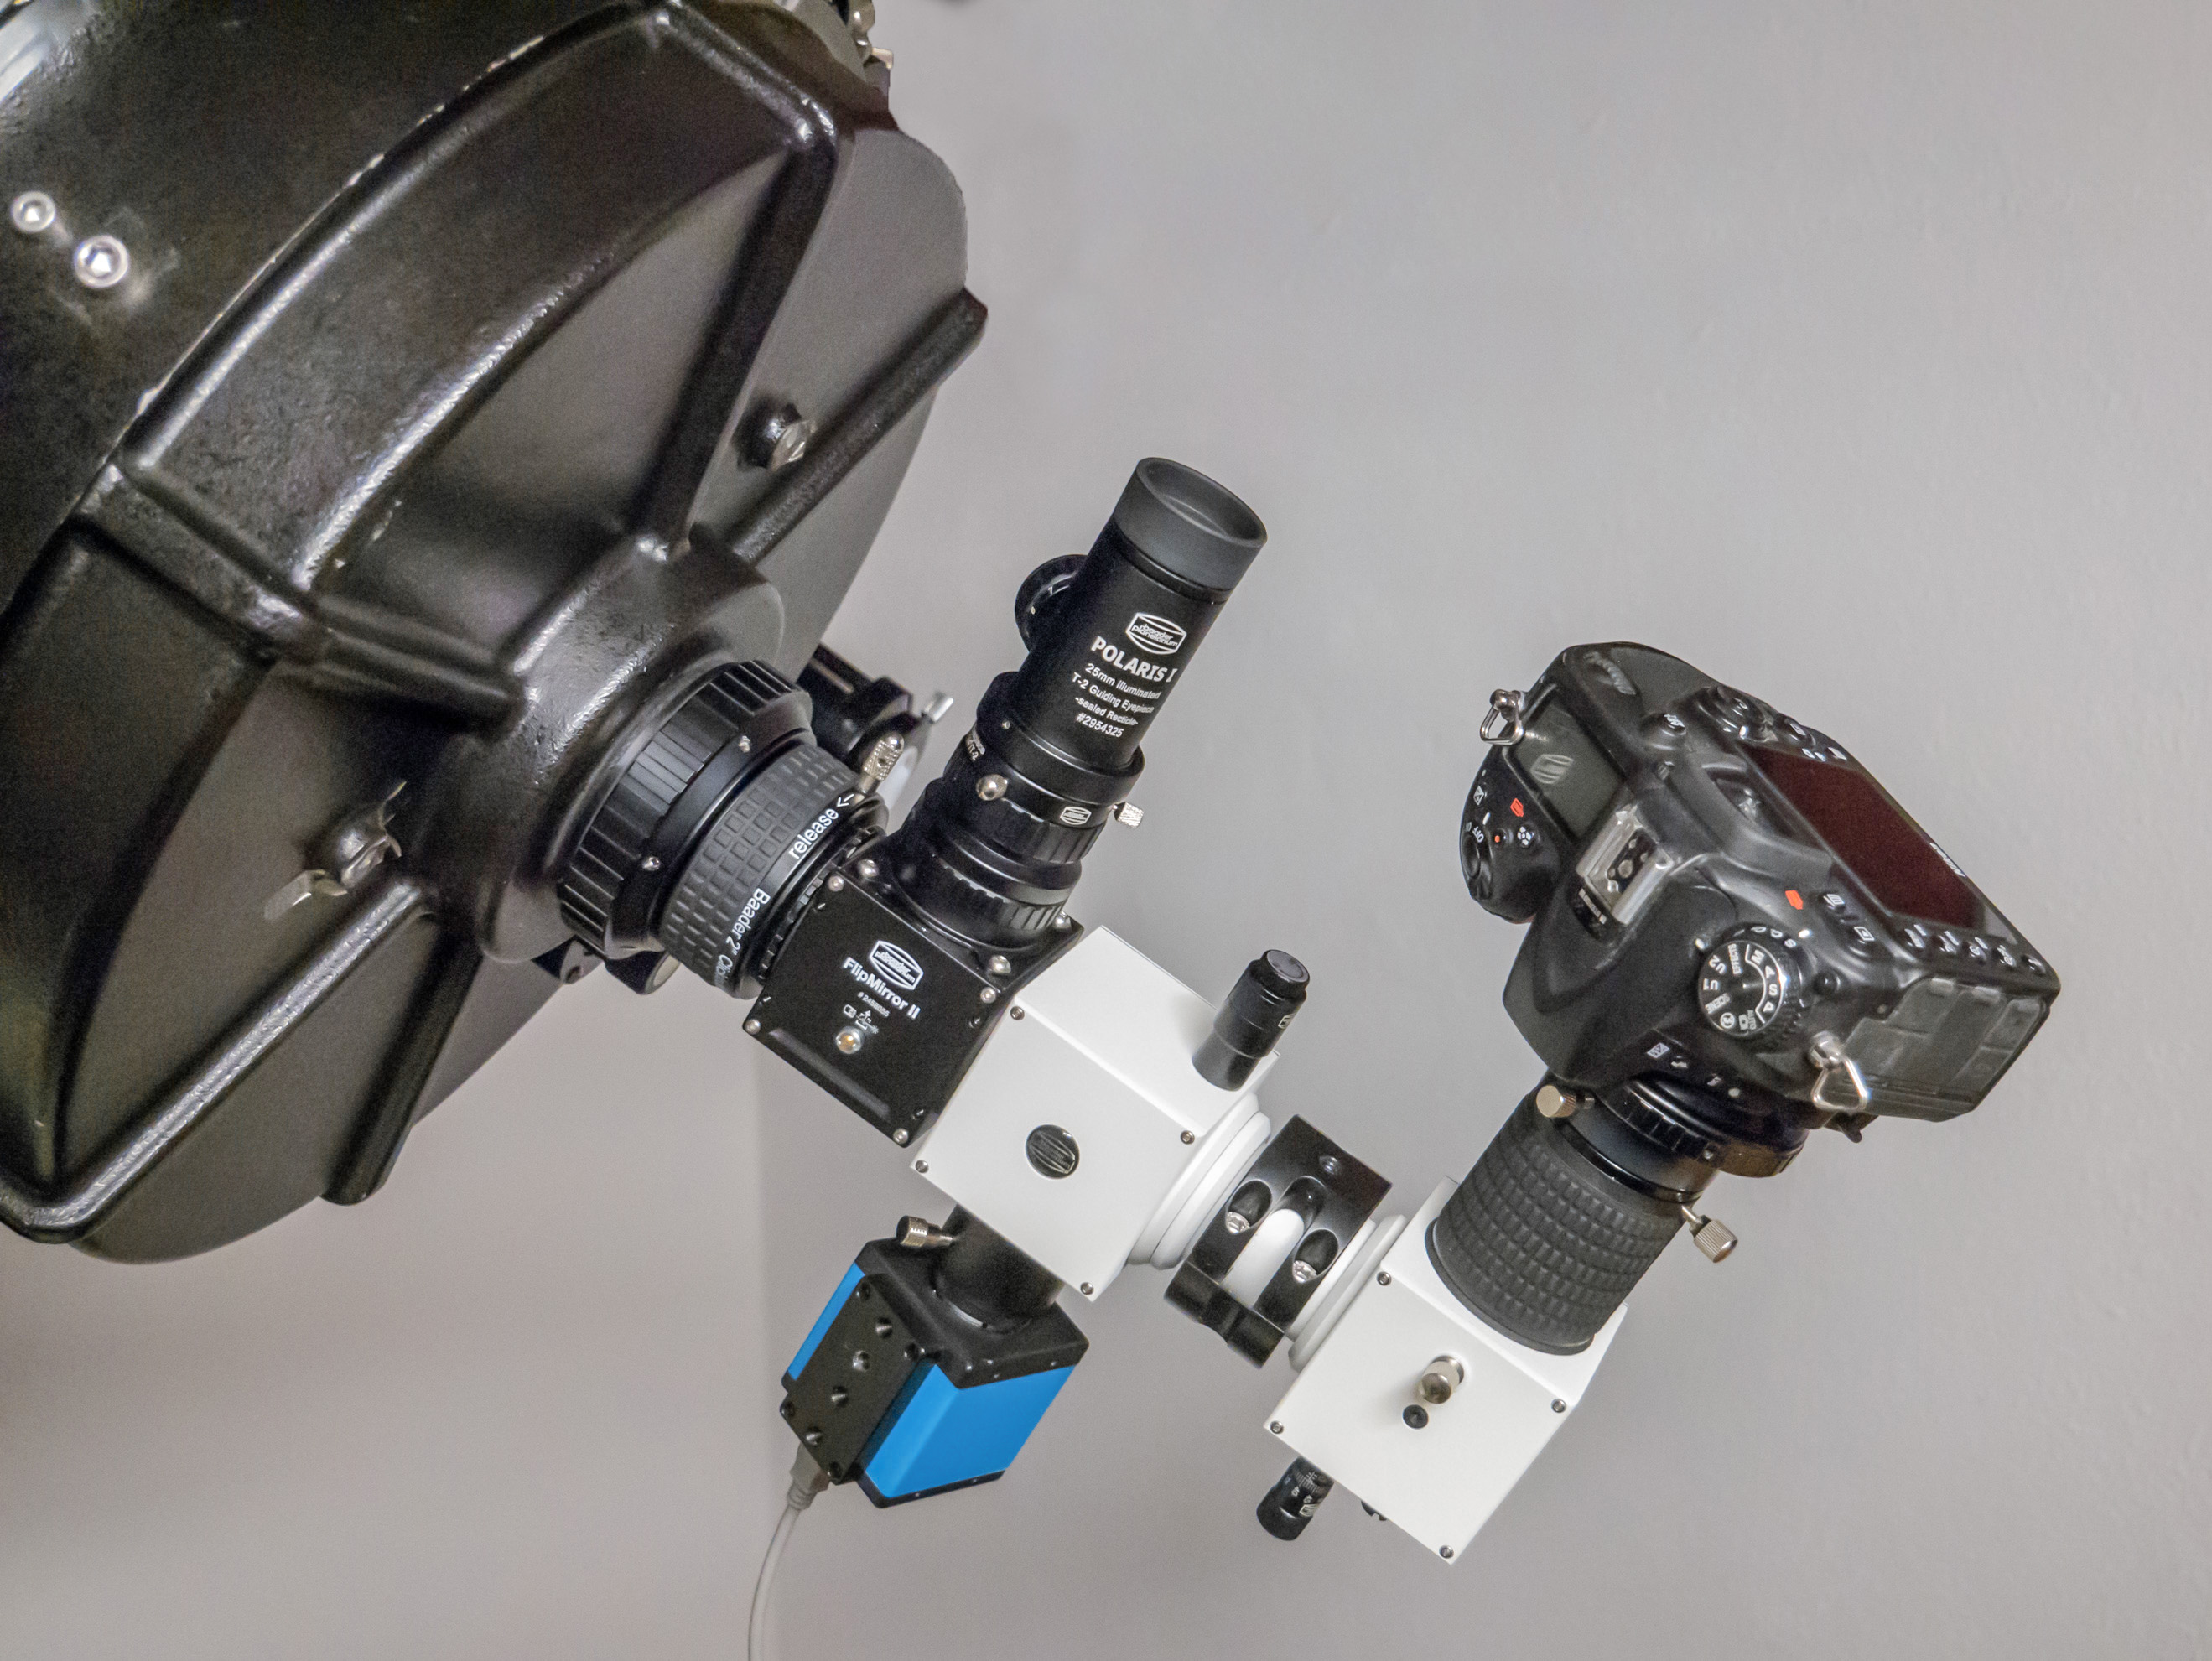
Baader Flip Mirror II star diagonal, equipped for astrophotography
Deep Sky Photography with Off Axis Autoguiding
The FlipMirror II star diagonal is far more than a simple flipmirror, as these accessories were known in the past. Thanks to the very high-quality, fine-optically polished mirror and the large T-2, M48 and S52 connection threads, as well as the connection possibility on four sides, it offers completely new possibilities to the astrophotographer to make the work easier.
Of course, the connection to any desired telescope of any size is possible. The same applies to cameras. All conceivable camera models, DSLR as well as bridge, system and astro cameras of almost all manufacturers can be attached.
In the picture on the right the camera is mounted at the rear end of the FlipMirror II, so that the light from the telescope can come in straight and unreflected when the flipmirror is "flipped up". If the hinged mirror is "flipped down", the light from the telescope is directed into the eyepiece instead of to the camera. With a variety of T-2 tubes and adapters, the eyepiece can be placed at the same distance as the camera so that the image is sharp in both the camera and the eyepiece. This means that the eyepiece can be used to center the object for the camera and (pre-)focus it for image acquisition.
FlipMirror II with Off Axis Guider (in this example with UFC filter slider)
The Baader UFC-System can be mounted before or after the BFM II, depending on your needs
Usage with Off-Axis-Guider
An Off Axis Guider can be attached to the lower end of the BFM II (e.g. [product sku="2956951"]). A small prism protrudes from the BFM-OAG into the FlipMirror II, which is located below the hinged mirror. The prism directs a small part of the telescope's field of view, which is not captured by the camera, to an optional guiding camera - regardless of whether the mirror is flipped up or down.
In this way you can use the [product sku="2458055"] for Off Axis autoguiding on every telescope. This also works if you want to work with narrowband filters, whose image is usually too dark for autoguiding. But due to the flexible connection possibilities of both the FlipMirror II and the Baader UFC system, filters can even be mounted behind the FlipMirror II, i.e. directly in front of the camera and not in front of the autoguider.
The FlipMirror II is a multi-purpose tool which provides many options and ports. It spares you a guiding scope as well as continous changes of eyepiece and camera. What could be more useful?
Coming Soon: Planetary imaging with the FlipMirror II star diagonal
Sharpened raw-sum image Saturn from July 29, 2018
On 28 July 2018 around 22:00 UTC we obtained the best image of the planet Saturn so far. It was taken through the 17" Planewave Astrograph of the Rooisand Observatory in Namibia. The imaging camera was a ZWO ASI 290M with 2.9 µm pixel size. The primary focal length of the telescope was extended by a factor of 1.7 with a Baader Q-Turret Barlow lens element, the equivalent focal length was about 5 meters. A total of 3000 single images were taken, of which 10% were stacked. A Baader IR pass filter was used to calm the seeing condition.
After processing the raw sum image, a thin black line appeared in the outer ring area, which seemed to be the Encke Gap in the A-ring. It was discovered in the year 1837 by the Berlin astronomer Johann Encke, at this time it was estimated to be 300 km wide. According to measurements taken by the Voyager spacecraft in 1980/81, the width is 330 km.
At Saturn's distance in July 2018, these 300 kilometres corresponded to only 0.05 arc seconds. However, the resolution of a 17" telescope at the deep red wavelength of 685 nanometres of the IR pass filter is theoretically only 0.33 arc seconds. So how is it possible that the Encke Gap is visible on our image?
Well, we have to distinguish between "resolved" and "detected", i.e. imaged. The resolution is defined as the separation of two point light sources. In principle, however, objects below the resolution limit can also be detected if the contrast to the environment is high enough and linear structures can also be detected more easily.
In the case of the Encke Gap it is as follows: The camera pixels on which the dark gap is imaged receive slightly less signal than the surrounding pixels, which image the brighter part of Saturn's ring. This means that the pixels in which the gap is imaged appear darker in the final image, even if the gap only covers a fraction of a pixel on the camera sensor.
To eliminate the possibility that "our division" is an artifact of image sharpening, we have scaled our image by a factor of 2 times and superimposed it with an image of the 1m telescope of the Pic du Midi (image by Damian Peach). And see there, the position of the gap is identical. The animation shows the slightly changed position of the ring system as viewed from Earth between June and July.
Animation Rooisand and Pic du Midi
Animation raw sum image and sharpened with AstraImaging
The image is a "small sensation" for us and shows the high optical quality of the Planewave astrograph.
D. Lucius, F. Hofmann and W. Paech - Team Chamäleon
Software: Stacking with AviStack, raw sum sharpening with AstraImaging, finishing with Photoshop.
We have received the following question on our Narrowband (and f/2 Highspeed) filters:
I understand that narrow-band filters suffer shifts of the passband for light rays that come in at an angle. Is that why they are good to a certain f-ratio and why you offer different filters for fast optics (how do they work? are they actually de-tuned to have the correct passpand at a different average angle?)? I would like to ask whether this additionally depends on the field-of-view of the optics? I would expect that since the angle should be larger for wide field imaging at the same f-ratio? So are all of the filter ment to be used with telescopes or can they also be used with shorter focal length camera lenses, for example?
Since this question is of particular interest for many other people, we would like to answer publicly. Please see our answer below:
In general what you assume is very true - but - "the devil is in the detail".
For an aperture ratio of f/2, the filter design-CWL would require to being given some shift in order to compensate for the large angle of the incoming wavefront. The devil in this game is - even if one were to do the coating layer design for a huge incoming angle, at the same time also image information is coming in at zero-degree-angle - respectively at all angles in between. Which essentially would mean that no shift ought to be allowed. A filter made to cover that wide an angle must cope with these contradicting requirements. Hence no one else has succeeded in making f/2-filters that would not suffer from severe image contrast fall off and vignetting effects, either in the corners of the field - or in the middle. And doing these coatings in the appropriate way is about the hardest task in filter coating technology today.
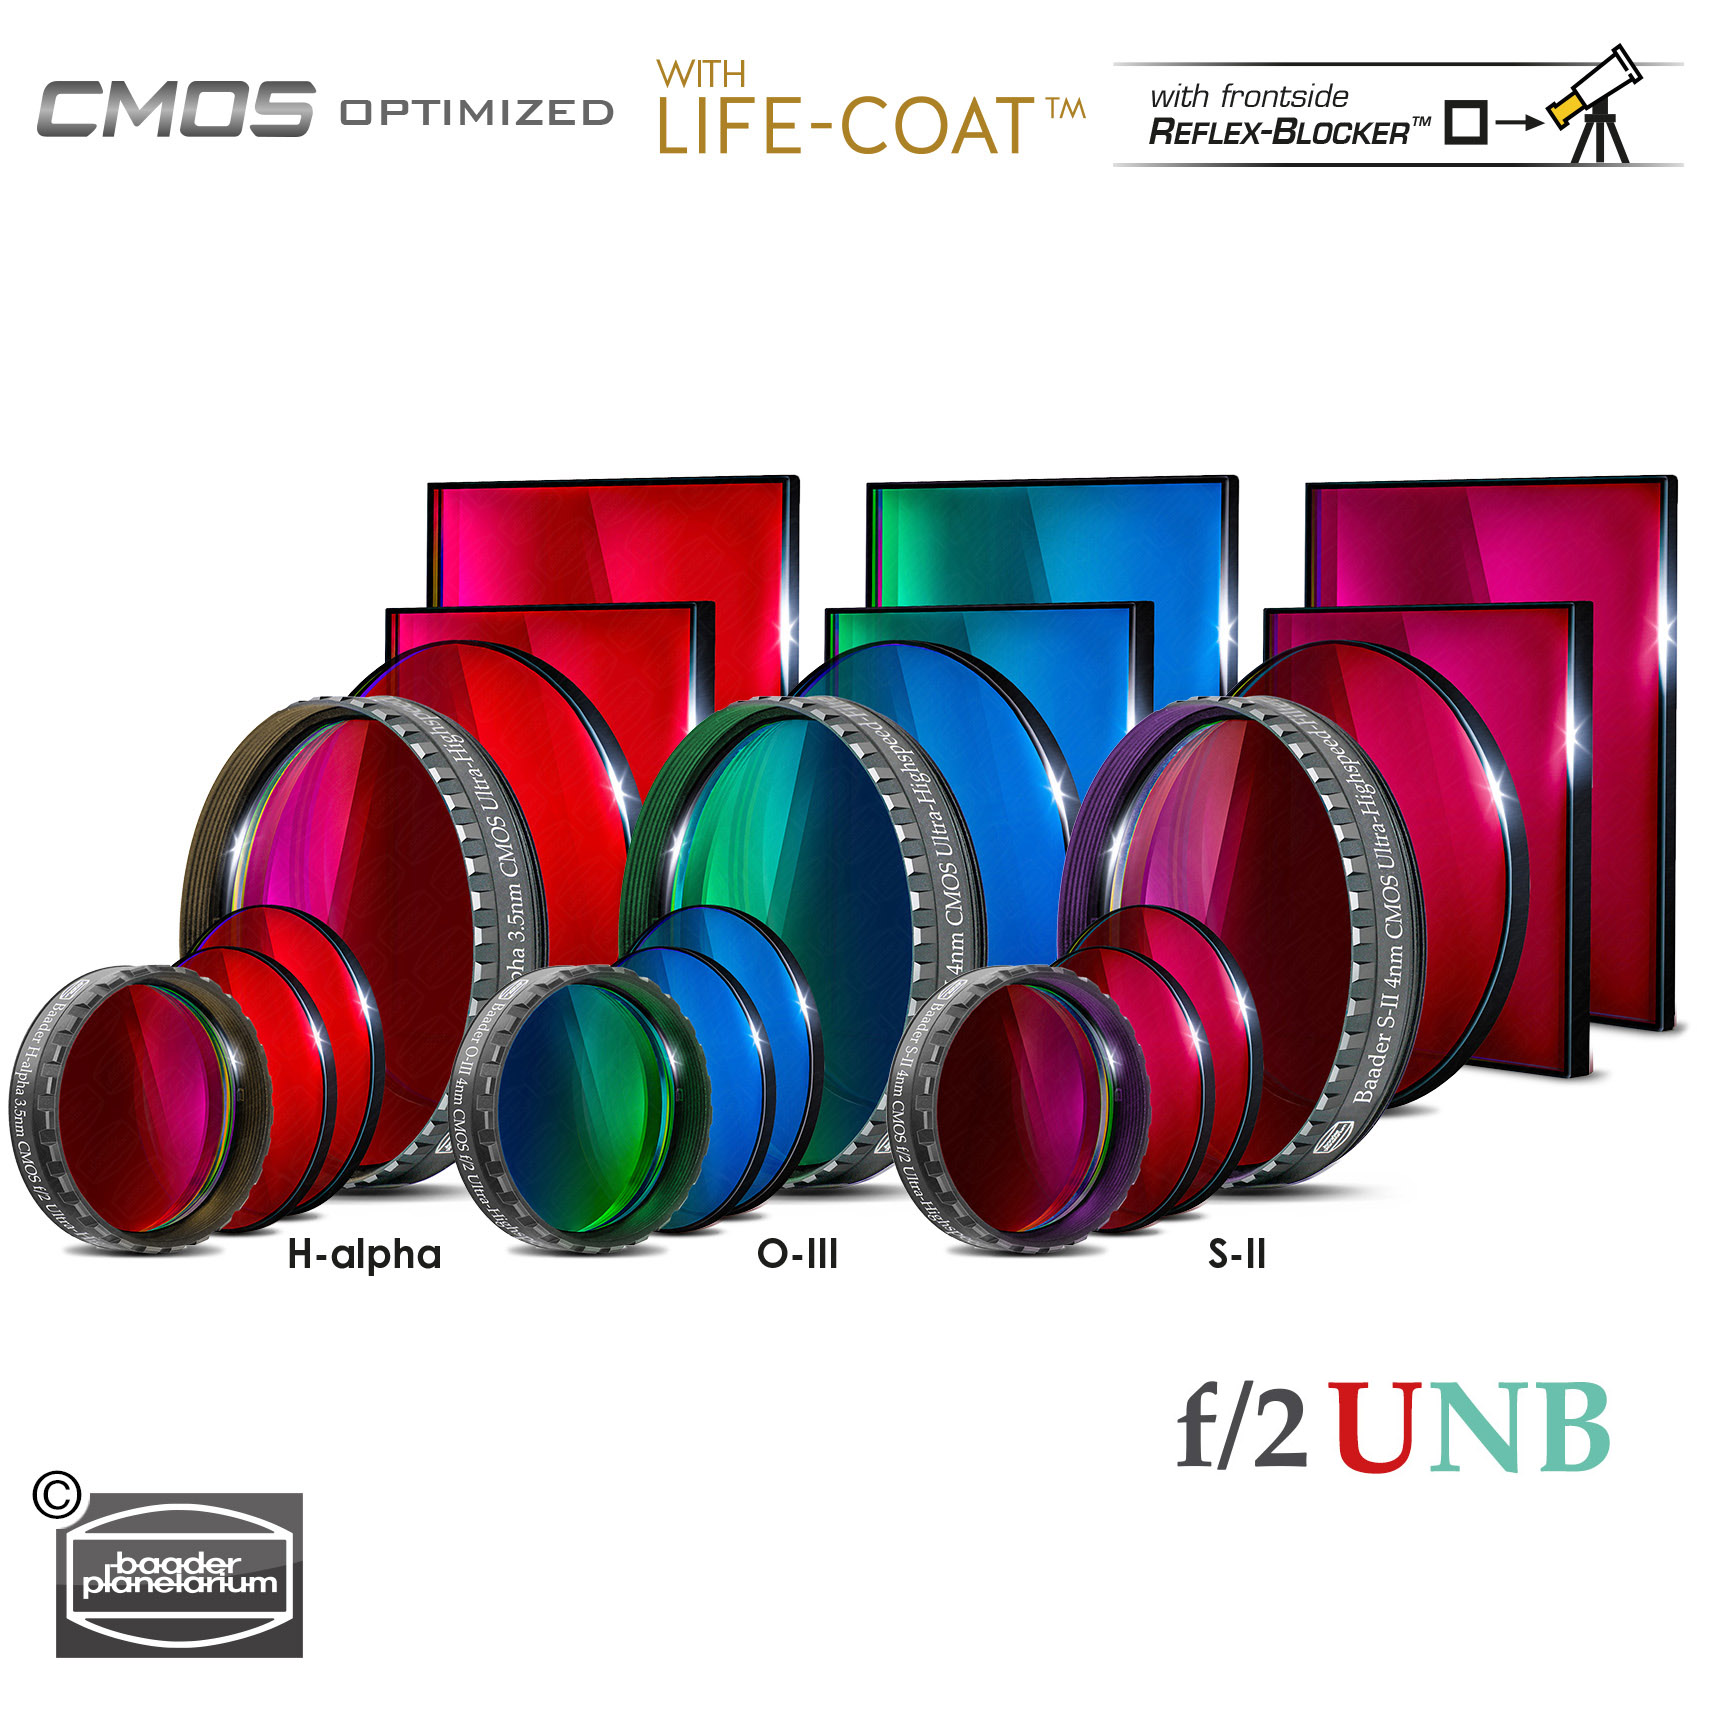
CMOS-optimized f/2 Ultra-Highspeed-Filters in sizes 1¼", 31 mm, 36 mm, 2", 50.4 mm, 50x50 mm, 65 x 65 mm
The production of these filters is anything but trivial. It took us around three years and numerous unsuccessful coating runs to finally be able to produce the CMOS-optimized f/2 Highspeed filters with consistently high quality. In essence we are moving to a much more elaborate and critical filter design with very steep slopes on both sides of the spectral window – hence with even better contrast and smaller stars.
We think that our competitors also must go through all of this vicious circle still – and we could not be more thankful that so many customers had the patience to wait until we finally can produce these filters continously in the necessary quality. Now you can finally start imaging monochrome with your prime focus optical equipment
Sh2-308, taken with Baader H-alpha and O-III ULTRA-Highspeed Filters
© Andreas Bringmann
Both families of our new f/2 Highspeed filters with 6.5nm and Ultra-Highspeed Filters with 3.5 / 4nm are entirely designed and exclusively manufactured to work for a focal ratio range of f/3.4 to f/1.8. They are NOT designed to work above that, say from at f/3.5 to f/10 and this may become very apparent to see in the imaging results, if someone would try this out – for these focal ratios, "classic" narrowband filters work better.
Those who will try out our new f/2 Highspeed filters though will be in for experiences like this image, done by Andreas Bringmann (Astrobin: Equinoxx) using the latest prototypes of our new generation of f/2-filters – in conjunction with an ordinary Hyperstar-Celestron 11 Edge-HD OTA).
About Production of Baader filters
Producing filters which will be used consequently and only for a defined and rather tight range of light ray angles (from aperture ratio and wide angle optics) really does make good sense. Most people would not notice that the difference in signal (emission line) throughput will be caused by their improper filters. Everyone will note that the exposure time varies widely, depending on the telescope he uses. In most cases longer delivery time for obtaining similar s/n ratio is attributed to a larger or smaller telescope aperture, but not to the difference in aperture ratio. So the decline in filter-transmission goes unnoticed. Fact remains that a filter designed to work at f/10 will gradually fall off in transmission while the focal ratio of the optics in use becomes shorter. At f/4 the transmission may only be 60% compared to 95% at f/10. To improve on this as good as technology allows, we do have extremely elaborate coating recipees and – most of all – very expensive rare earth coating materials applied – with a large amount of layers accumulating on both sides of the filter-substrate.
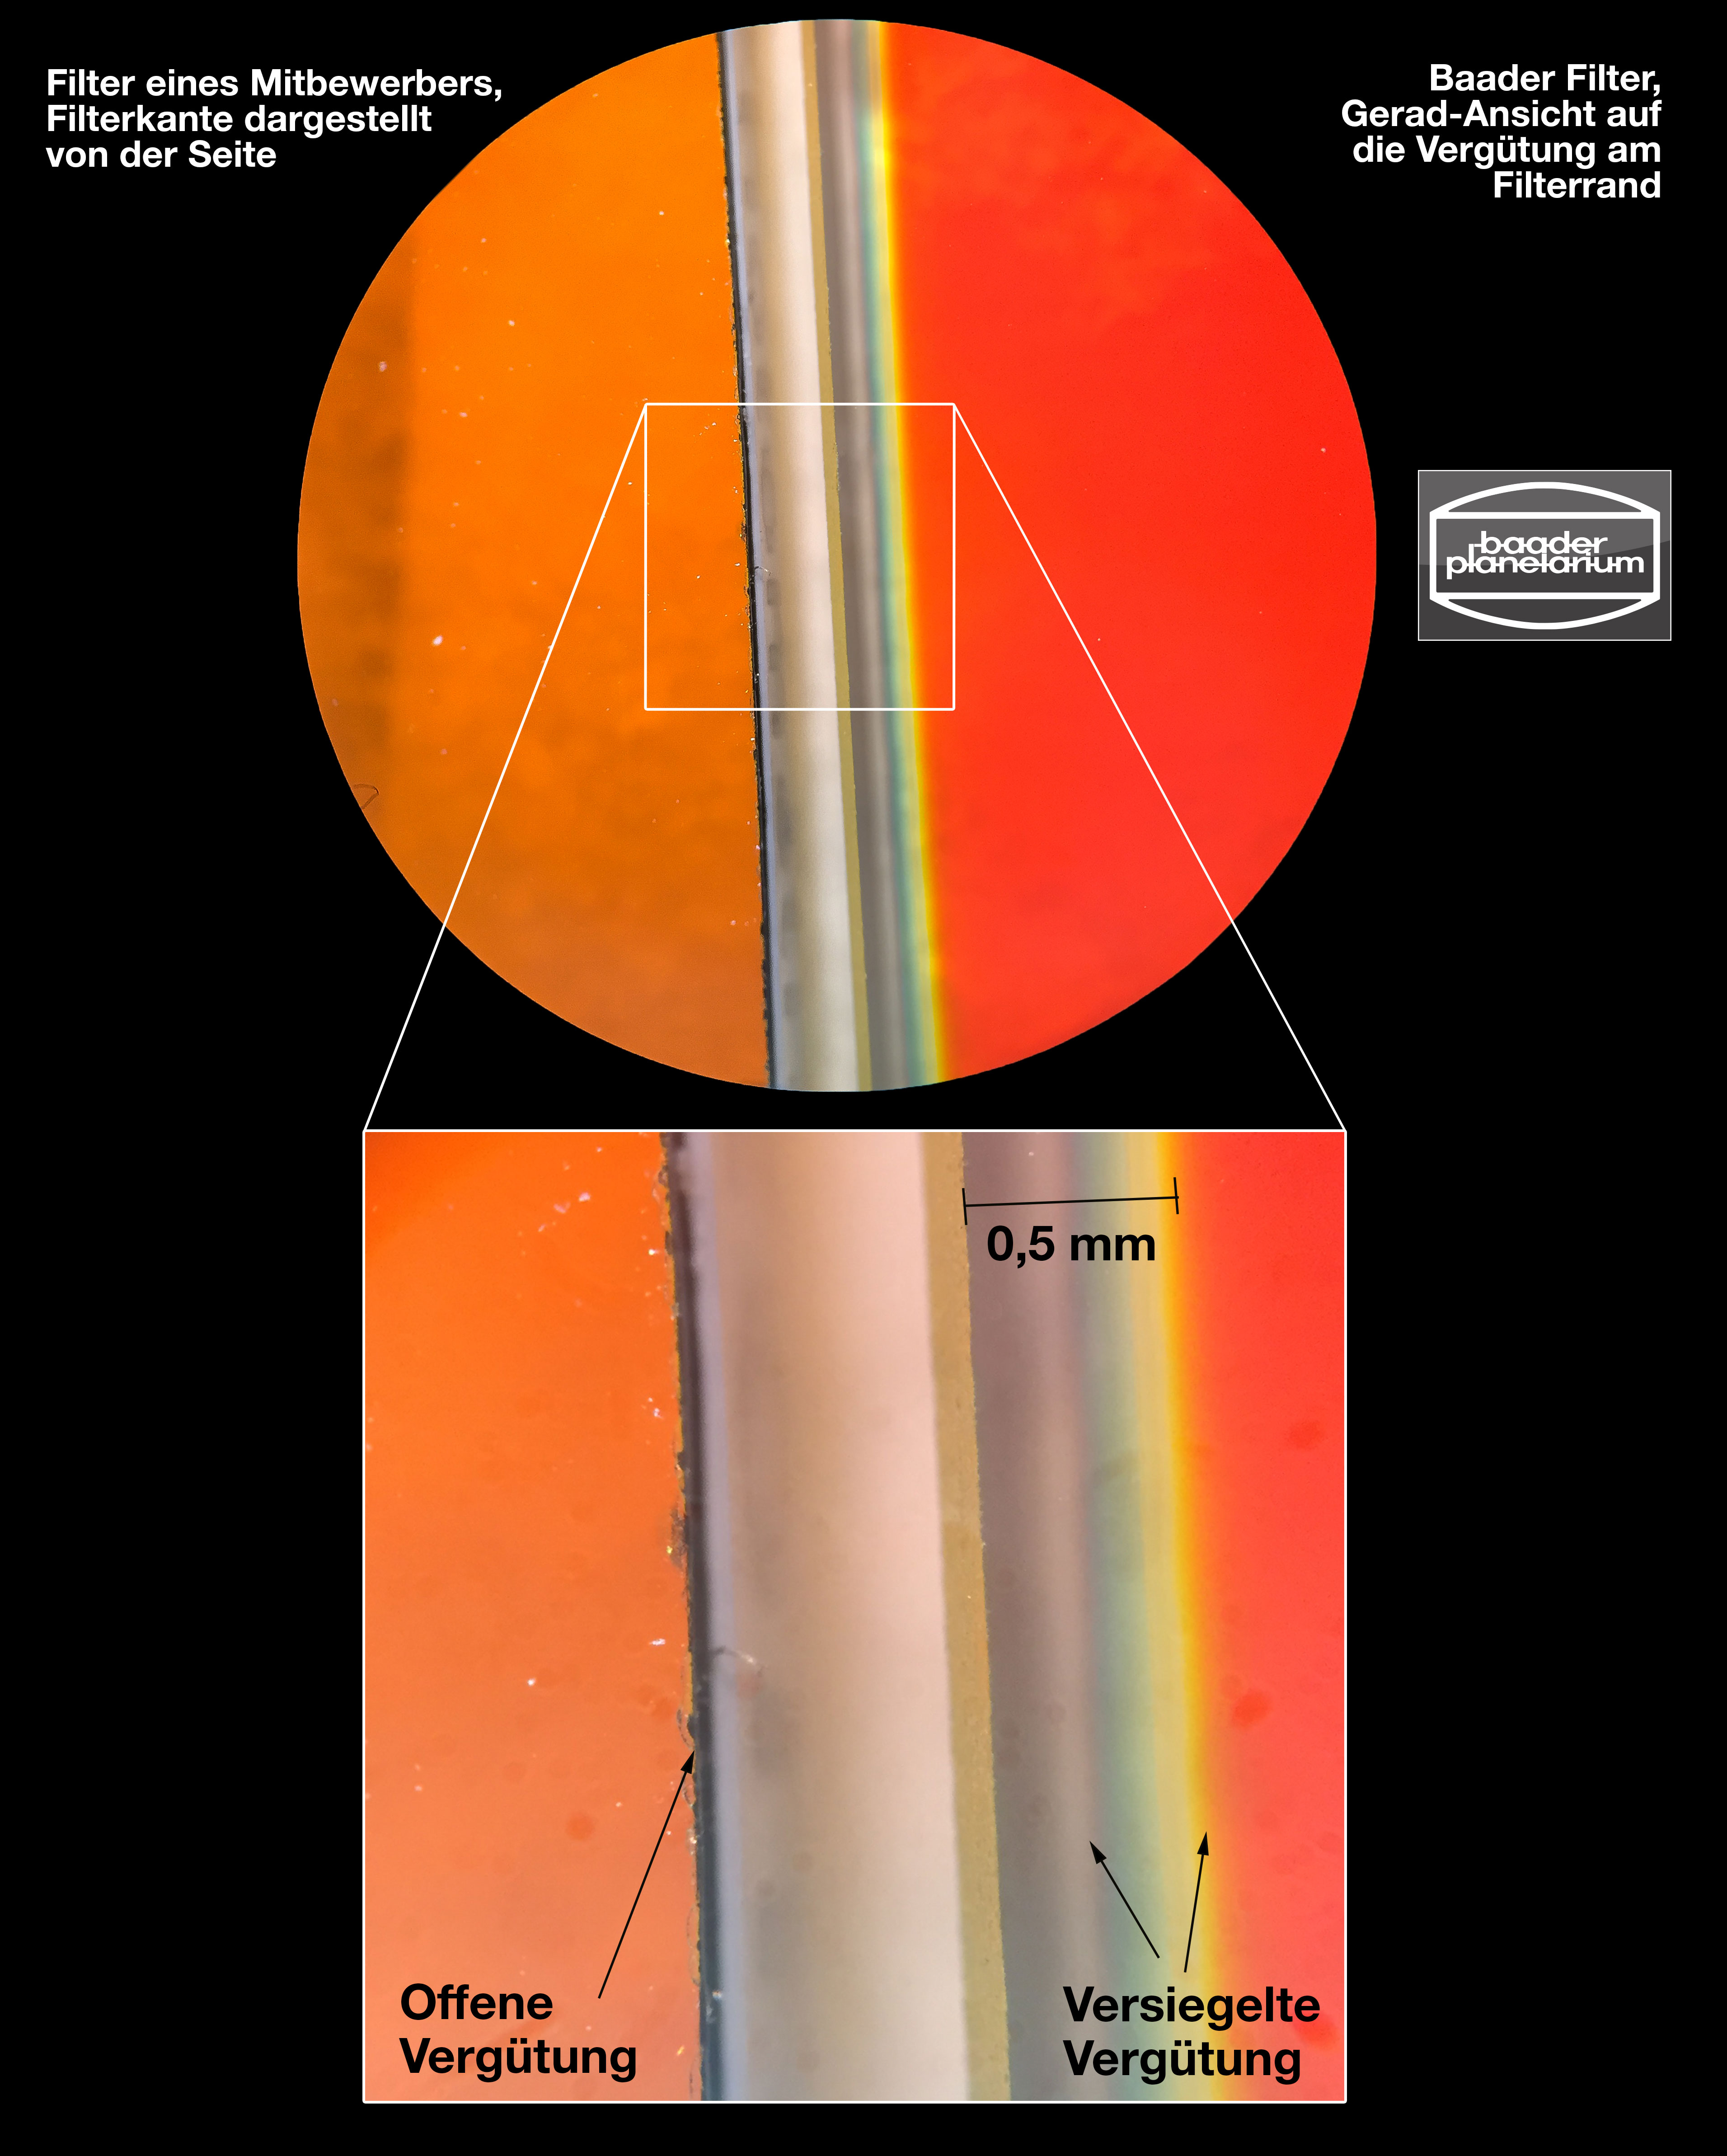
A stack of coating layers (up to 60 layers depending on the filter complexity) has a considerable thickness and, above all, a different coefficient of expansion than the carrier glass. When this stack of layers is cut at the edges, the entire stack of layers may separate from the carrier glass over time. Baader Planetarium, on the other hand, allows the coating to gradually run out towards the edge. This means that the outermost filter edge (0.5 mm) cannot be used for filtering, but the coating remains sealed permanently.
The thick coating stacks applied onto our coating substrates make it very necessary to protect the coating edges from peeling and aging. And this extra amount of care against aging we are putting into our production process - as we do explain since years. Contrary to many competitors, our filters are coated as individual sized substrates for each filter size that we offer. We do NOT follow the road of economic optimisation to coat large plates and cut the filters from these plates on demand, in the diameters or sizes required. We could not risk to do this as the thick coating stacks would separate themselves from the substrate when the coating is just brutally cut all through together with the substrate. All these years we have checked if we are right in going this route. When looking at the layer structure of a filter cut out of a larger plate it becomes obvious that the coatings will age from the side while our coatings remain all time sealed all around the filter edges (see image to the right). We will soon emphasize this by announcing a lifetime warranty for all Baader Narrowband-filters. We have emphasized this now clearly by giving each new CMOS-optimized Baader Filter a Limited Lifetime Warranty:
Test review: Comparison of Baader U-Filter (left) and a similar filter of a competitor © Dr. Klaus Schmitt
Many far east companies at this time begin to offer filters at wonderful prices. But once you start to go into details you will learn that their coating designs suffer from severe flaws (e.g. see the test review on uvir.eu) - mostly concerning totally inappropriate off band blocking leading to meager color separation (see also an Article on Cloudy Nights) as well as a huge transmission fall off when the filter has to work at a different than the design f-ratio - not to speak of different temperatures. Regularly filter designs are calculated under the assumption that the application of these filters - as well as the testing of filter specs - happens in the lab. However - astronomical narrowband-filters quite rarely are actually used under lab conditions. So when someone will measure our filters in the lab he might be mistaken to think they do not reach the transmission values they may claim for their own lab designed filters. We have taken pains to come up with coating designs that will work from -30°C to +30°c with an absolute minimum of shift. The secret really lies in the coating materials - the more expensive these are and the more these layers are accumulating, the better the temperature shift as well as the angular shift can be brought under control. So we most carefully aim to achieve a consistence performance across a wide range of working temperatures and f-ratios.
Note the improper off band blocking of the filters measured. This is a flaming proof that the criticism expressed on CN about the leaking color separation is entirely true
Image: © Teleskop-Austria.at
To ensure this standards, we quality inspect each individual filter before it leaves our buildings here. Among else, we utilize a professional Echelle-spectrograph with about 100-times better resolution and ThAr-calibration than the simple educational spectral imagers that are being offered at economy pricing and that recently are being put into use by some companies to offer their own payable "filter inspection service" (found on teleskop-austria.at)
The wealth of filter design knowledge that we gained over the past 20 years is almost "too much information". We could do much better in pricing with choosing cheaper materials for vacuum deposition, use lesser grade coating machines with less exact layer monitoring equipment during the coating process – and let a much worse quality controlled product go out the door - if we were not to absolutely know all the many possible flaws this would cause. The f/2 Highspeed filters weren't available for a much too long time, and we suffered from it as well as our faithful customers. However – the situation did only arise because we NEVER let anything go out this door which is not fully meeting our specs. And still – we are only human. If something like this does happen for once within 20 years – then we call it back. This happened once – and we don't want to let it happen again.
And concluding your question:
As long as you put our regular Narrowbands (6.5 nm) or the new family of Ultra-Narrowband filters (3.5 / 4 nm) in front of your (non-wide angle) DSLR-camera lens, you do not at all need to care for using f/2 filters. Only if you were to put our filters into the back of a fast camera lens – that is between the camera body and the optics – then indeed you would need to choose from the f/2-filter family.
But note: in contrast to the usage with telescopes the light ray angles with camera optics have a much stronger variation, this is due to the short backfocus and mainly back lens and iris size limitations. With full format sensors these light angle differences can exceed the on-axis f/2 light angle spectrum by far! So take care when using strong wide angle lenses! With telephoto there will be less effects.
Digital, temperature compensating focusing untis by OPTEC
For many years Optec has been committing itself to the automation and motorization of telescopes as well as to the production of mechanical adapters and optical accessories.
Optec is a US-based company which designs and manufactures intelligent accessories for amateur astronomy since 1979. In collaboration with Starlight Instruments, digital temperature compensating focusing units and accessories / software have been developed to meet all the requirements of the latest technology and precision. A wireless software control is available via apps for tablet and smartphone. The focusers are fully ASCOM compatible.
We have been offering Optec products for a couple of years to expand our own product range. Furthermore we have successfully installed and tested a new series of Optec motor focusers in various remote observatories under adverse climatic conditions with temperatures between -40° and +50°C over the past few years.
There are three types available:
- Retrofit modules for manual Feather Touch focusers
- Retrofit module for TEC 3.5" and Takahashi FSQ dual-speed MEF focuser and
- TCF-Lynx, fully autonomous focuser in 2 "and 3"
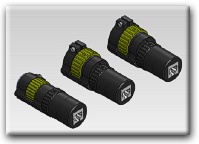
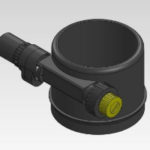
FocusLynx FT QuickSync System for retrofitting manual Feather Touch focusing units
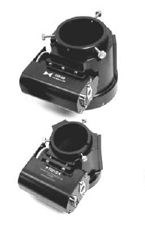
The big advantage of these add-on motors is that they retains the capability of manual focusing with the 1:10 reduction of the Feather Touch focuser. The usual disadvantage of normal focusing motors is that the adjustment paths are minimal and thus virtually useless for visual observation with changing between accessories with different focal positions. Being able to focus both manually and via the stepper motor, Optec's FocusLynx system is ideal for amateur astronomers who sometimes like to observe visually but are also interested in perfect photographic results. The coupling or uncoupling of the motor is done by a simple rotation of the unit. By a 10° rotation of the housing, the motor can be safely coupled or disconnected. Thus, the operation by hand with or without 1:10 reduction is possible at any time without cumbersome dismantling and reassembling.
This short video shows the simple coupling and uncoupling of the FocusLynx FT systems for the Feather Touch focuser and the control via a smartphone app:
When using the FocusLynx FT QuickSync systems nothing is left to be desired. It is possible to control the motors via WiFi, Ethernet USB / serial and ASCOM via software. Only high-quality materials are used, even for the intermediate gears, no plastic elements are used.
The Optec motorfocuser consists of a control unit and a motor unit, which is attached sideways to the focuser in place of one of the hand wheels. An optional keypad and further accessories are additionally available.The compact motor unit is attached permanently to the focuser. The required connecting components are enclosed.
Additionally, a built-in temperature sensor sends its data directly to the control unit, thus enabling temperature compensation. The FocusLynx FT's and TEC with DirectSync temperature sensor is integrated into the motor housing.
The motor unit is connected to the control unit via the included CAT6 cable, which supplies the power (PoE) as well as the control signal.
We can offer you the following Optec motor units:
- Motor unit FT20: suitable for Feather Touch 2" focuser – FTM C8, C9.25, C11, C14 (Feather Touch) and Celestron RASA telescope (#1317515)
- Motor unit FT30: suitable for Astro Physics 2.7" focuser with Feather Touch micro focuser and Feather Touch 2.5", 2.7", 3" focusers (#1317520)
- Motor unit FT40: suitable for Astro Physics 3.5" and 4" focuser with Feather Touch micro focuser and TEC Telescope with 3.5" Feather Touch focuser - Feather Touch 3.5" focuser (#1317525)
More Details
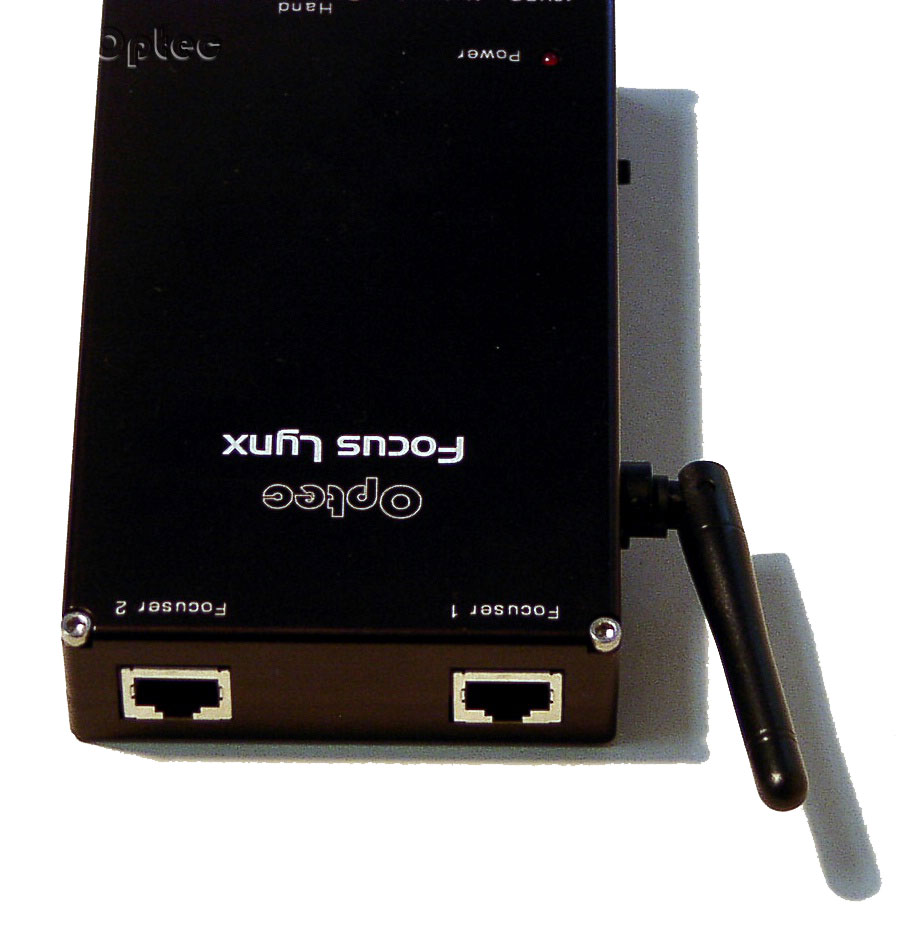
The Optec FocusLynx Controller Hub is necessary for operating.
 FocusLynx was presented with a Star Products award for Astronomy Magazine's fifth annual event in 2014.
"Advanced astrophotographers appreciate the precise focusing control offered by the FocusLynx Focuser Hub. With this product in place, you can adjust up to two Optec or Starlight focusers simultaneously and independently via a computer, smartphone, or optional hand controller."
Optec FocusLynx Controller Hub
The controller hub is shipped with one motor input plus RS232/USB adapter, so that it can be connected to the computer by LAN as well as RS232. There is also an input for the optional hand control unit. The hand control unit itself can be purchased separately. The control unit is powered with 12V by the provided power supply. The motor focuser can be controlled via PC by the Optec software. Installation of the current ASCOM platform is essential. Of course, the connected motor units can also be controlled directly over ASCOM and therefore other software like Maxim DL or Focus Max can be applied as well.
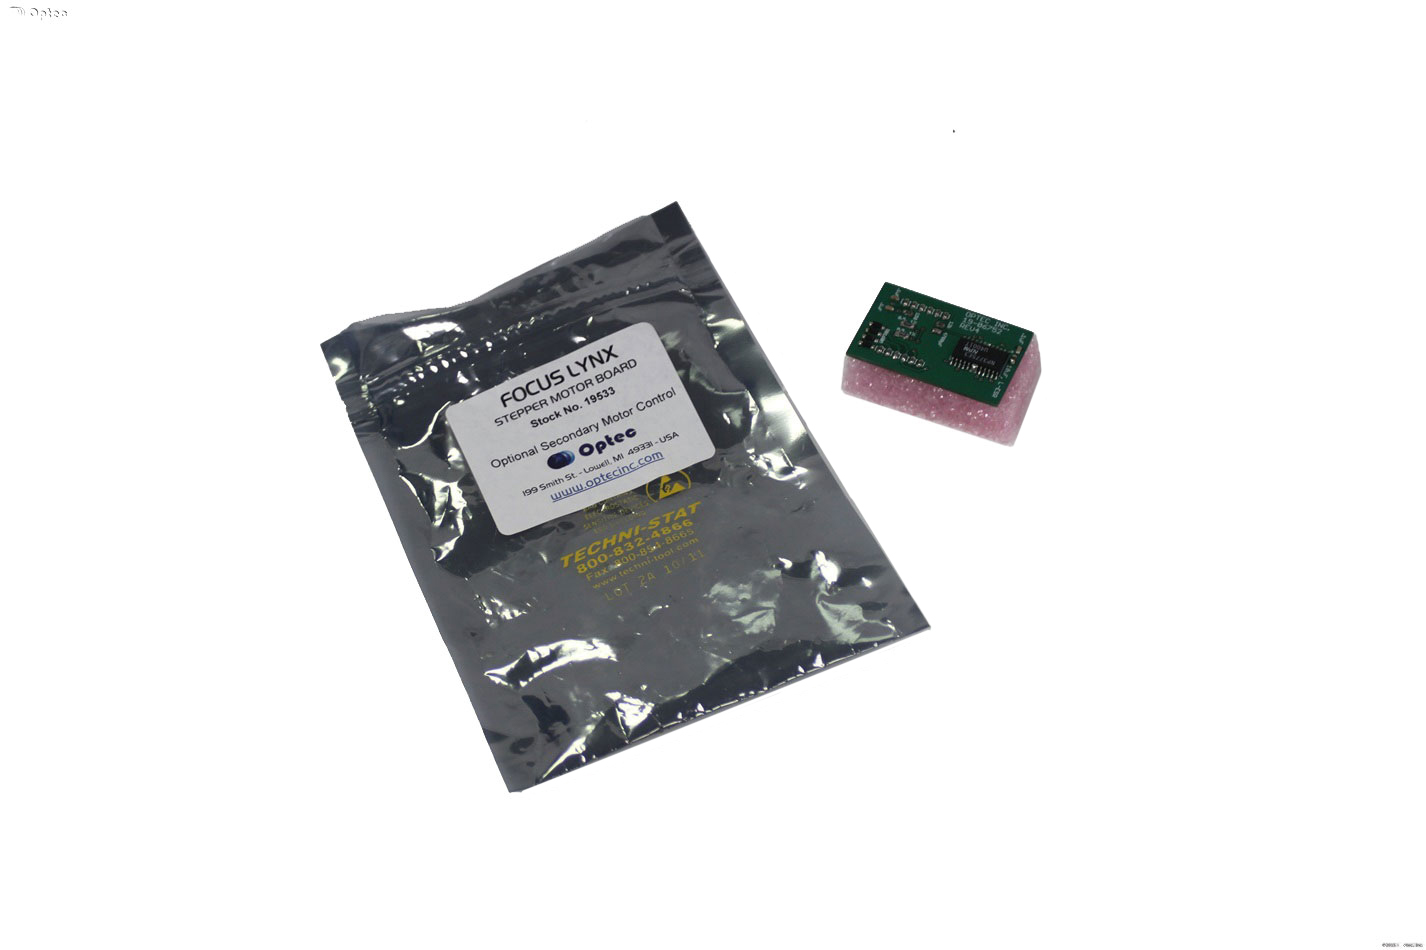
[br]Two further separate retrofit accessories can be purchased to be built into the housing:
Optec Bipolar Stepper Driver Board
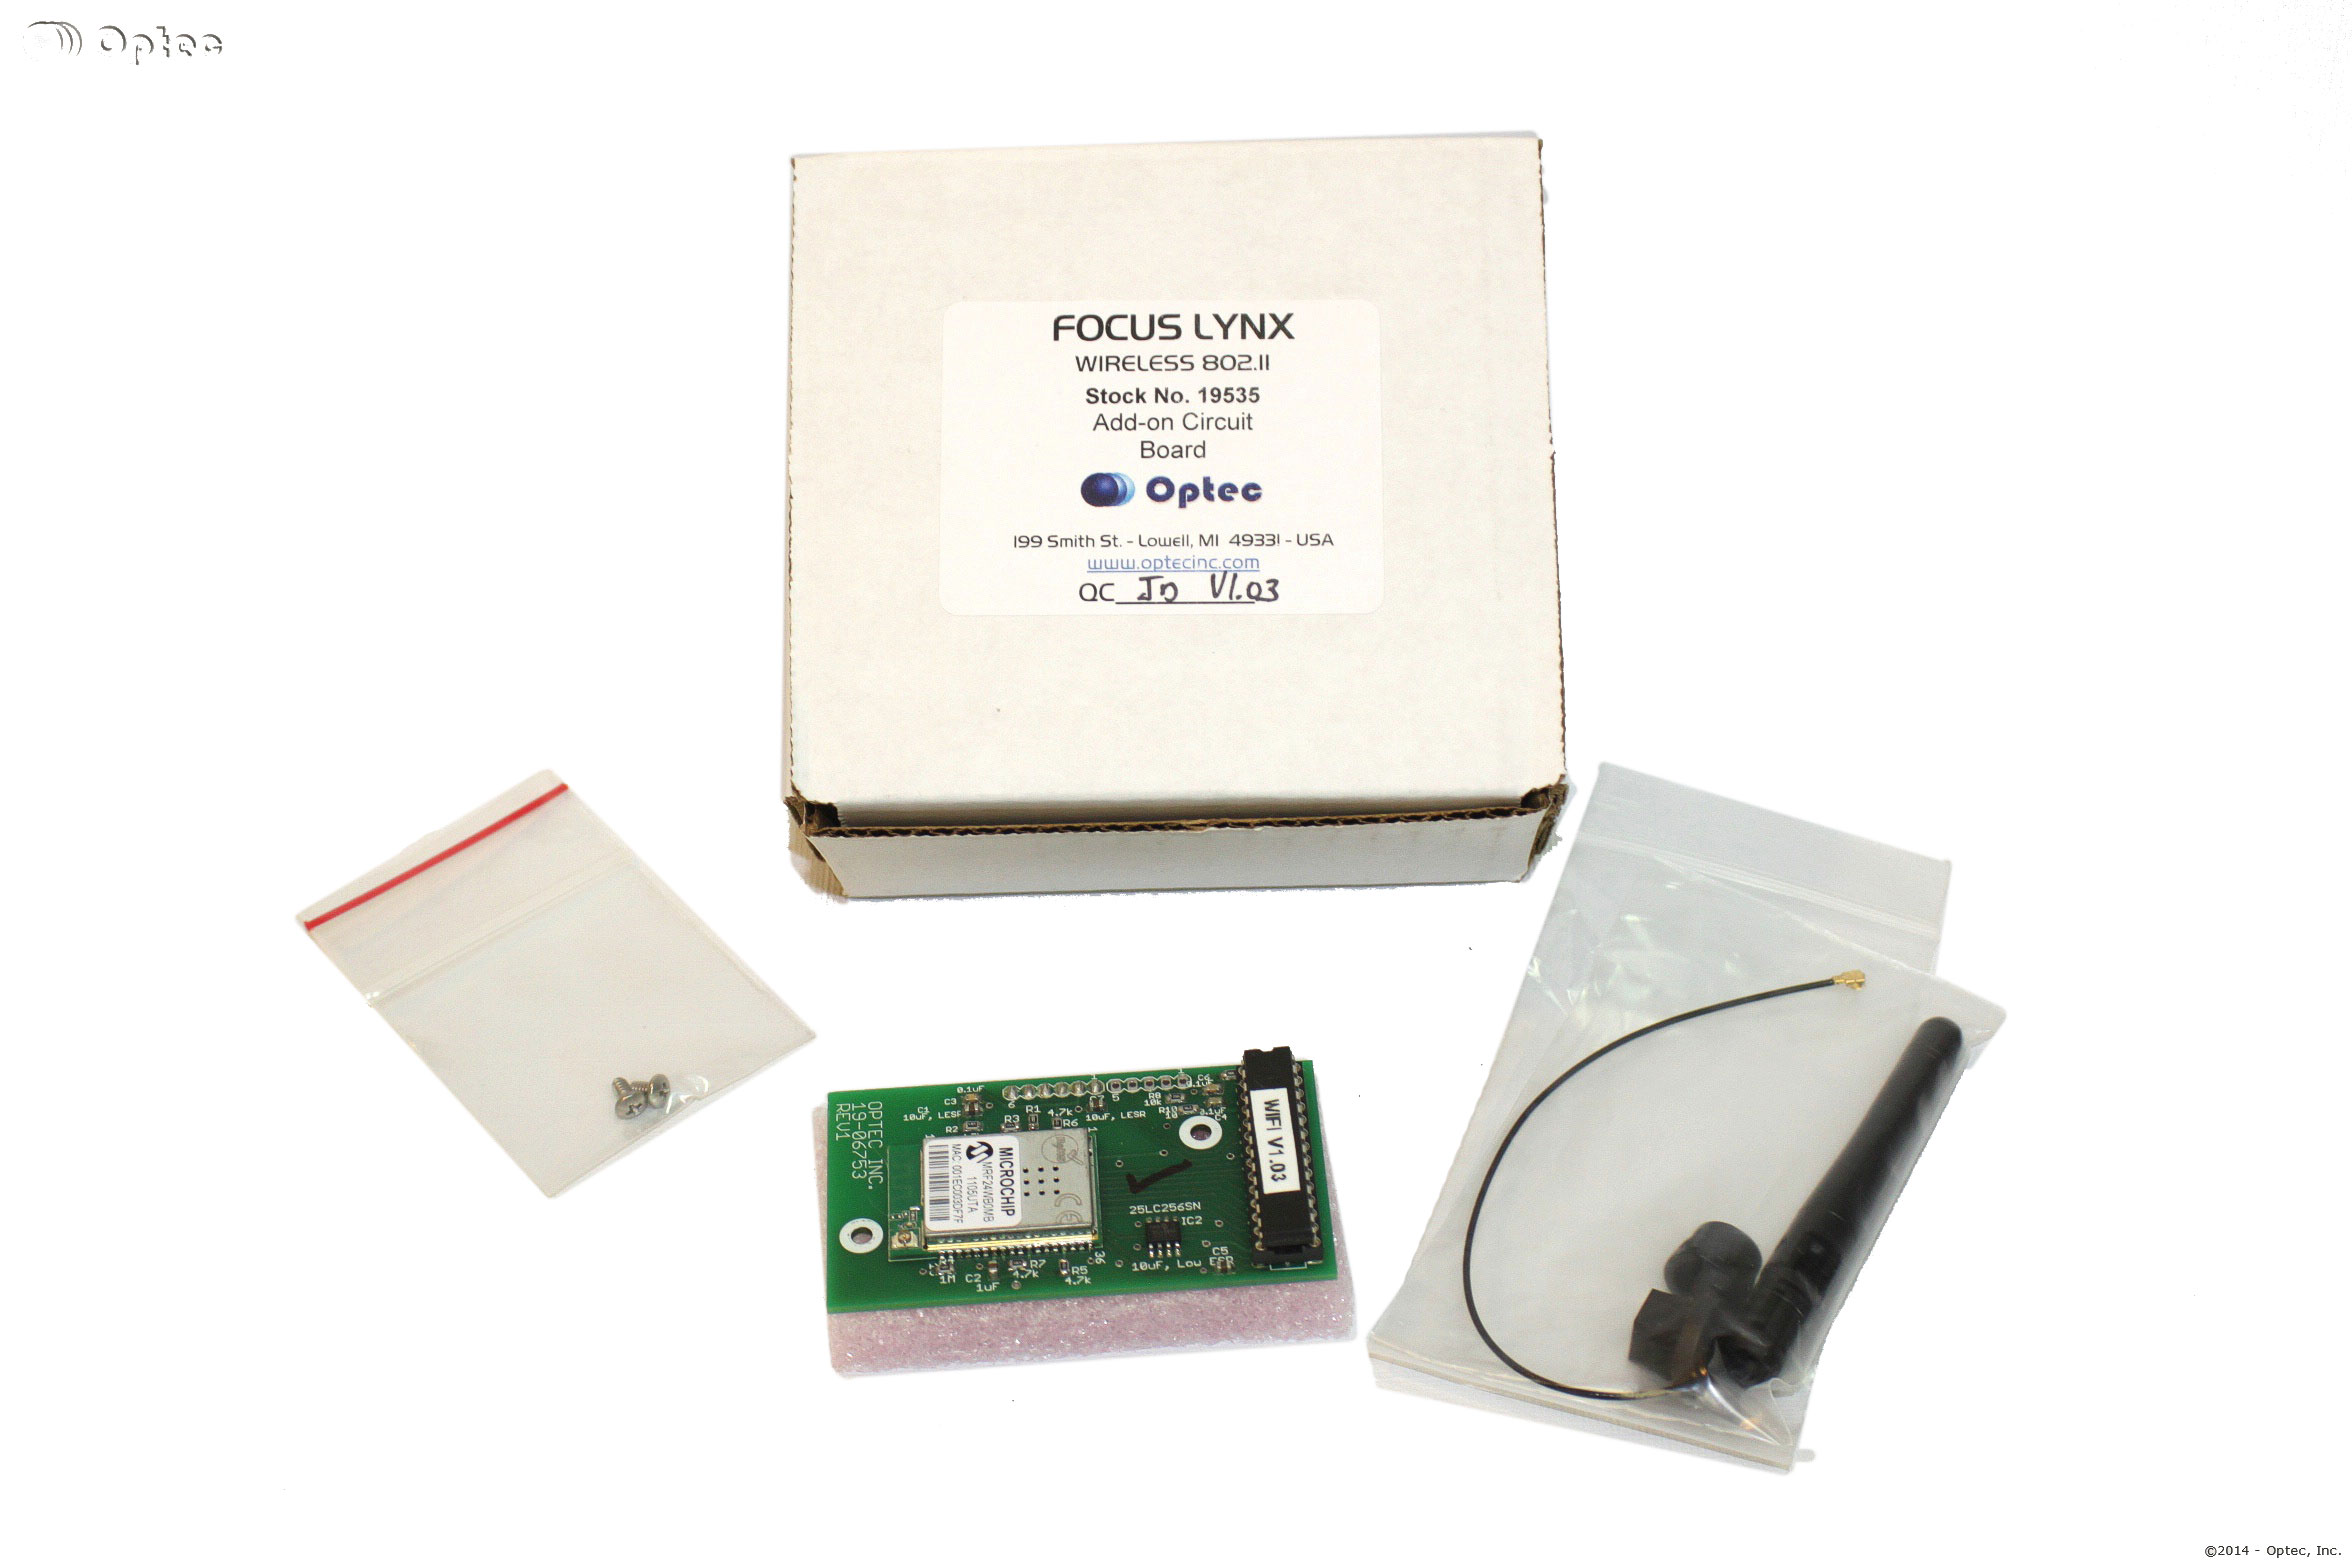
Optec Wireless 802.11b/g add-on circuit board
- Wi-Fi module
Allows wireless connection between control unit and PC, smartphone or tablet PC over Wi-Fi. Appropriate apps for Android and iOS can be downloaded from the manufacturer’s web page.
[br]NEW: Motor Unit for Celestron RASA Astrographs
The RASA motor unit can be used on all Celestron SC telescopes, which are equipped with a 1:10 focus reduction by Feathertouch. Especially for the HyperStar systems, this retrofit is highly recommended, because the focus is much more sensitive and the temperature compensation useful.
The Motorfocuser by OPTEC is available as complete set including the motor unit FT20 and FocusLynx Controller hub, fit for Celestron RASA telescopes. The scope of delivery includes a manual, cable and power supply.
This set is used for remote control of the main mirror focuser system of the CELESTRON RASA/HyperStar. The temperature sensor is mounted ready-to-use inside of the motor housing and lets you compensate the temperature-shift of the focus position. Communication with the control computer is done via Ethernet, RS232 or USB and ASCOM via Software.
More Details
[br]FocusLynx TEC with DirectSync – Retrofit module for TEC 3.5" focuser
The FocusLynx DirectSync TEC system is a retrofit module for the TEC 3.5" Large Focuser and includes the new DirectSync digital motor with built-in temperature sensor.
This motor unit allows both manual and motorized focusing of your TEC telescope. The focuser and motor allow loading with accessories up to a maximum of 12 kg (for example CCD cameras with filter wheel). The motor can be powered via WiFi, Ethernet, USB / Serial e.g. with the software TheSky x, CCDSoft, FocusMax and / or the ASCOM platform.
More Details
[br]Add-on motor for Takahashi FSQ Dual-Speed MEF focusers

Optec Motorfocuser - Takahashi FSQ Dual-Speed
The QuickSync FSQ motor with built-in clutch mechanism and temperature sensor allows both manual and motorized control with a simple twist of the motor housing.
Designed especially for the Takahashi MEF Dual-Speed focusers, the QuickSync FSQ features simple installation and an elegant design. The QuickSync motors are fully compatiblity with the FocusLynx Control Hub making QuickSync the very best choice for motorizing any Takahashi telescope with the dual-speed MEF (Micro-Edge Focuser).
More Details
[br]Focusing units TCF-Lynx in 2"and in 3"
Why an automatic temperature control of the focus position?
Changes in the ambient temperature (falling or rising) cause a shift in the optimum focus position via the optics of the recording telescope. An image, which was optimally focused at the start of a long-term exposure, can ultimately be completely ruined by a temperature change causing defocusing, and valuable observation time is wasted.
The solution is a temperature probe built into the TCF series focusers - and this is a combination of Optec's time tested and proven TCF focuser with the FocusLynx Controller Hub. Thus, the user can record a curve of the temperature-induced focus drift, save and this is automatically retrieved during a slow exposure and the focus drift is automatically compensated.
These focusing units are fully automatic, temperature compensating Crayford focuser, for which many different adaptations to various telescopes are available. The available adaptations can be found on the original Optec website. They are delivered as complete units, external temperature sensors are optional available.
These two focusers are best suited for fixed telescopes on which a DSLR or CCD camera is adapted to the eyepiece. So, for example for remote operated telescope systems. Manual focusing is not possible with these focusing units. For a non-software controlled focusing the Optec hand control is mandatory
More Details
Optec Pyxis Intrument Rotator
De-rotation of the field for long exposure images with alt-azimuth mounted telescope is absolutley necessary.
The Pyxis 3-inch has a full 3 inches of clear aperture and is designed to hold large instrument packages without flexure or wobble. A 6-inch bronze worm gear and stainless worm rotate the center tube with a resolution of 0.01875 degree per step from the stepper motor.
This model is large and heavy and is intended for larger telescopes on observatory caliber mountings. The 2.4-inch thickness warrants telescopes that can accommodate this increase in the back-focus distance. It uses the same telescope mounts and camera side adapters as the TCF-S3. ptec's new 3-inch temperature compensating focuser. Any telescope mount or camera side adapter has to be ordered separately.
More Details
Gemini Focusing Rotator with temperature probe for automatc temperature compensation
Optec engineers have developed a completely new concept for combining telescope focus and camera rotation functions into a single robust, yet compact package. Rather than simply adding a rotator onto the end of a focuser drawtube, Gemini was designed from inception with a rotating drawtube providing superior strength and rigidity for heavy camera payloads. (LINK ZUM PRODUKT).
More Details
Optec Perseus 4 Port Instrument Changer
Optec's 4-port Instrument Selector allows the remote observatory user the ability to remotely select any of four instrument packages attached to their telescope. There are four instrument ports - three 2-inch ports and one 3-inch port available with the Perseus.
The photo shows a top view of the selector with two different CCD cameras, a single channel SSP photometer, and a separate TCF-S focuser and eyepiece.
More Details
All Optec products at a glance:
 >>More information and technical details of the products we are offering in the Optec motorfocuser program can be found on our product pages<<
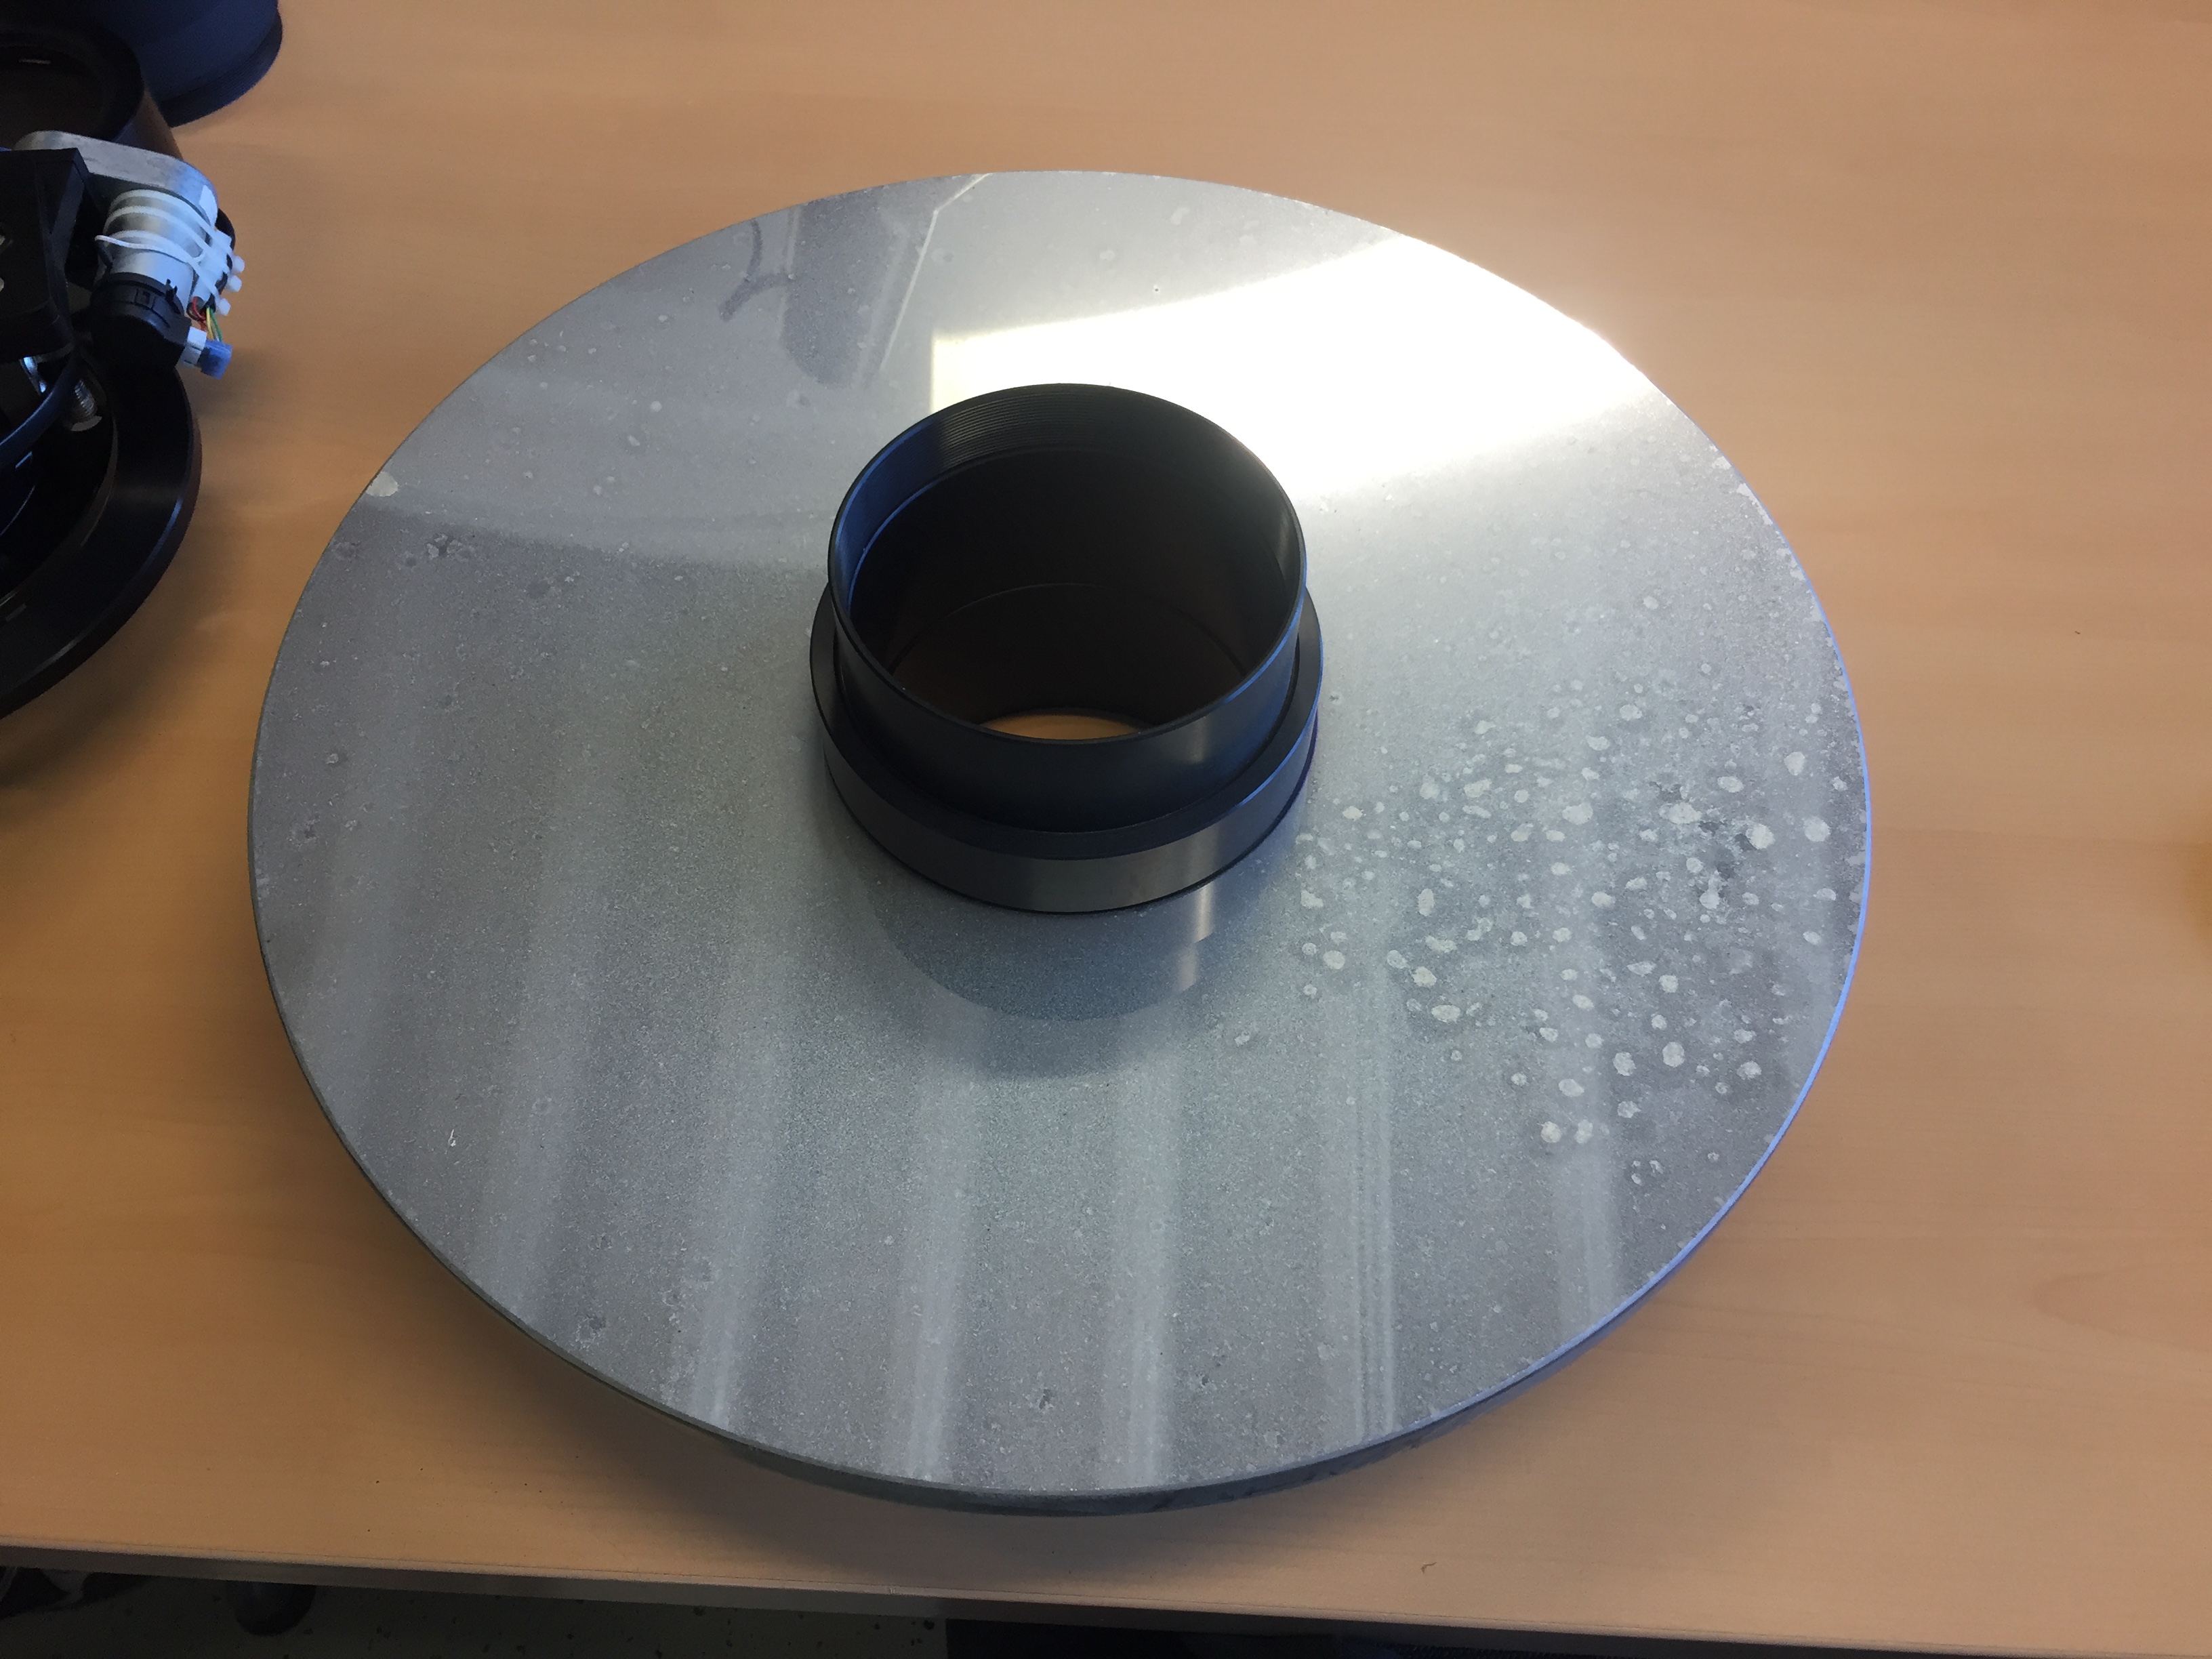
[br]In our Observatory installations, we have contact to customers for many years. This is why we get old telescopes for cleaning from time to time. This particular mirror is from a CDK 17" wich was used in a heavily poluted and salty area. The picture show´s that the mirror lost most of it´s reflectivity.
The fun fact about this is that after the cleaning our customer wondered why all his images where saturated. The reason was simply that the mirror got so much reflectivety back due to the cleaning, that the instrument was twice as fast as it was before.
The cleaning was done with Optical Wonder™ Cleaning Fluid.
To clean such a heavily poluted mirror, we lay it flat on the table and put a layer of one way tissues on the surface. This layer we make wet with Optical Wonder™ Cleaning Fluid and let it wet for some hours, so that all pollution softens up. Then we carefully remove the tissues and blow the pollution off the mirror with dry air. After this, we repeat the procedure again, but now we remove the tissues sideways from the mirror with no pressure. This step is repeated as often as necessary to get mirror free from particels which may scratch it.
Once all the heavy pollution is removed, we do a final cleaning run with Optical wonder and Optical Wonder Cloth to achieve a perfect finish of the surface.
Now, the mirror is good to go back to the tube and do some more years of observation.
Further examples: The cleaning in this example was done with Optical Wonder™ Cleaning Fluid.
The biggest advantage of Celestron SC and EdgeHD optics: Extreme longevity, because the optical surfaces remain protected for a lifetime. Even extreme dirt can be removed without residue within a short time.
To Celestron SC- and EdgeHD Optics (german webpage)