APF-R goes online as official plugin in Adobe Photoshop
Christoph Kaltseis is a Photoshop expert and an experienced astrophotographer. In recent years, he has developed APF-R (Absolute Point of Focus), an innovative image sharpening process in Photoshop that has attracted considerable interest among experts. The Hubble Space Telescope team has been using his method for over 2 years.
Interview with Christoph Kaltseis on Picture Instruments about his experience in astrophotography. Christoph reveals the tricks he uses to get the finest details out of his stunning images: "The secret behind Christoph Kaltseis astro images" on Picture Instruments - News (picture-instruments.com)
Adobe Photoshop has now introduced the easy-to-use APF-R Photoshop CC plugin for Christoph's complex process. The tool sharpens images using APF-R with just a few clicks, even without much prior knowledge. The plugin has already proven many times that it can meet even the high quality standards in astrophotography.
It's not everyday that one could find a new sharpening technique or algorithm that would increase the sharpness of delicate threads of a nebula or dust lanes at the bright centre of a galaxy without significantly increasing noises or over-saturating stars in astronomical images. So when APF-R first came to my attention as a new technique to sharpen images while respecting their angular resolution, it sounded too good to be true! However, after fine tuning it for various different kinds of astronomical images during last couple of years and finding myself using it as part of my post-processing early steps more often than not, it's clear that if applied correctly APF-R could be adjusted to sharpen details in specific or wide range of image frequencies and yet in large part prevent over-saturation of highlights and amplifying noises in the shadows. " Hubble Space Telescope Team
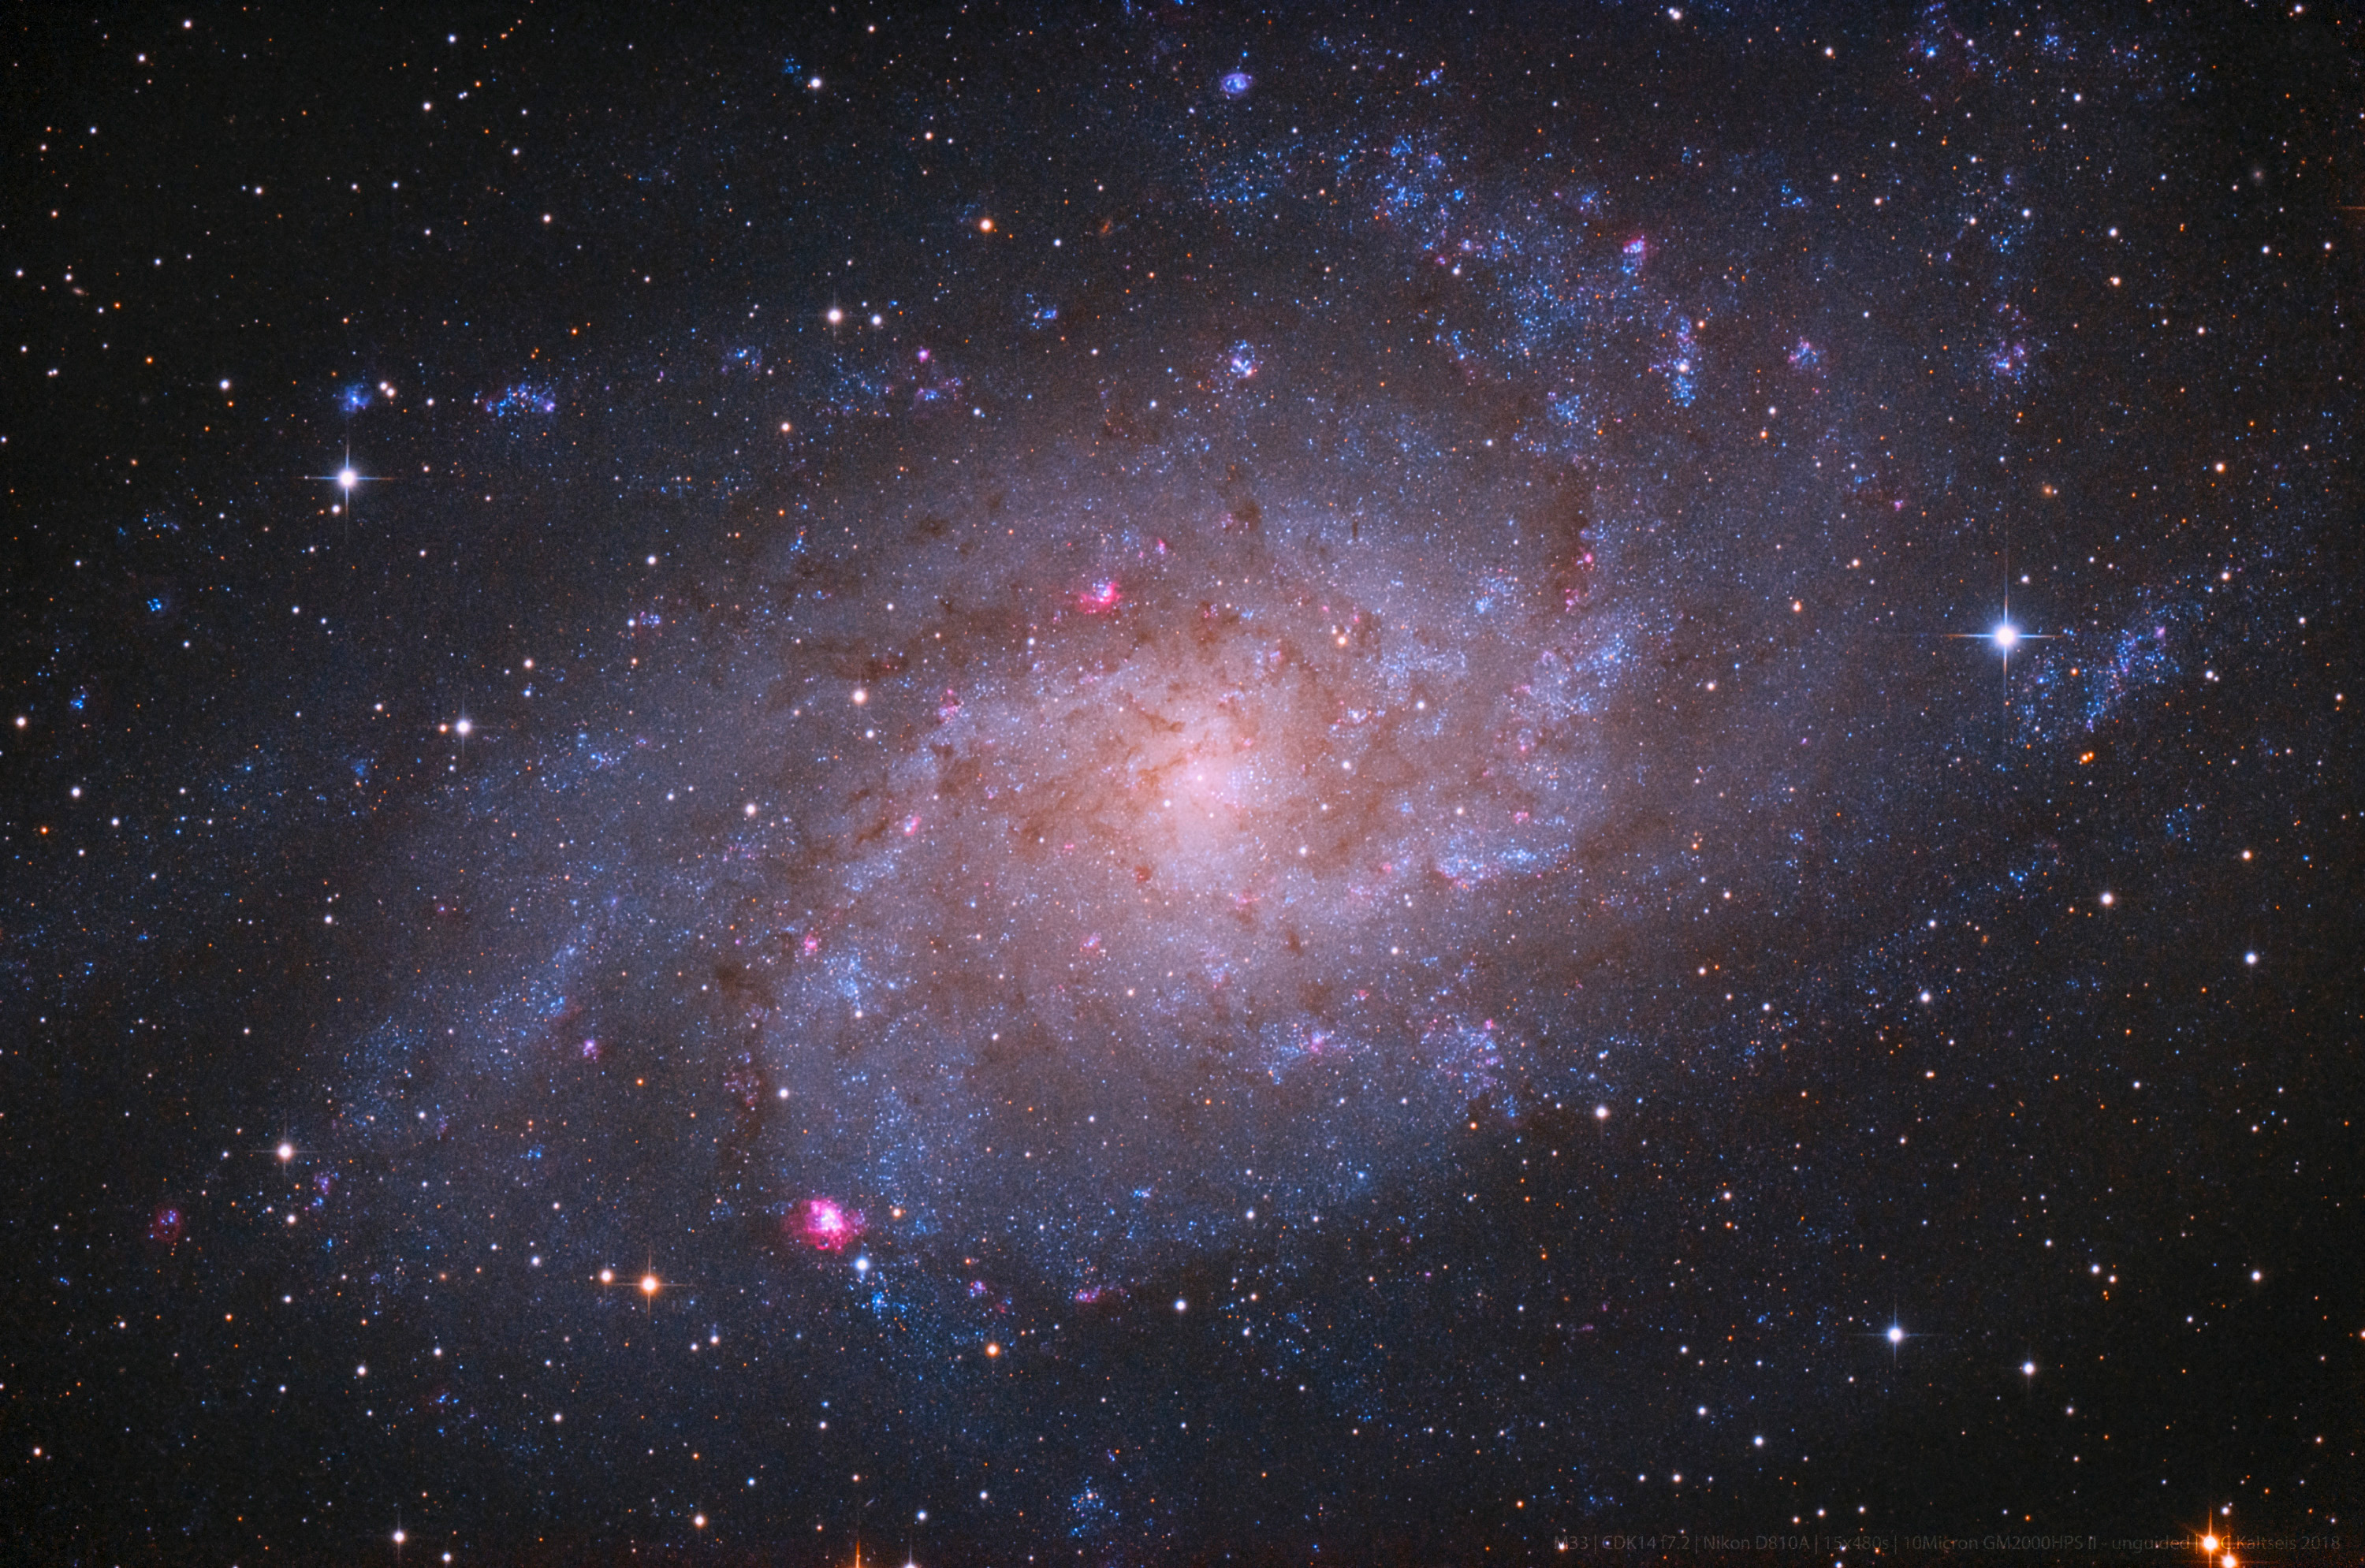
In his career as an astrophotographer, Christoph Kaltseis has also created several APODs (NASA Astronomy Picture of the Day), e.g. the APF-R-processed image of the M33 Galaxy or the Heart of the Orion Nebula (M42).
The image-sharpening process APF-R was designed and implemented by Christoph Kaltseis over the last years. The basis is a simple, but important question: What does a really sharp picture look like? APF-R delineates this step in image processing in a new way.
Numerous processes claim to master this topic, but in all cases, compromises have to be made. Each image is dependent on numerous factors, especially in astrophotography. Christoph Kaltseis' motivation was to get the maximum out of each picture. On the way to an APF-R picture, it is important to make the first step as thorough as possible. This first step is crucial: It determines what details will be visible in the final image.[br]
Please note: The images shown on this page are low-resolution GIF-images, which should only demonstrate the sharpening effects. Original images as .PSD files can be found on www.cedic.at/apfr.
Visual Components:
Sharpness is an impression that is perceived differently by everybody. That is why the result is fine-tuned in the last step of the APF-R process. APF-R cannot be done with in a single, universal command, so we recommend a step-by-step approach. "Why this?" you may ask now. APF-R is a very flexible method that can be matched precisely to any grade of detail. Each step is a procedure conceived by your experience with your own imaging system: if you match it perfectly, the final result will be superior. For daylight images, the first step is also one of the most important ones in the process. Each lens and camera behave differently - so different pictures of the same object do not always deliver the same accuracy and quality. Therefore, APF-R can be precisely tuned to achieve the best sharpening and to retain the natural impression of the image. The result is a three-dimensional effect in the picture.
Requirements:
APF-R plugin only available for Adobe Photoshop CC
Additional APF-R Information
Christoph Kaltseis has developed this processing for the last 5 years, with testing and learning and trying on many different images (all kind of astronomy images and daylight images). APF-R is a Adobe Photoshop processing, and it can be recorded as an Photoshop action for every privat system ( you can record your own action at photoshop!). APF-R is very flexible, so you have to built it for your system, because there are ever so small adjustments that change the final APF-R result entirely.[br]
APF-R Tutorials
Below is the APF-R Intro-Video as well as the first APF-R Tutorial. Further Videos and example images can be found on this website: www.cedic.at/apfr[br]
Amazon screwed up. I've been telling them that for weeks and as the problem gets worse, the person there stopped responding to me. I think they're overwhelmed. They know they screwed up. They're trying to do the best they can. They don't know what they're doing.
Dr. Rick Fienberg – American Astronomical Society (AAS) press secretary
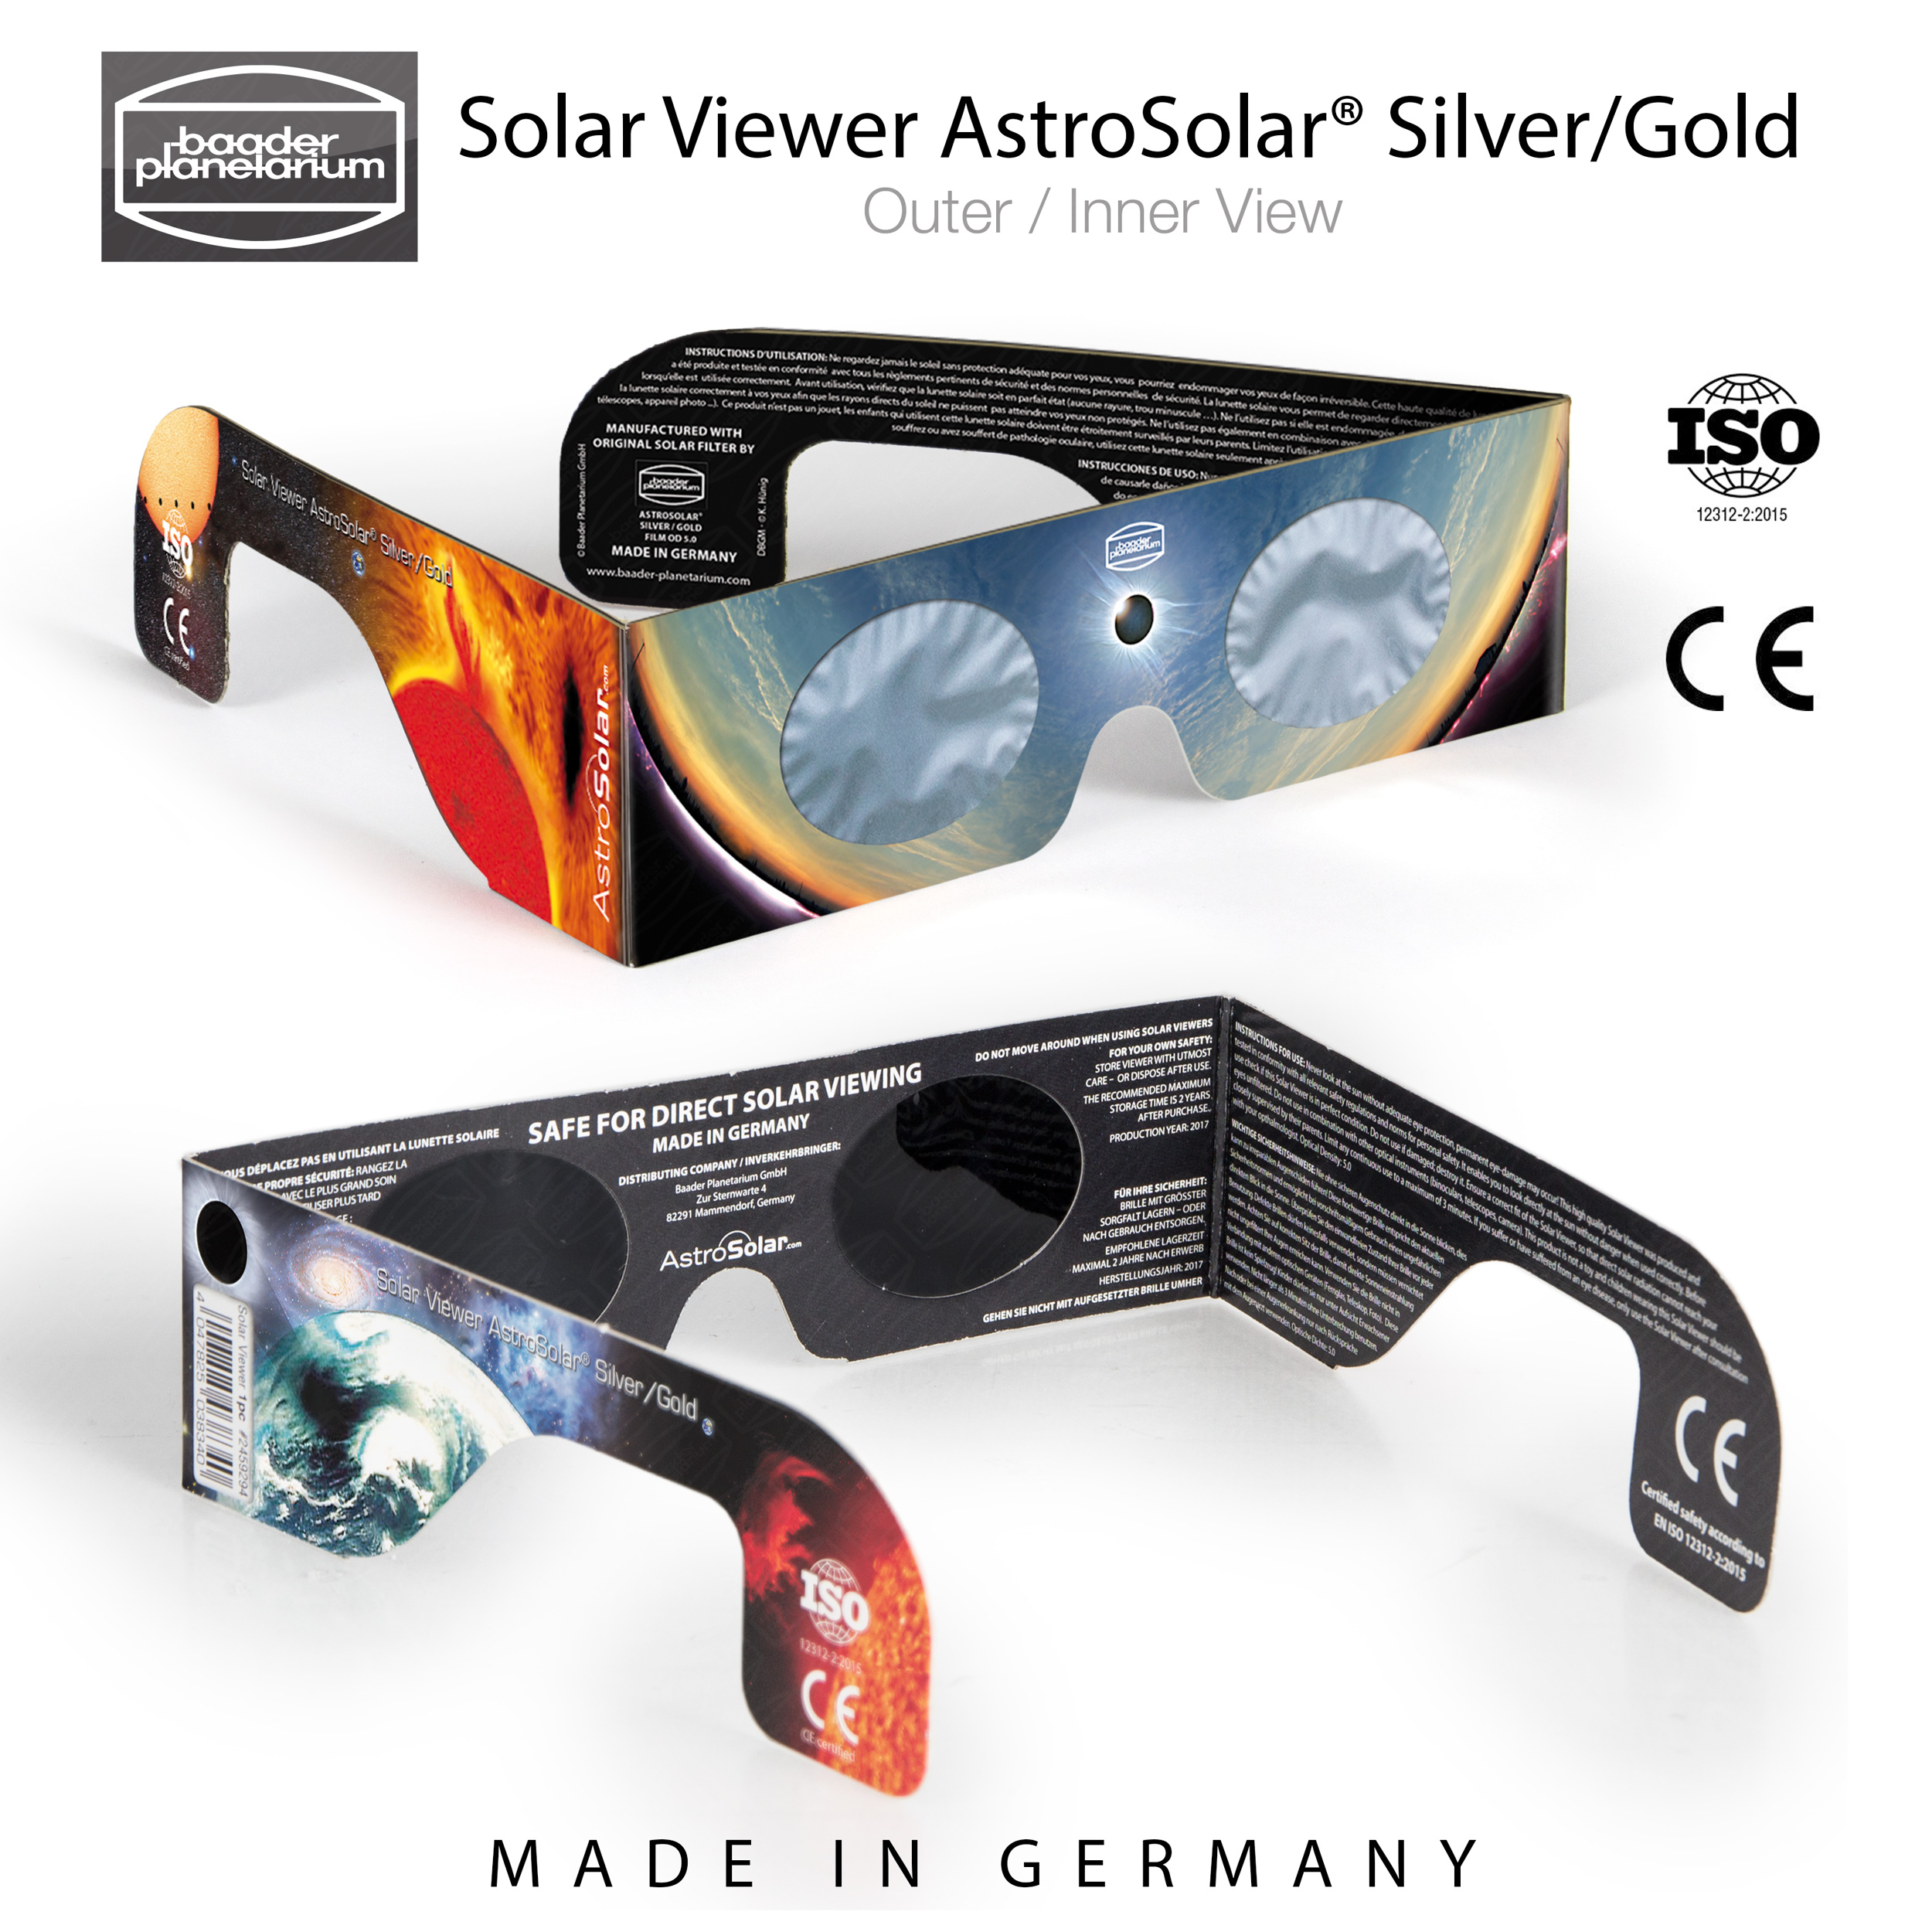
Baader Solar Viewer AstroSolar® Silver/Gold are CE / ISO certified and absolutely safe: they conform to and even exceed the transmission requirements DIN 12312-2:2015 for eye safety
On Sat, Aug 12, Amazon sent an email to all customers who had purchased a wide variety of solar products (glasses or viewing cards) from several of our US-dealers that the product they received may not be safe of certified, and they recommend that customers not use these items. The email states that "Amazon has not received confirmation from the supplier of your order that they sourced the item from a recommended manufacturer." This is completely untrue and incorrect.
Baader Planetarium Solar Viewer AstroSolar® Silver/Gold are indeed ISO 12312-2:2015 certified. Please see our certification as PDF download to the right. We also sent our fully detailed ISO-certification and test results to the AAS and are listed there as an official manufacturer: https://eclipse.aas.org/resources/solar-filters
Please note also the PDF "Invest in the best" (above) with the Specs of our Solar Viewer. If the Solar Viewer you purchased looks as in the pictures (same printing, inside black film, outside silver film) than you can be sure that you purchased a genuine Baader Planetarium product, 100% Made in Germany with 100% Quality control of each viewer. Neither the film nor the mounting or printing is made in China.
Regarding AgenaAstro: We also hereby confirm, that our distributer Alpine Astronomical has supplied our Solar Viewers to Agena Astro Products. They listed the viewers in Amazon and also supplied Amazon with the required ISO-documentation more than two weeks ago. Amazon however neglected this and now AgenaAsto is held responsible for this "overprotective action". Please rest assured that Solar Viewer AstroSolar® Silver/Gold that where purchased on Amazon by the seller agenaastro are legitimate Baader Products and safe to use![br]
Solar Viewer AstroSolar® Silver/Gold are
100% safe for eyes-only solar observation
100% UV-protection,
100% IR-protection,
99,999% reducing sun light intensity
[br]
How can I observe the eclipse in full safety without buying any commercial product?
In case you can't get your hands on viewers or film anymore to observe the solar eclipse (e.g. with your school class / children) there is an alternative to Solar Viewers and Film that can be done with household items only. You can build your own "Camera Obscura" to observe the eclipse phases without looking directly into the sun. Please check out the following PDF: How can i observe the eclipse in full safety without buying any commercial product?
Let us officially state that Baader Planetarium AstroSolar® Safety Film 5.0 is in production for more than 25 years and not one single person in all this time has been injured or had suffered eye problems during - or long after - using AstroSolar® Film for observing the sun with the naked eyes or through any kind of optics up to one meter in clear aperture. Since a new ISO-norm 12312-2:2015 for eye safety came into being, we have no rights to declare the old DIN-norm EN 1836 safe for direct "eyes-only" solar viewing, e.g. with eclipse viewers. However - as long as that old norm was in place, we had collected 25 years of experience though. In all this time we did not receive information about any single case of eye irritation or eye damage while approx 20 Million people each used one Baader solar eclipse viewer equipped with a single layer of AstroSolar Silver film to directly observe the sun.
We do supply AstroSolar® to two sources in the U.S. and from there AstroSolar® is being offered at Amazon and multiple dealers. As long as you purchase the original size of Baader ECO-Film (EAN# 2459286) or Baader A4 Film (EAN#2459278 ) or Baader 100x50 cm film (EAN#2459282 ) you are sure to receive a genuine Baader product. And we wholeheartedly recommend all makes of readymade solar filters in cell mounts for most telescope sizes - as long as they are being produced in Germany or inside the USA (such as Kendrick or our Baader cell mounted filters ASTF/ASSF/ASBF).
In 2015 the new ISO-norm 12312-2:2015 had been installed for eclipse viewers only, which requires a tiny fraction of higher optical density in the UV as added safety measure for meeting possible law problems in the U.S. For this reason AstroSolar® Film would still remain the only diffraction limited film for using in front of any optical device but must not be recommended anymore for producing eclipse viewers without adding reduction of UV-transmission.
At this point, please let us state that there IS NO STANDARD for for any type of solar filter except eclipse glasses and other solar viewers meant to be used for eyes-only direct observation of the Sun. That’s what the ISO 12312-2:2015 standard applies to — nothing else. How do we know that certain aperture solar filters are safe for use with telescopes, binoculars, and camera lenses? Because they come from reputable manufacturers whose products have been tested by people with access to the appropriate equipment — such as optometrist and eclipse chaser Ralph Chou of the University of Waterloo — and found to be safe, and because they have been used in the field by thousands of astronomers without any problems for years.
AstroSolar® is the single highest-quality material in the world for producing front objective filters for Telescopes, SpottingScopes, Binoculars and Cameras - but the film alone must not be advertized anymore for production of eclipse viewers - unless you would combine it with an added layer of dark film - or use it together with dark sunglasses which are blocking the UV anyhow. But even in this case you would not create a product that is ISO-compatible because this very product of yours might be perfectly safe - but it had not been officially certified to be so. Talking straight - your homemade eclipse viewers would not become ISO-compliant anyway, because it is not enough to just use ISO-certified film - the finished viewer would need to be ISO-certified as a whole, in order to be completely lawful and to not present any risk - to the seller. Any selfmade paper-film-holder that might be blown away or that might not cover the face well enough would become "risky business" - with hysteria about solar eclipse eye safety running to a peak within these very days. But if you are not selling your DIY-product but are proudly using it for yourself and with your family - were is the judge that will ask about the certification of your private DIY-activity?
For our own new and ISO-compliant solar eclipse viewers we had combined AstroSolar® Silver film with a special made dark film that has the same properties as a very dark pair of sunglasses - completely blocking the part of the spectrum below 400 nm. And this combination has been ISO-certified - which is very expensive and time consuming. The results of this certification process is registered at the AAS as stated above.
We do recommend AstroSolar® Safety Film as single sheet without any extra layers for making solar objective filters for astronomical/terrestrial optics with all care taken. This is lawful and does retain the value of the film. If used for eclipse viewers the true optical quality grade of AstroSolar® would be wasted somehow. AstroSolar® film has the same properties as a precision polished planeparallel piece of optical glass and hence is good for 250x magnification and more, which is much better than any other solar film or "economy-priced" glass filter on the planet.
August 14th, 2017 Baader Planetarium GmbH
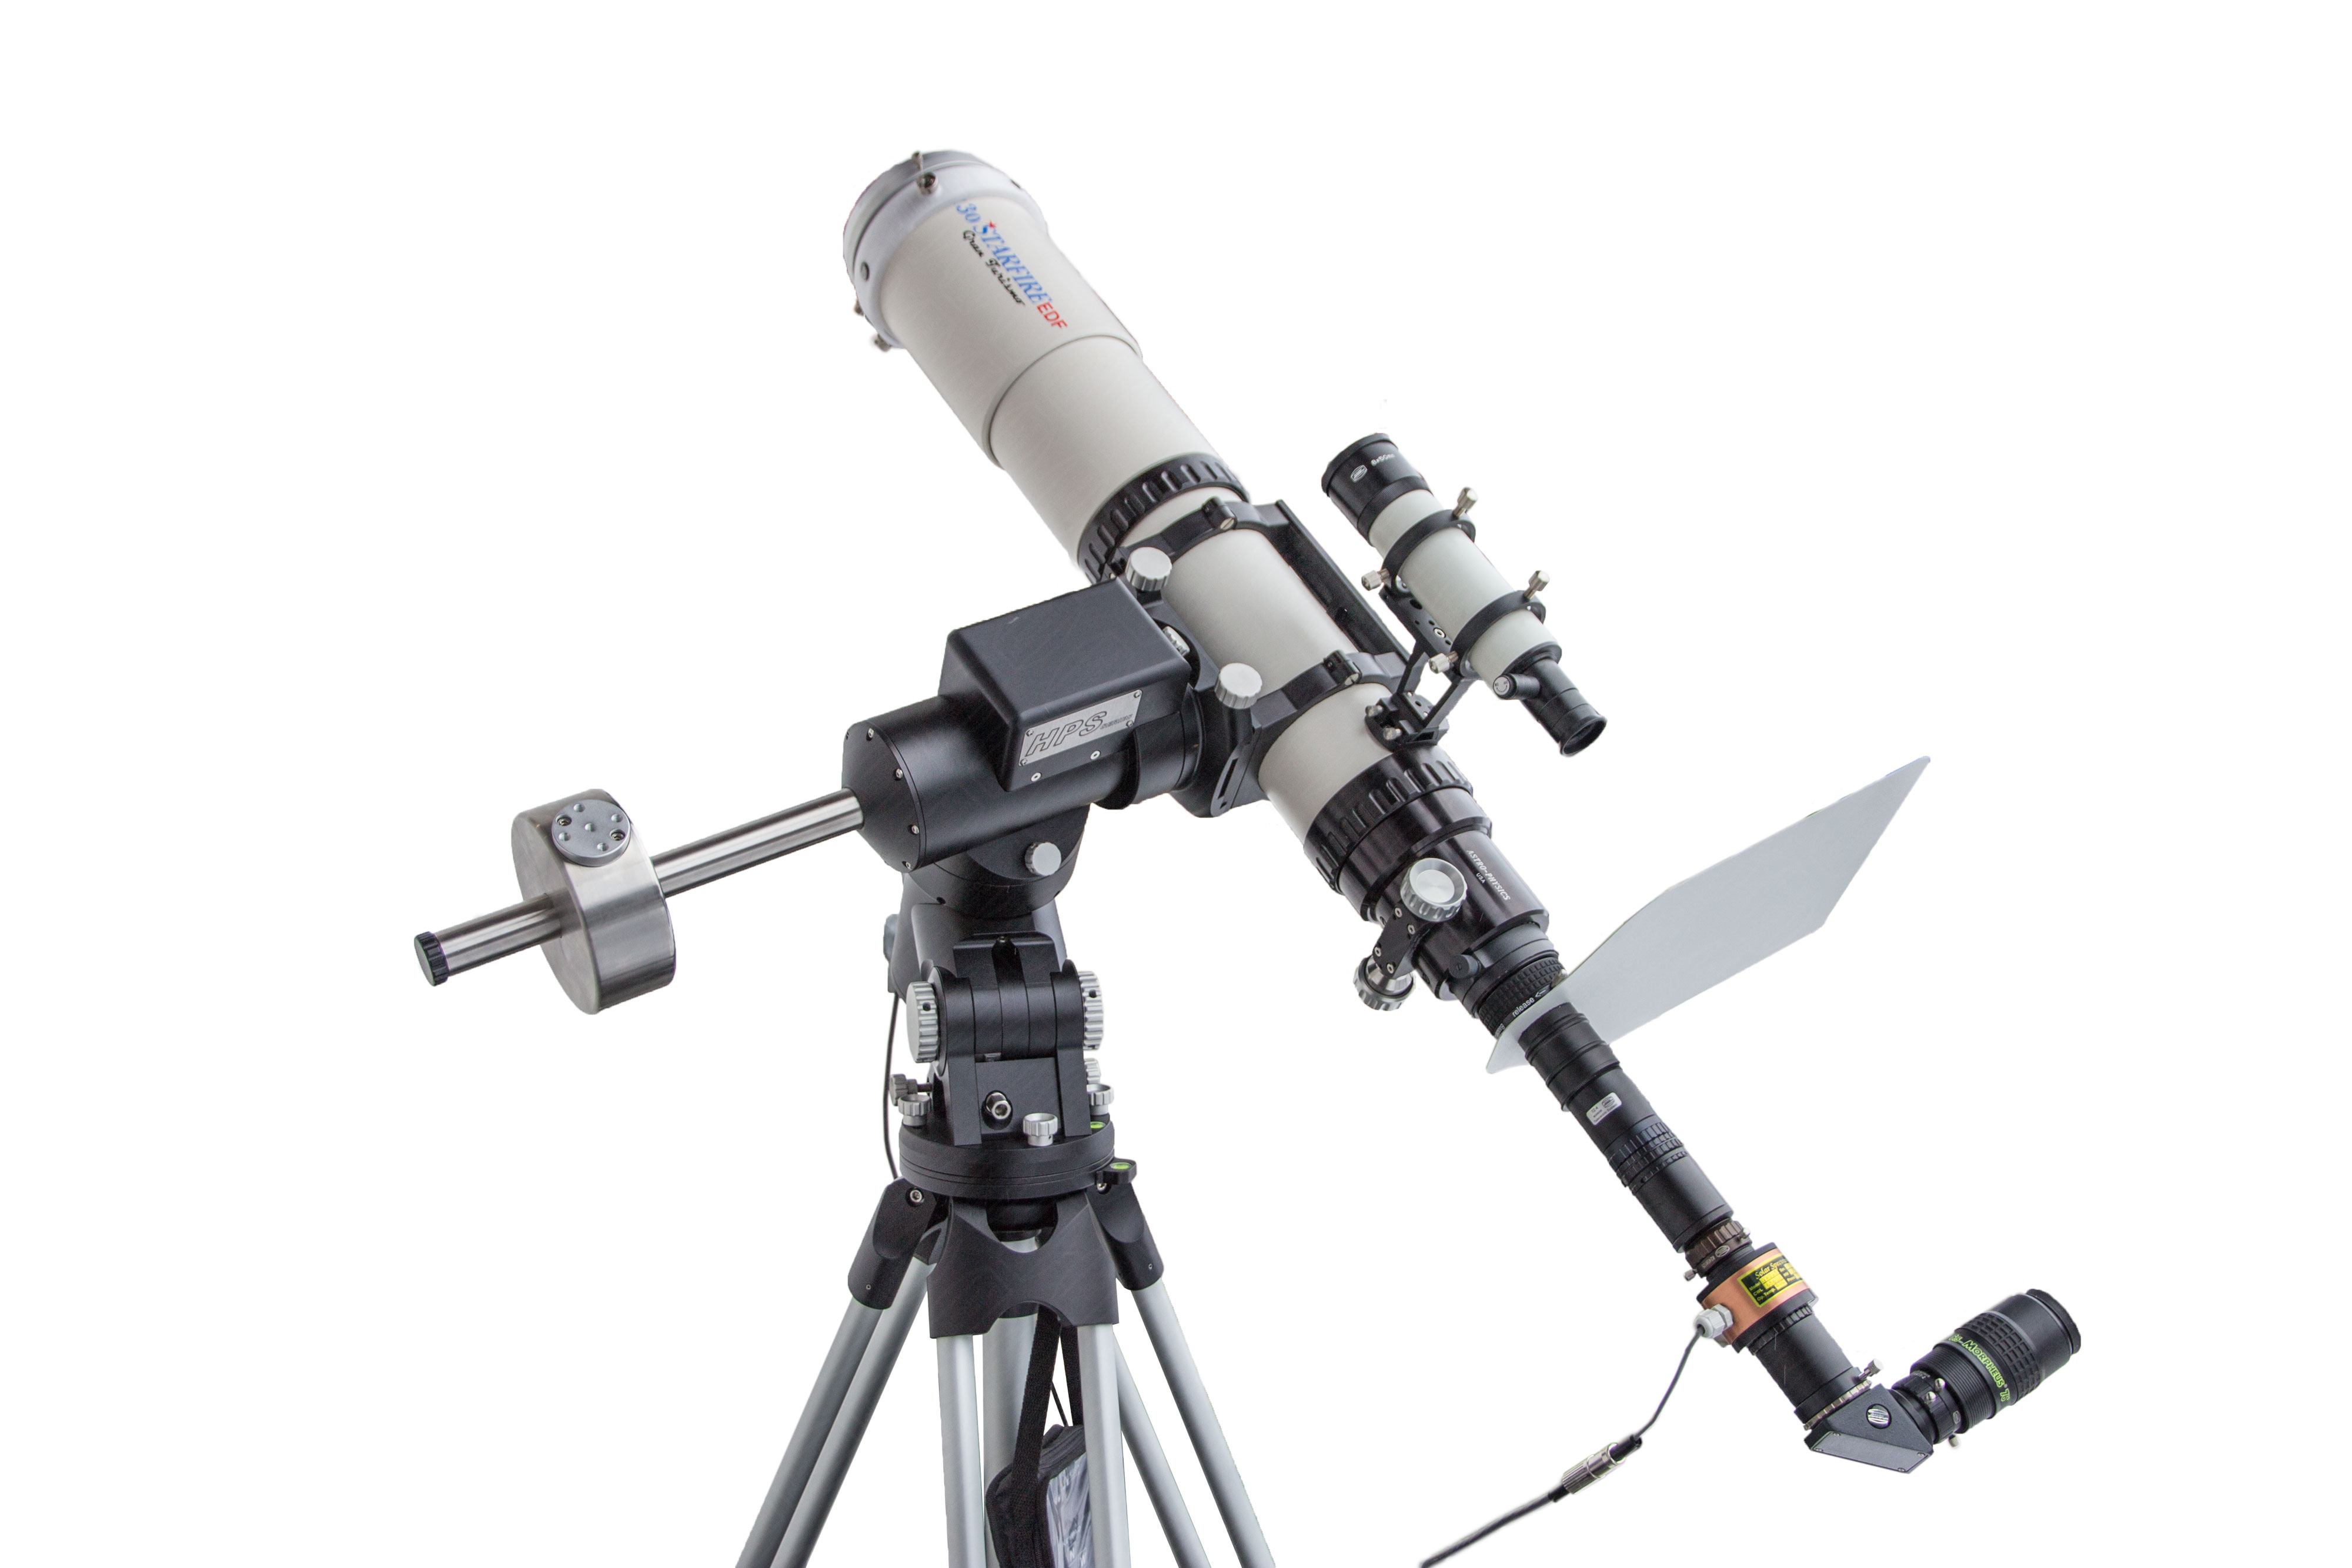
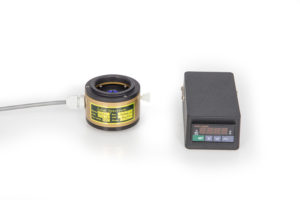
A competely equipped M68 H-alpha Telescope - with all recommended accessories
Our sun is a fascinating target even when the solar activity is low - given that the telescope aperture can be increased sufficiently. When equipped with a heated SolarSpectrum H-alpha filter, telescopes from 80mm aperture to 280 mm aperture will show incredibly faint, rapidly changing structures. A SolarSpectrum filter with matching D-ERF-filter and telecentric beam accessories will turn almost every telescope into a highest resolution H-α-telescope. These heated H-alpha filters are manufactured for observatories and ambitious amateurs who want to utilize the aperture and resolution of their existing large telescopes for detailed imaging and monitoring faintest solar features, instead of just taking a quick look at our closest star with a comparably small objective aperture.
SolarSpectrum filters have no central obstruction and the whole H-alpha stack of optical elements inside is precision heated with a autocorrecting thermo-controller. There is no need for frequent manual or visual calibration or readjustment of the H-alpha line during the course of a day. Hence SolarSpectrum filters are the brand of choice for long term solar observation, time-lapse photography or public observation - were a large crowd of people must be served quickly without constant realigning of the H-alpha image.
H-alpha Telescope with T-2 accessories and Solar Spectrum Sundancer Filter
The thermal calibration range is wide enough to shift the observed center wavelength – to observe in the red or blue wing of the H-alpha-line. SolarSpectrum filters are for those who prefer quality over price. They are available in different HBWs (band-widths). This influences solar surface contrast as shown in the photographs to the right.
Solar Spectrum Research-Grade filters are selected to deliver a very homogenous image across the complete field of view. The new series of SunDancer filters in addition allow for manual fine tuning to widen H-alpha wing observation.
Be warned: this intriguing combo of fast-changing protuberances, filaments, flares and surges rising up from the sun´s surface can cause you to become addicted to solar-observing!
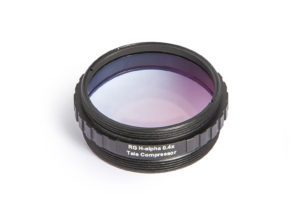
The RG 0.4x Telecompressor is with 46mm clear aperture perfectly suitable amongst others for RG46 Research Grade Solar Spectrum H-alpha Filters
74mm focal length, optimized for videography and for showing the whole sun. Ø 16 mm corrected image field
gets mounted eyepiece-sided directly onto the SolarSpectrum filter and reduces the previously by the telecentric system extended focal length again by a factor of 0.4
2" male threads on both sides, fitting Universal Flange Adapter #2958240 (included with SolarSpectrum H-alpha filters
Telecompressor is used to adjust the focal length to possibly poor seeing conditions and / or enlarging the field for photographic- or webcam applications
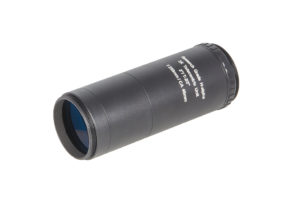
Solar Spectrum Sundancer Filter Series 1 & 1,5: Standard-Filter with a clear aperture of 19mm and 25mm respectively. Shows the full sun disc up to effective focal lengths of approx. 2200mm
Different Halfbandwidths available – please choose "Version"
TZ-optical systems are essential for undeteriorated performance of heated SolarSpectrum filters:
Please note that for H-alpha observations below 1 Ang halfbandwidth (FWHM) a telecentric lens system is absolutely mandatory, in order to achieve the recommended focal ratio of f/30 to (preferably) f/40! Because only with a telecentric approach you can create a perfectly parallel optical path which is essential for the unrestricted function of such a complicated etalon.
A TZ-lens-system is an ESSENTIAL prerequisite. One could also optically - or by means of a Barlow lens - bring a telescope to a focal ratio of f/30, but this does not mean at all that a parallel optical path is created. And mind you, a still slightly conical optical path with f/30 sent into an etalon with 0.5 Ang FWHM would only provide the contrast as if the filter had a FWHM of 0.7 Ang or much worse.
It doesn't have to be a TZ-4. The new{{block type="core/template" template="wordpress/product/shortcode-global.phtml" shortcode="[product sku=\"2459257\"]"}} is much better in terms of optical calculation than the 20 year older TZ-4. So it makes sense for the user to start with a TZ-3 RG and rather stop down the telescope aperture to get to f/30. This will bring out the real contrast of the chosen SolarSpectrum-filter much better than with a poorly matched system where, for example, the older TZ-4 has a smaller clear aperture than the Solar Spectrum-Etalon would require. In the long run, a newly calculated, large RG TZ-4 is in preparation - it is worth to wait for it and to get familiar with H-alpha observation with the TZ-3 first. In the end one will certainly need both systems (RG-TZ-3 and RG-TZ-4) and adjust the telescope aperture individually - as the system would require to enable an f/ratio of f/30 at minimum or f/40 as optimum.
Only AFTER the H-alpha etalon you can extend the field size by reducing the f-ratio with adding the new ResearchGrade telecompressor 0.4 into the optical train.
Basically - a Barlow lens has no place in an H-alpha system!
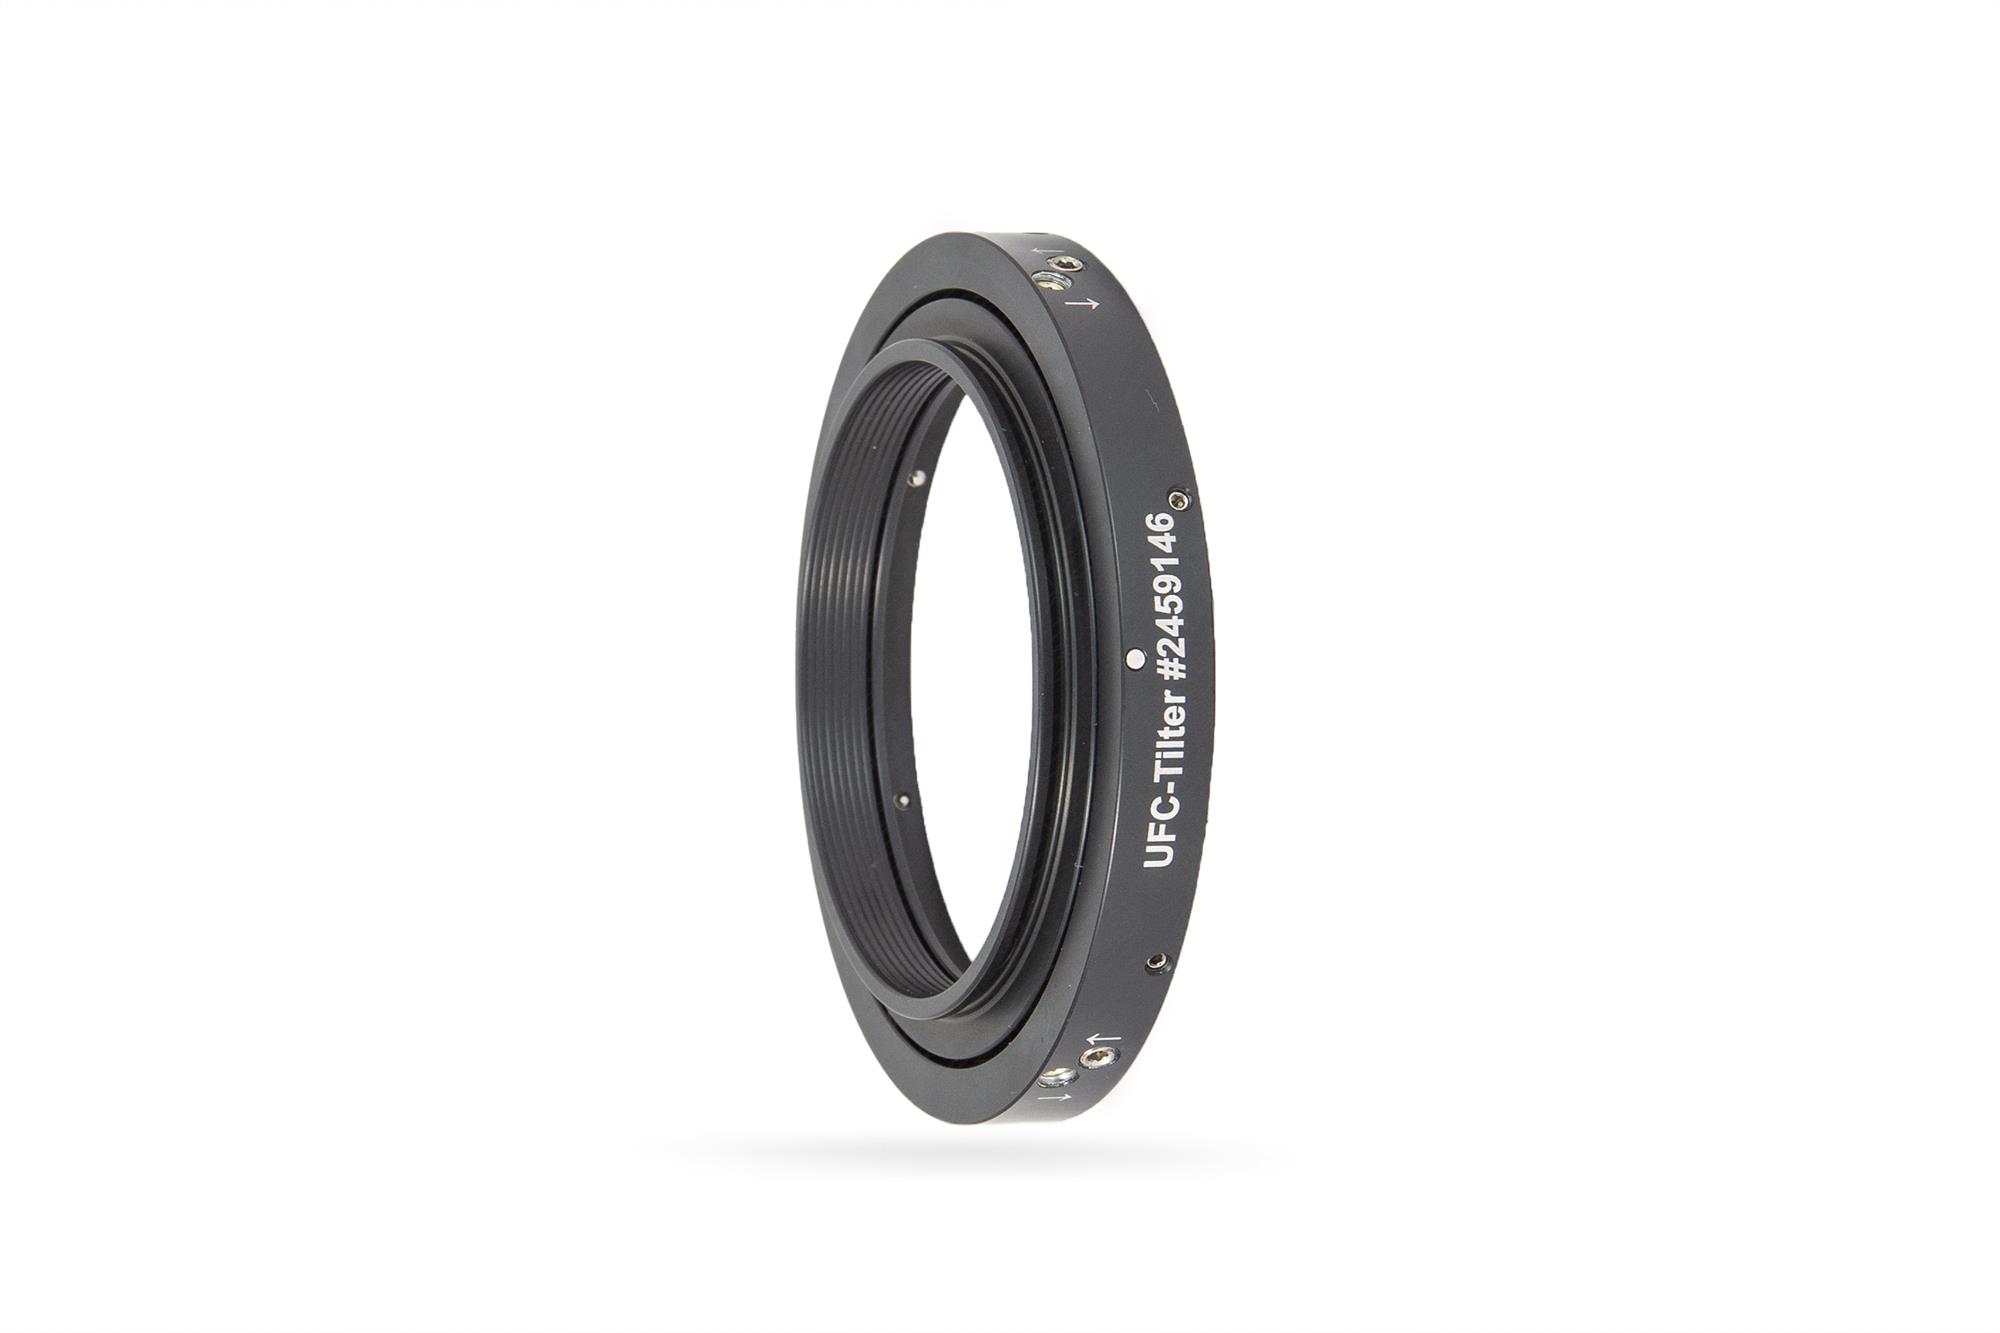
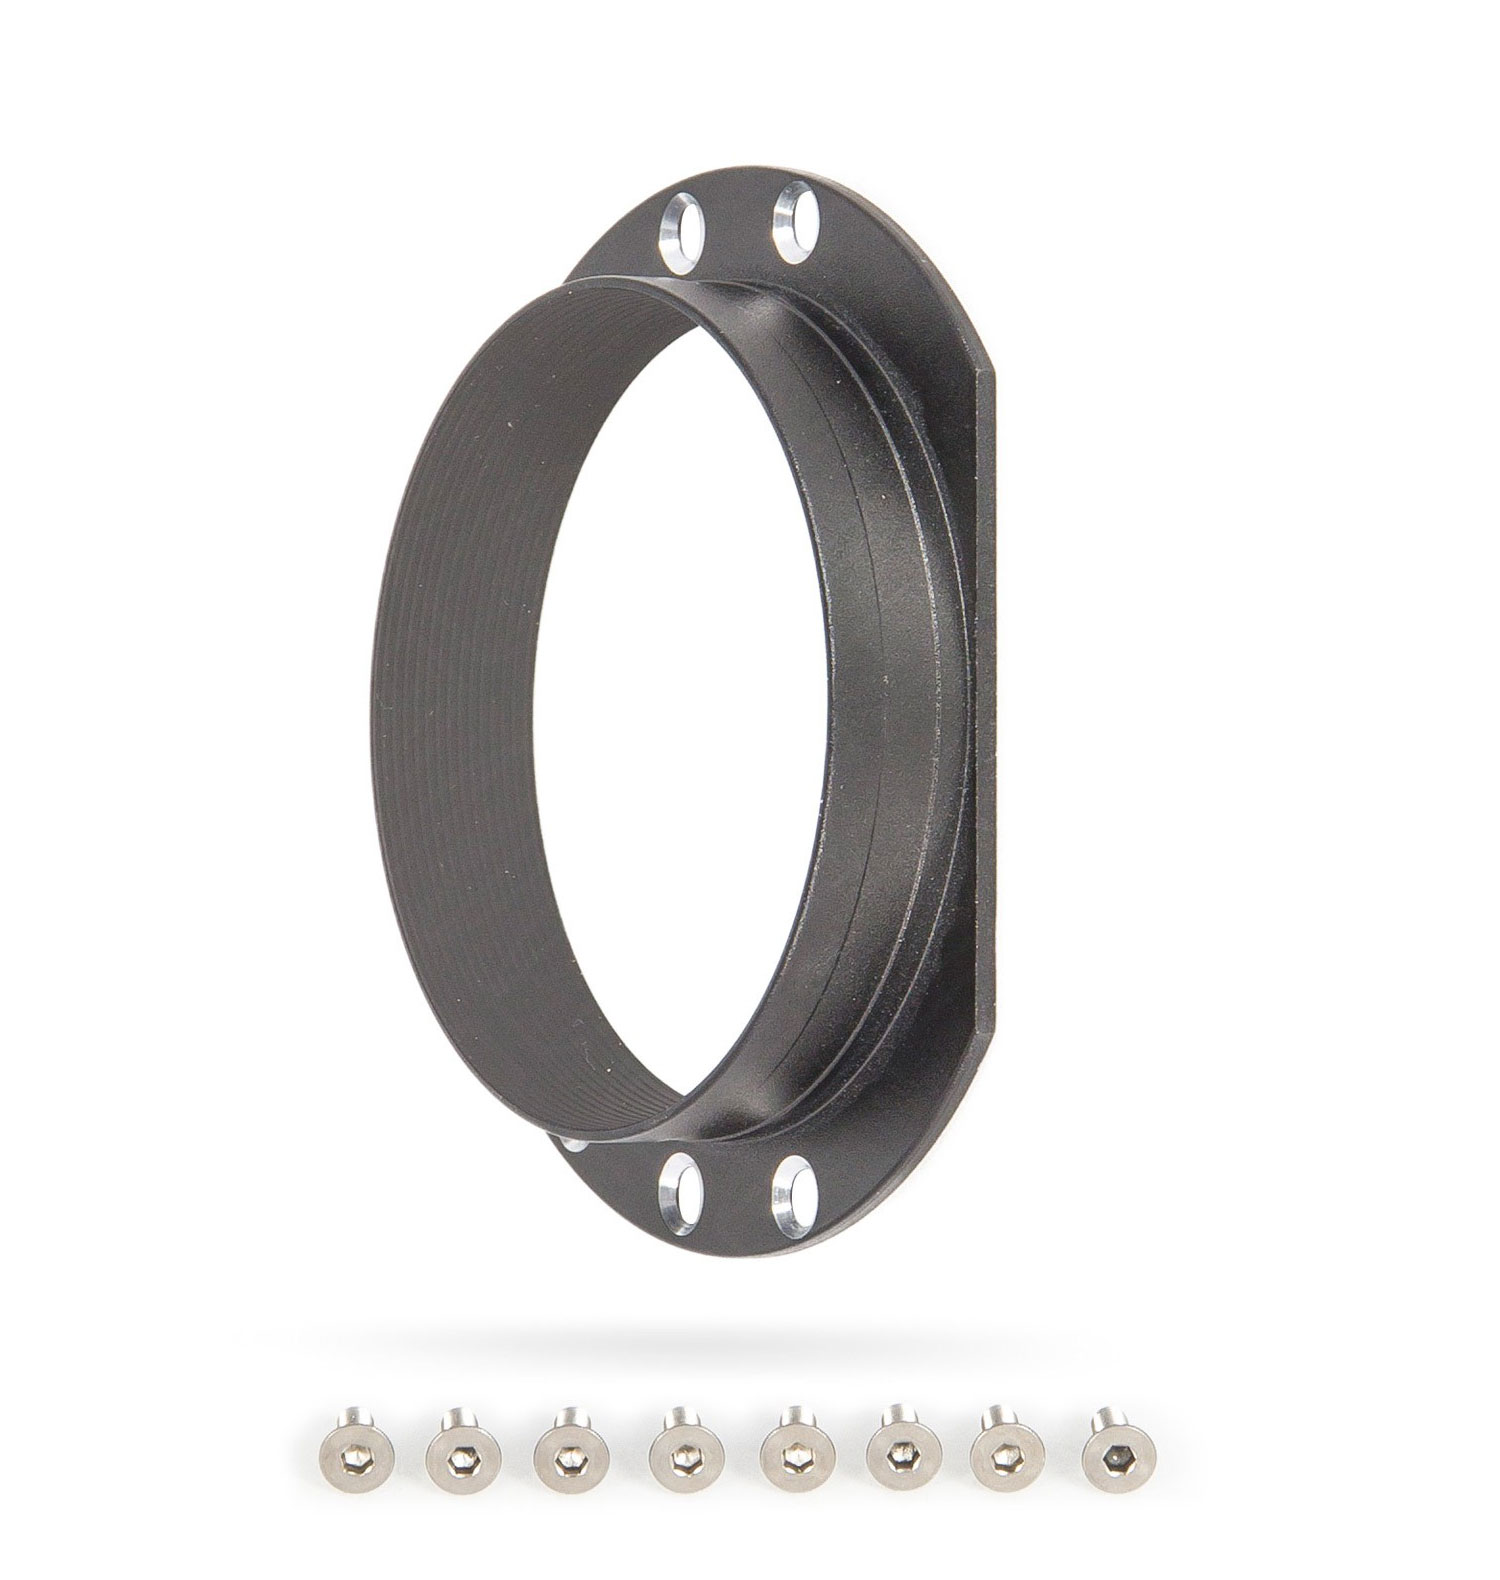
Baader UFC Tilter
[br]
[br]
[product sku="2459146"]
The effects of image tilt can ruin an otherwise great astrophoto. Image tilt (or image plane tilt) happens in imaging when an area towards the edge of the field exhibits out-of-focus or imperfect star images and is caused by the image sensor not being pefectly perpendicular to the light path. Focuser skewness (or "droop"), flattener/corrector lenses, extension adaptors, camera angle adjusters as well as inherent camera sensor tilt in the camera body itself are all causes of image field tilt. Being able to correct for this image plane tilt is important and essential to get perfect focused sharp star images across the field of view.
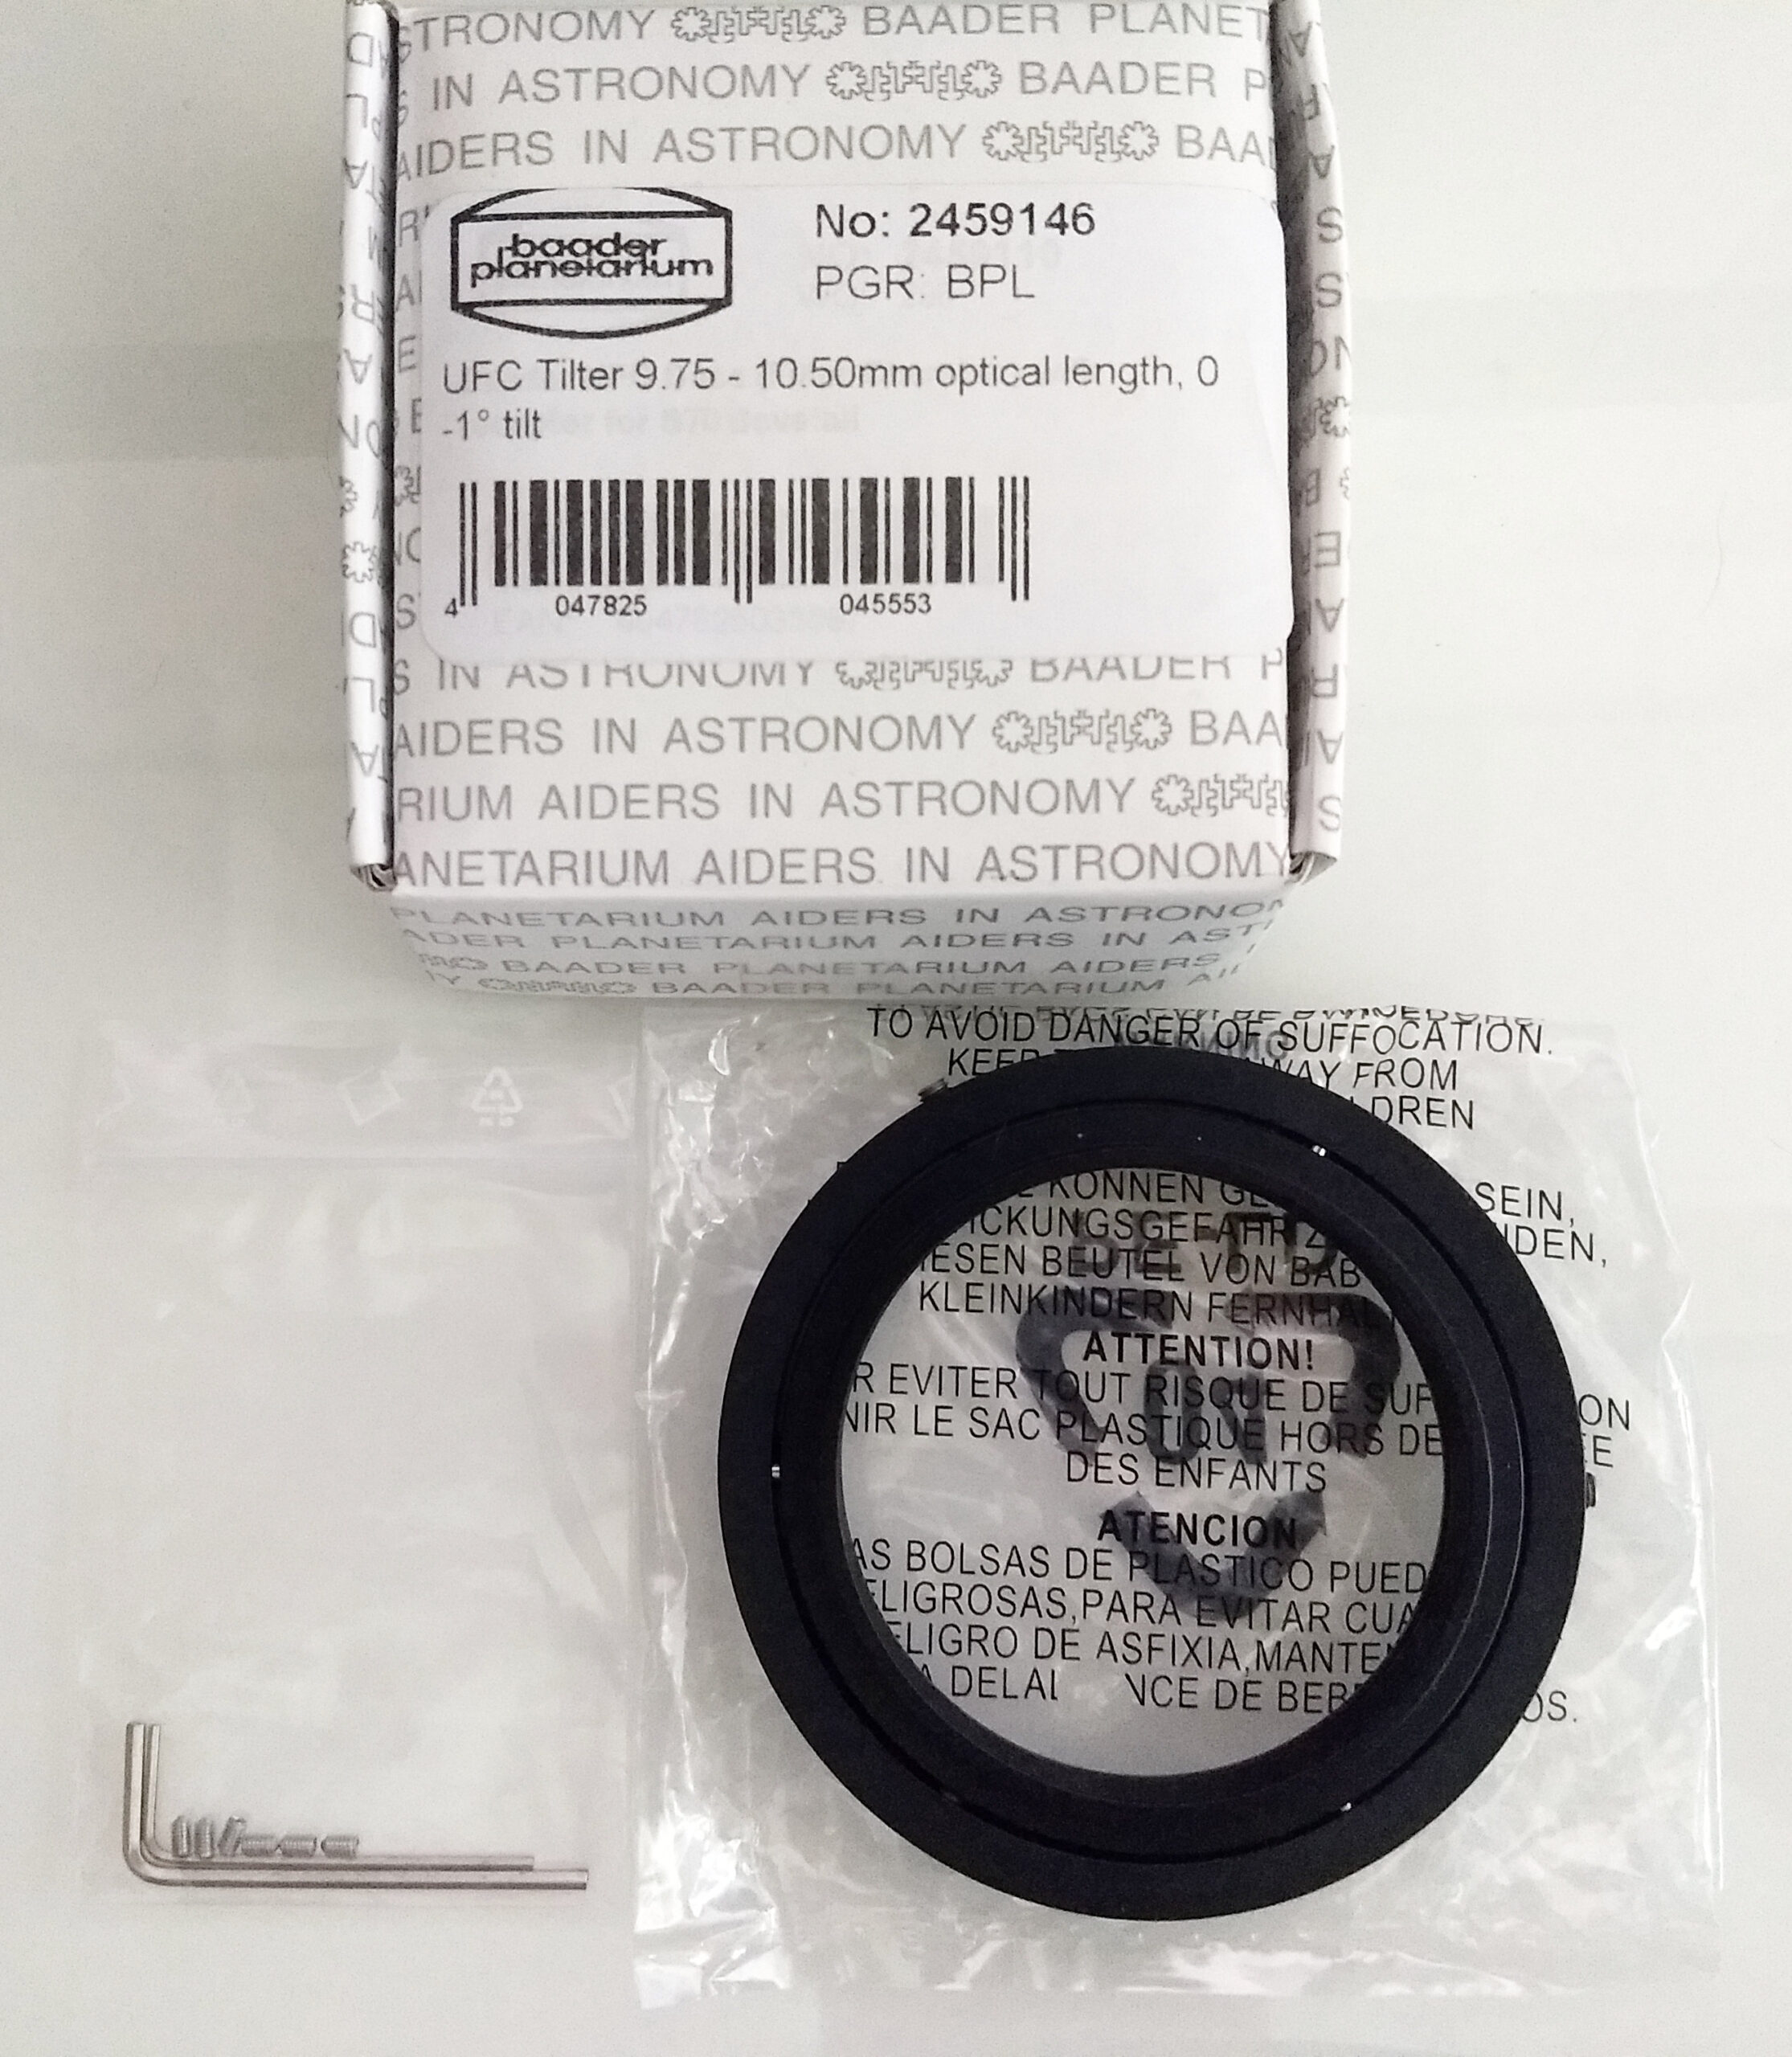
UFC Tilter scope of supply
For those that do astroimaging with our Universal Filter Changer (UFC) we are pleased to annnounce a NEW accessory to help compensate for image plane tilt - the [product sku="2459146"]. This is a telescope-side UFC S70 accessory that is compatible with the entire UFC system and can be used with many refractor and Celestron 11" and 36cm RASA imaging setups. The unit allows an adjustment tilt shift of the UFC Base (and an attached camera) of up to 1° to compensate for misalignments in the image field. The Tilter is only 9.75-10.50 mm in optical length depending on amount of tilt adjustment made.
The UFC Tilter comes in a Baader Planetarium labelled box with its name, code and description clearly displayed. Inside the box there is the UFC Tilter and a small bag containing six Hex-screws and two Allen keys. The small hex-screws are used to secure any of the UFC S70 telescope-side adapters in place using the smaller of the two Allen keys. The larger Allen-key is used to attach to or remove UFC camera-side adapters from [product sku="2459110" template="wordpress/shortcode/productlink.phtml"] if needed.
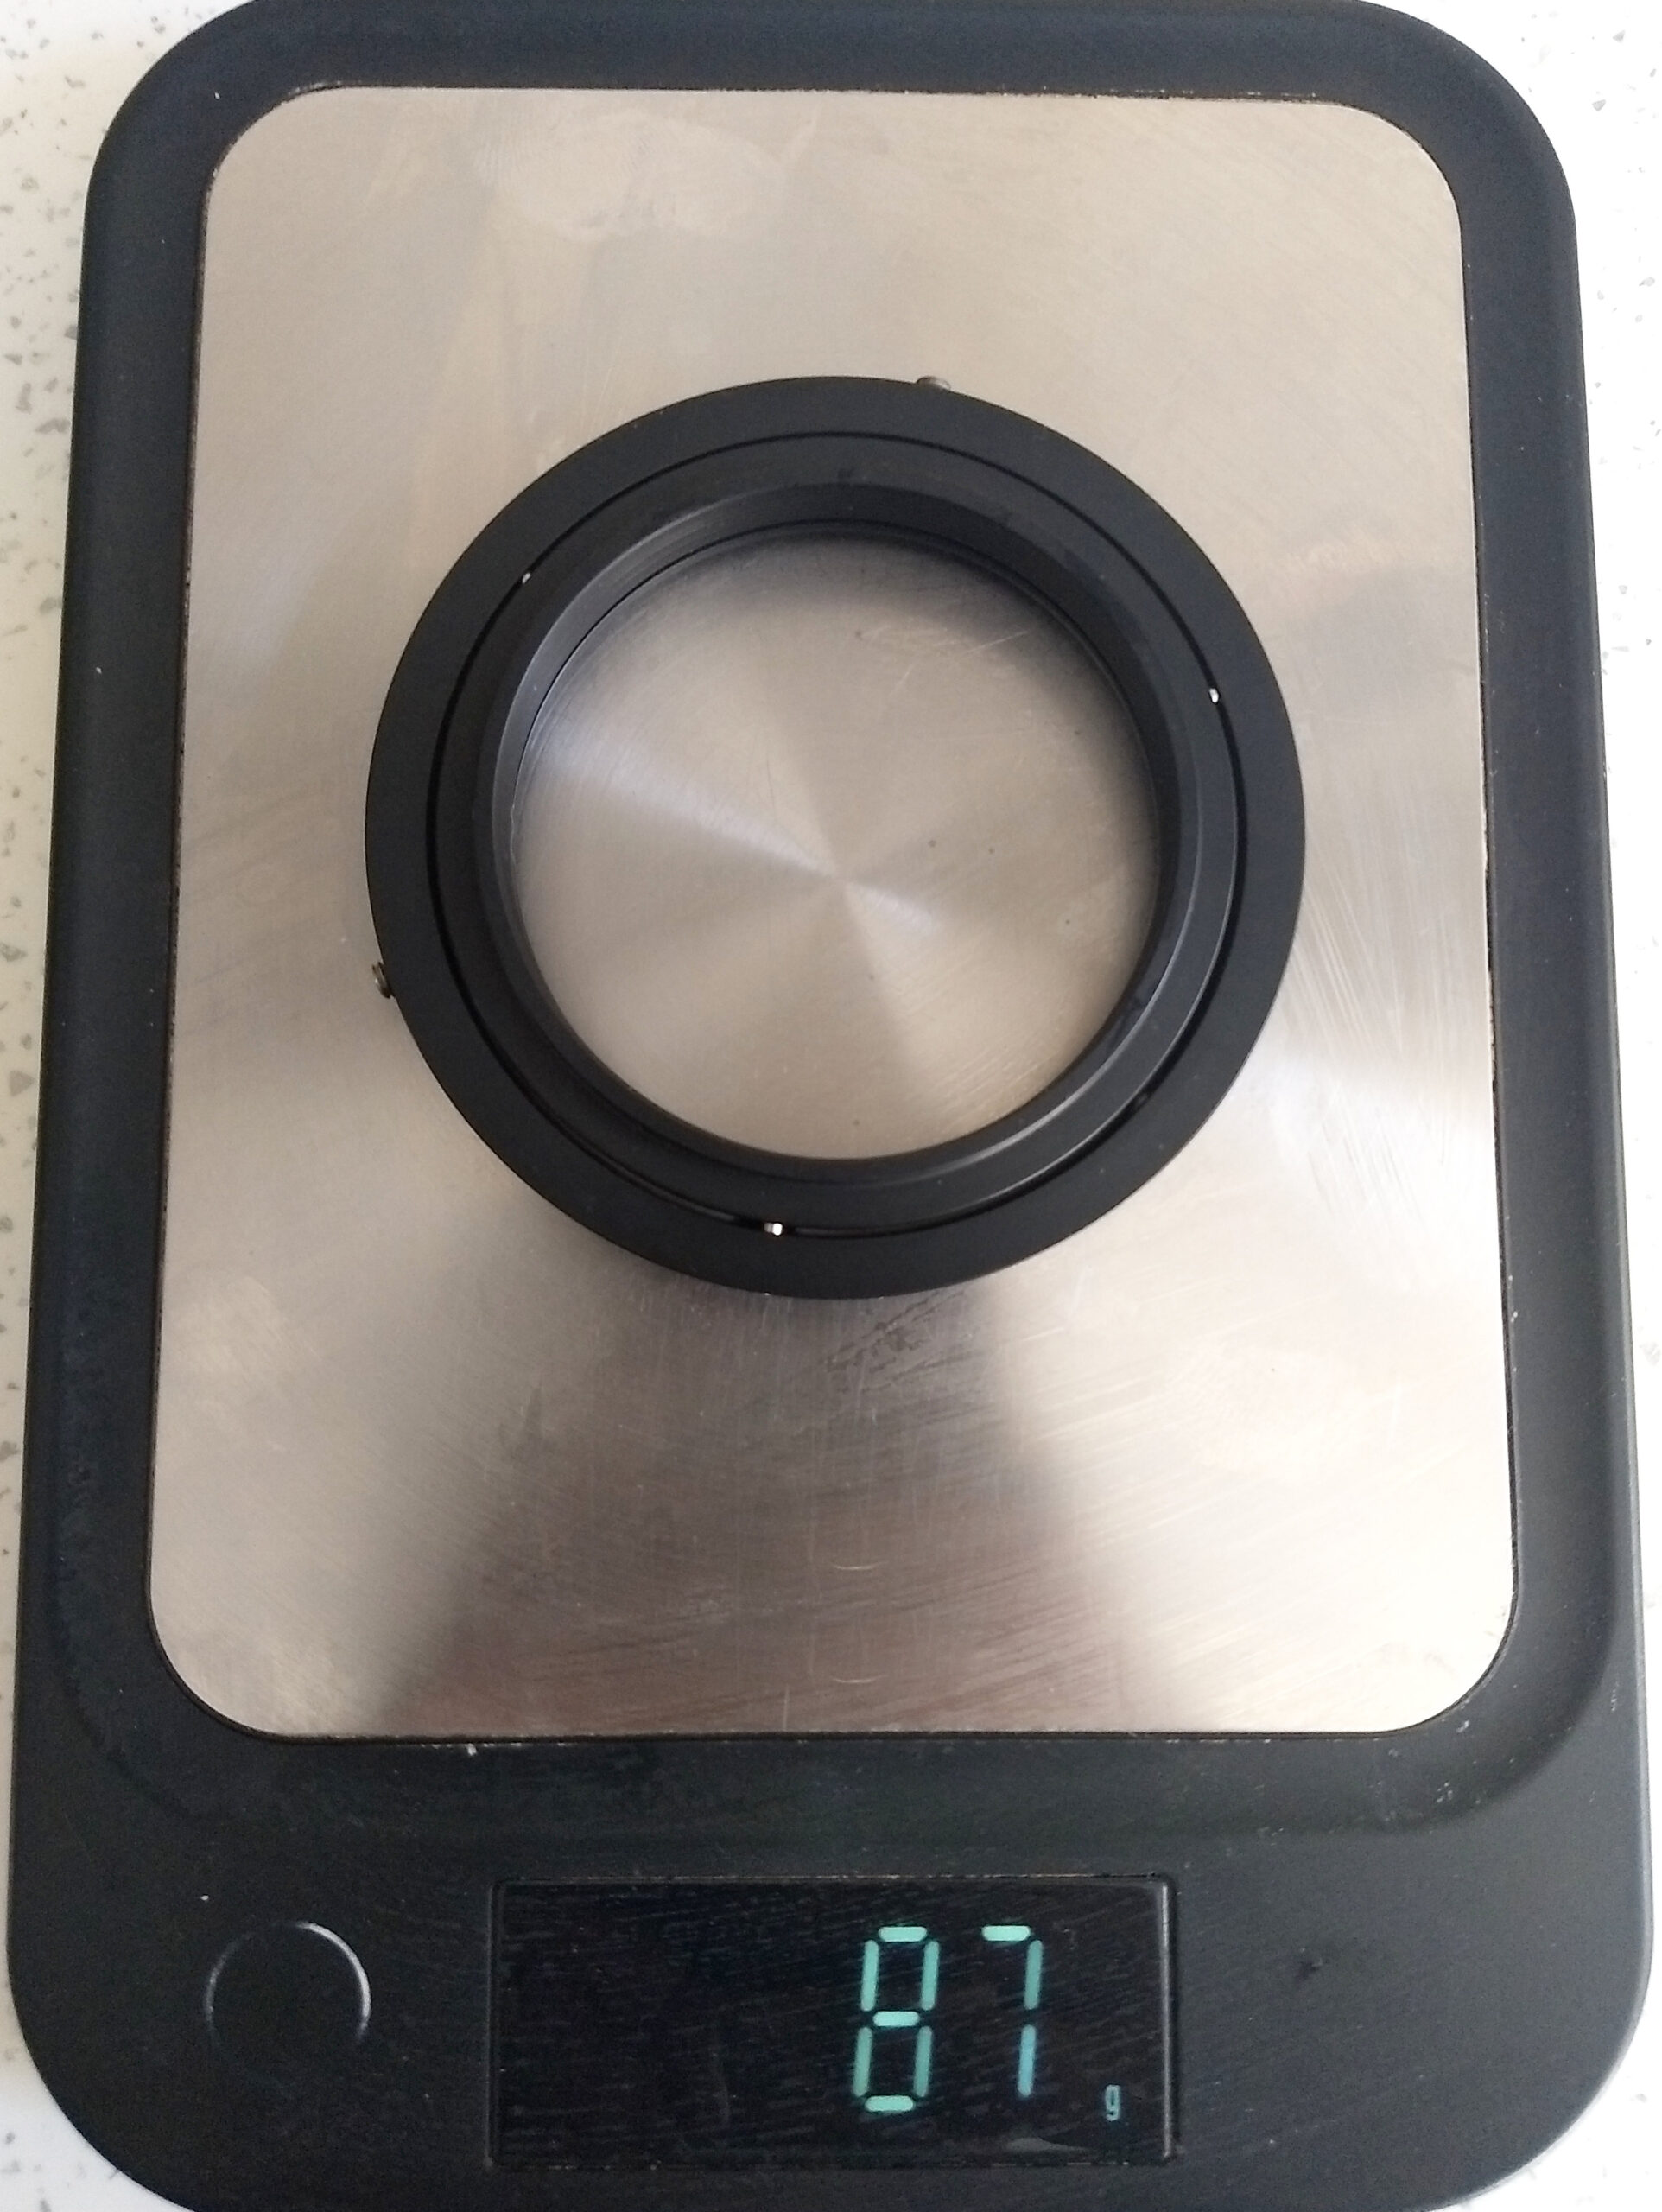
The UFC Tilter only weighs just ~87g
The Tilter unit measures ~91mm in diameter, which is just slightly larger than the UFC Filter Base, and it is not heavy adding a mere 87g to the overall payload. On the Tilter's camera/UFC-Base facing side there is an adjustable (inner) tilt ring with an S70 dovetail for secure attachment into the UFC Base Filter Chamber. Three equally spaced steel pins that go through the outer body of the tilter and into the inner tilt ring act as a "security system" to prevent the tilt ring from falling out. On the telescope side of the Tilter there is the circular opening that accepts any of the UFC's S70 telescope-side adapters.
View showing the 3 metal pins that secure the inner tilt ring from falling out
Three pairs of screws for adjusting tilt are positioned 120° apart around the outside edge of the unit with tilt adjustment direction arrows clearly labelled, all of which make adjustments very easy. One of the issues with some inexpensive tilt adjusters is that the tilt adjusting screws are located on the camera-facing plate so that when a large-body cooled imaging camera (or the UFC Base) is attached, the adjustment screws are obstructed making further adjustment(s) very difficult or impossible and only accessible by removing (and then replacing) the camera or UFC after each adjustment(s) made.
The UFC Tilter functionality is especially valuable for the Celestron RASA-community with the RASA 11 and RASA 36 optics where the original "on-telescope" tilt adjustment screws no longer need to be used. Adjustment(s) of the three front-side tilt screws on the RASA lens assembly are required, often with the removal and replacement of the imaging train if these screws are obstructed, but it is still not guaranteed that the adjustments are able to produce a perfect alignment across the full field of view since lateral play in the original manufacturers threads and fittings are just too big for repeated threading and unthreading of cameras and adaptors. With the UFC Tilter the whole "tilt operation" can be achieved without imaging train removal. Furthermore, the whole of the camera+UFC+UFC-Tilter-assembly can be removed from the OTA for safe travel or storage and the next time it is all remounted, none or only small fine adjustments may be required for perfect chip realignnment and all in only a few minutes. So your RASA set up is ready for action as fast as it is when it is taking images...!
Side view showing the S70 telescope-side securing hex screw (bottom) and one pair of the tilt adjustment screws with tilt direction arrows.
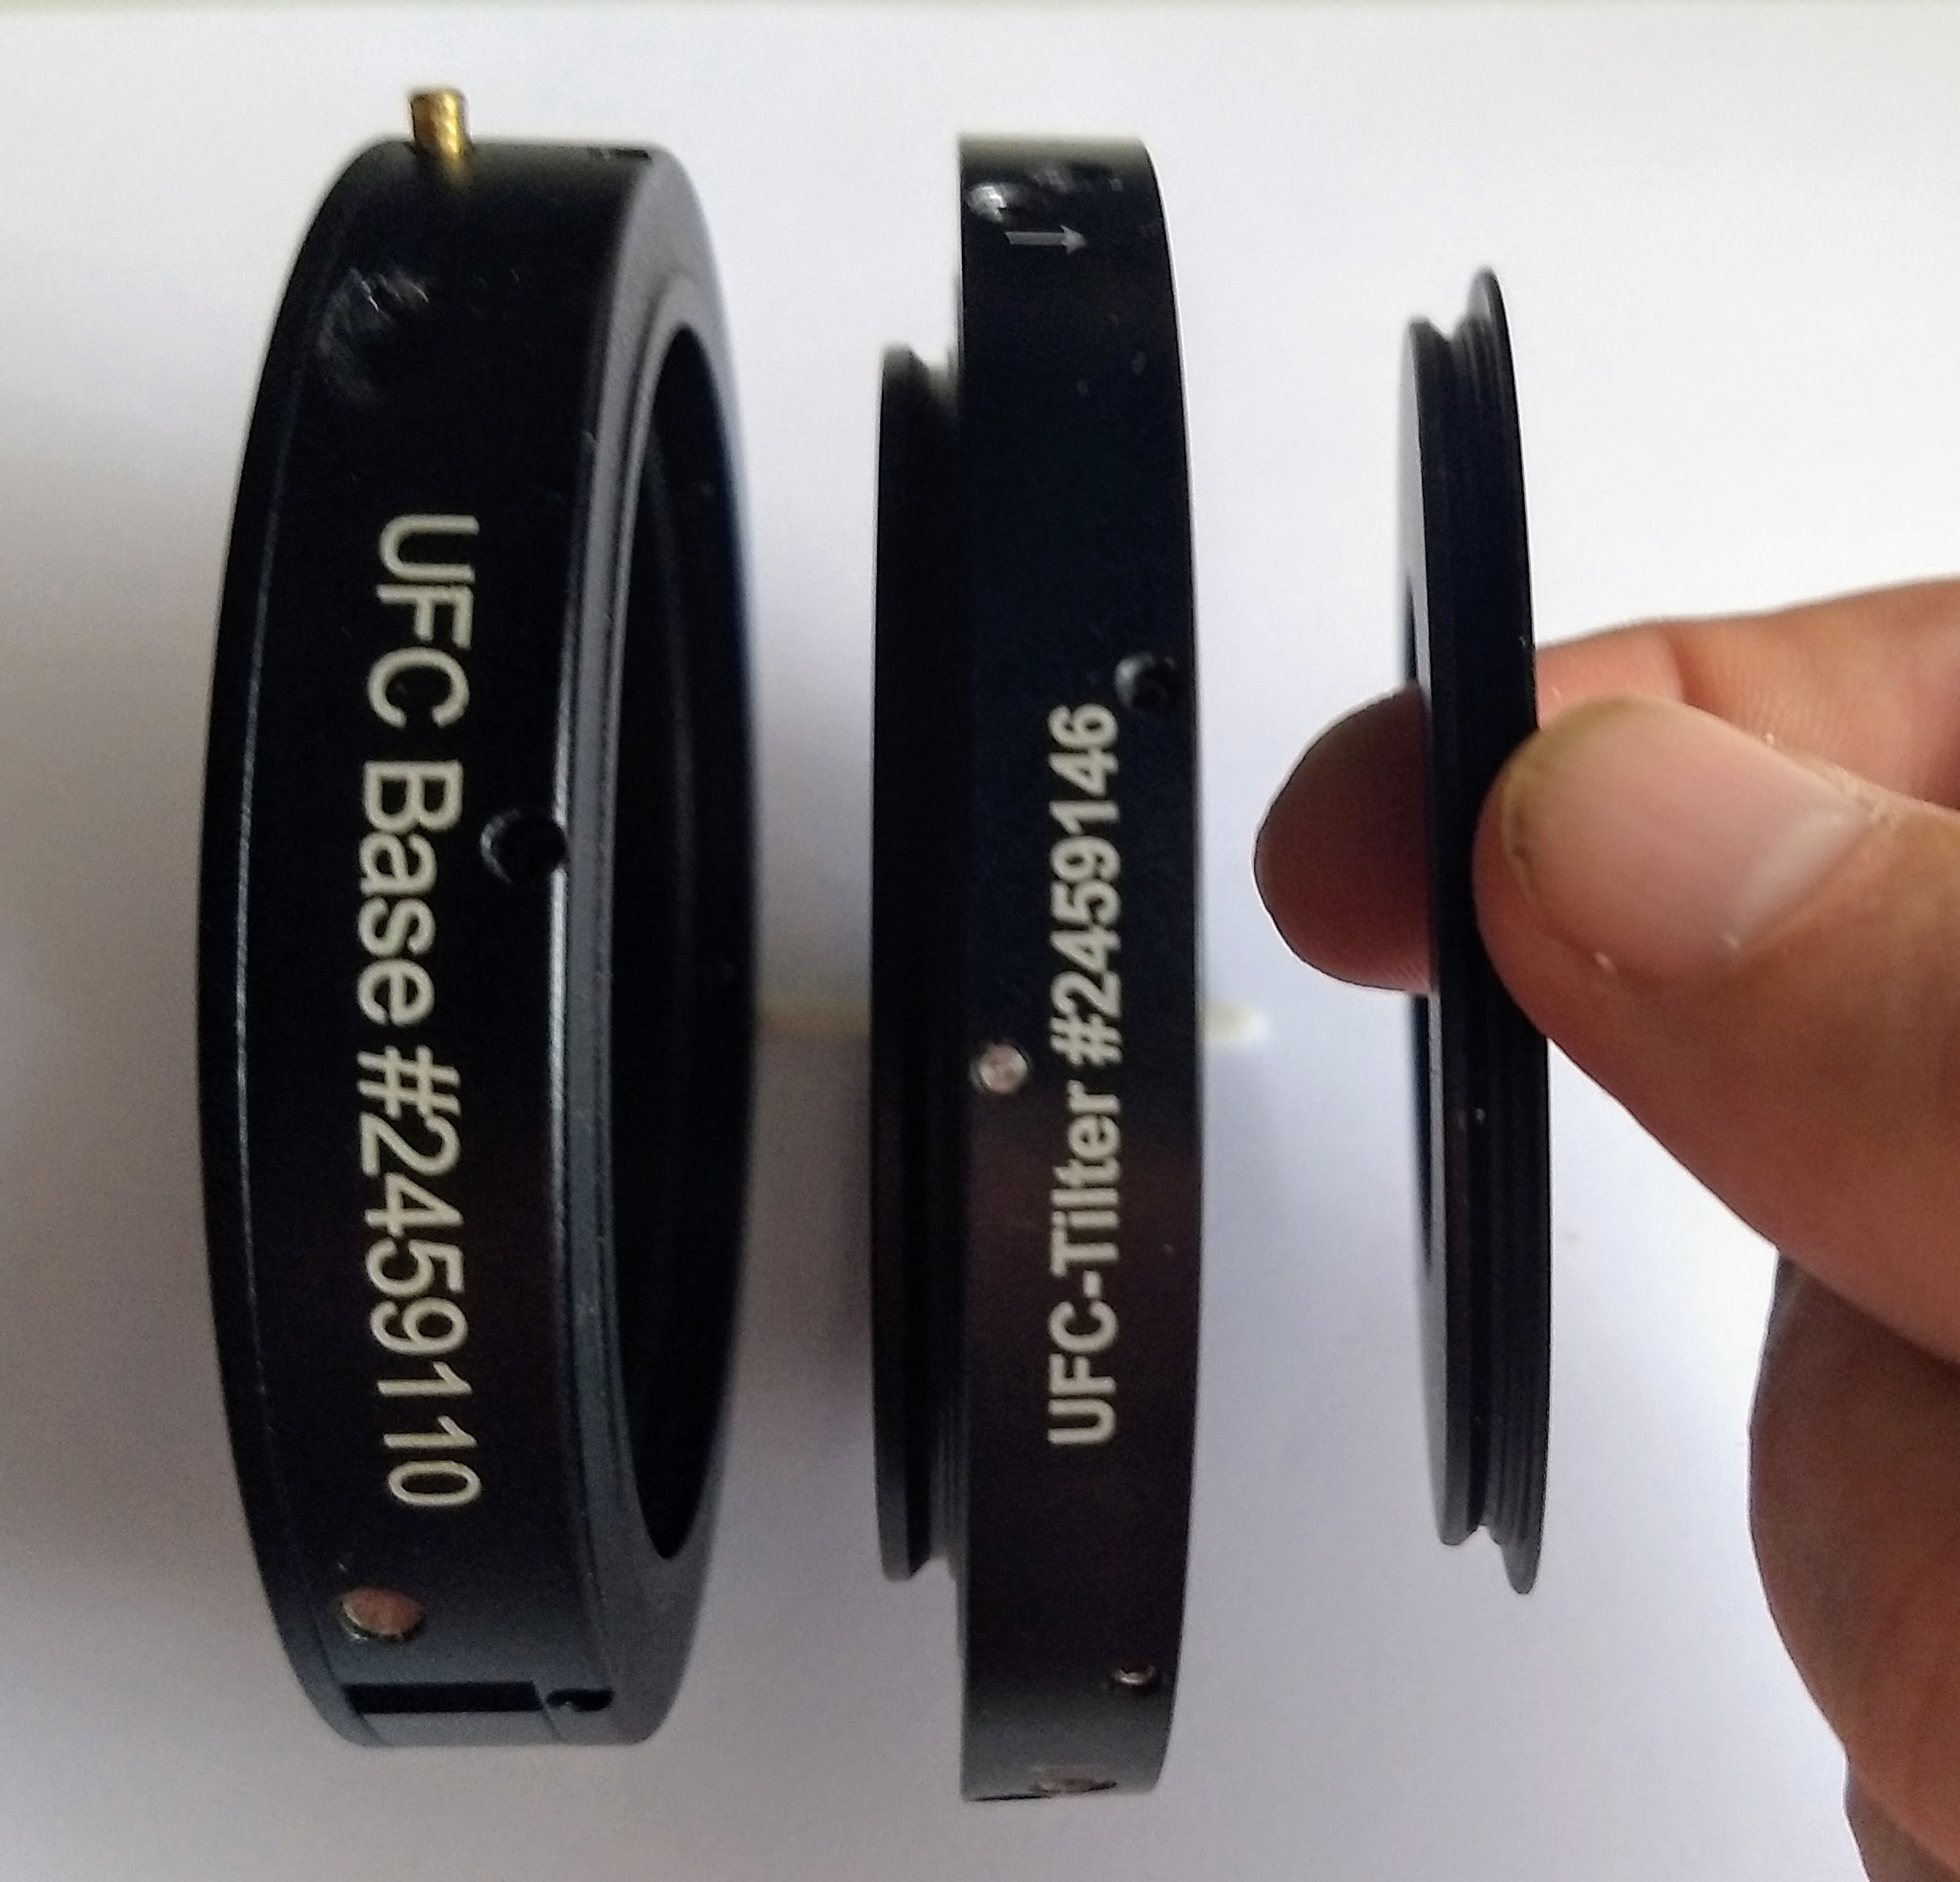
Example set up: UFC Base Chamber (left) with UFC Tilter (middle) and S70 T-2 Telescope-side adapter (right)
Attaching the Tilt Adapter to a UFC set up is simple. If you already have a UFC with a telescope-side adapter in place, simply loosen the six retaining screws on the [product sku="2459110"], remove the (scope-side) adapter and replace it with the UFC Tilter with its S70 dovetail side facing the UFC Base "S70 port" and then retighten the six Hex screws. Next, add your telescope-side S70 adaptor into the Tilter's S70 opening and secure with the unit's six Hex screws.The image to the left shows an example configuration.
In use, with all parts of the imaging train in place and attached to a telescope, we suggest that the UFC Tilter is adjusted so that the middle of the sensor is set at the required optimum distance from e.g. reducer or corrector (may require use of spacers such as the UFC fixed or variable length extensions). This is initially achieved by rough adjustment of all three pairs of tilt adjusting screws being moved equally which will allow for about 0.3 mm of inward or outward (camera) travel of the inner tilt ring. By viewing the resulting image, each corner of the image needs to be addressed separately by working each of the three individual sets of inward/outward adjusting screws for "final tweaking" of each corner by up to an additional of +/-0.2 mm until all of the chip corners in the image show perfectly formed stars. The tilt adjustment screws only need to be tightened with "mild force" as it is two hardened-steel contact surfaces doing the adjustment action and once contact is made, no further movement will occur. This functionality is also available for our new [product sku="2458170"] which is compatible with the entire Baader M68 adapter system.
UFC Tilter: Click on the image to see the Tilter in action and how the adjustments are made.
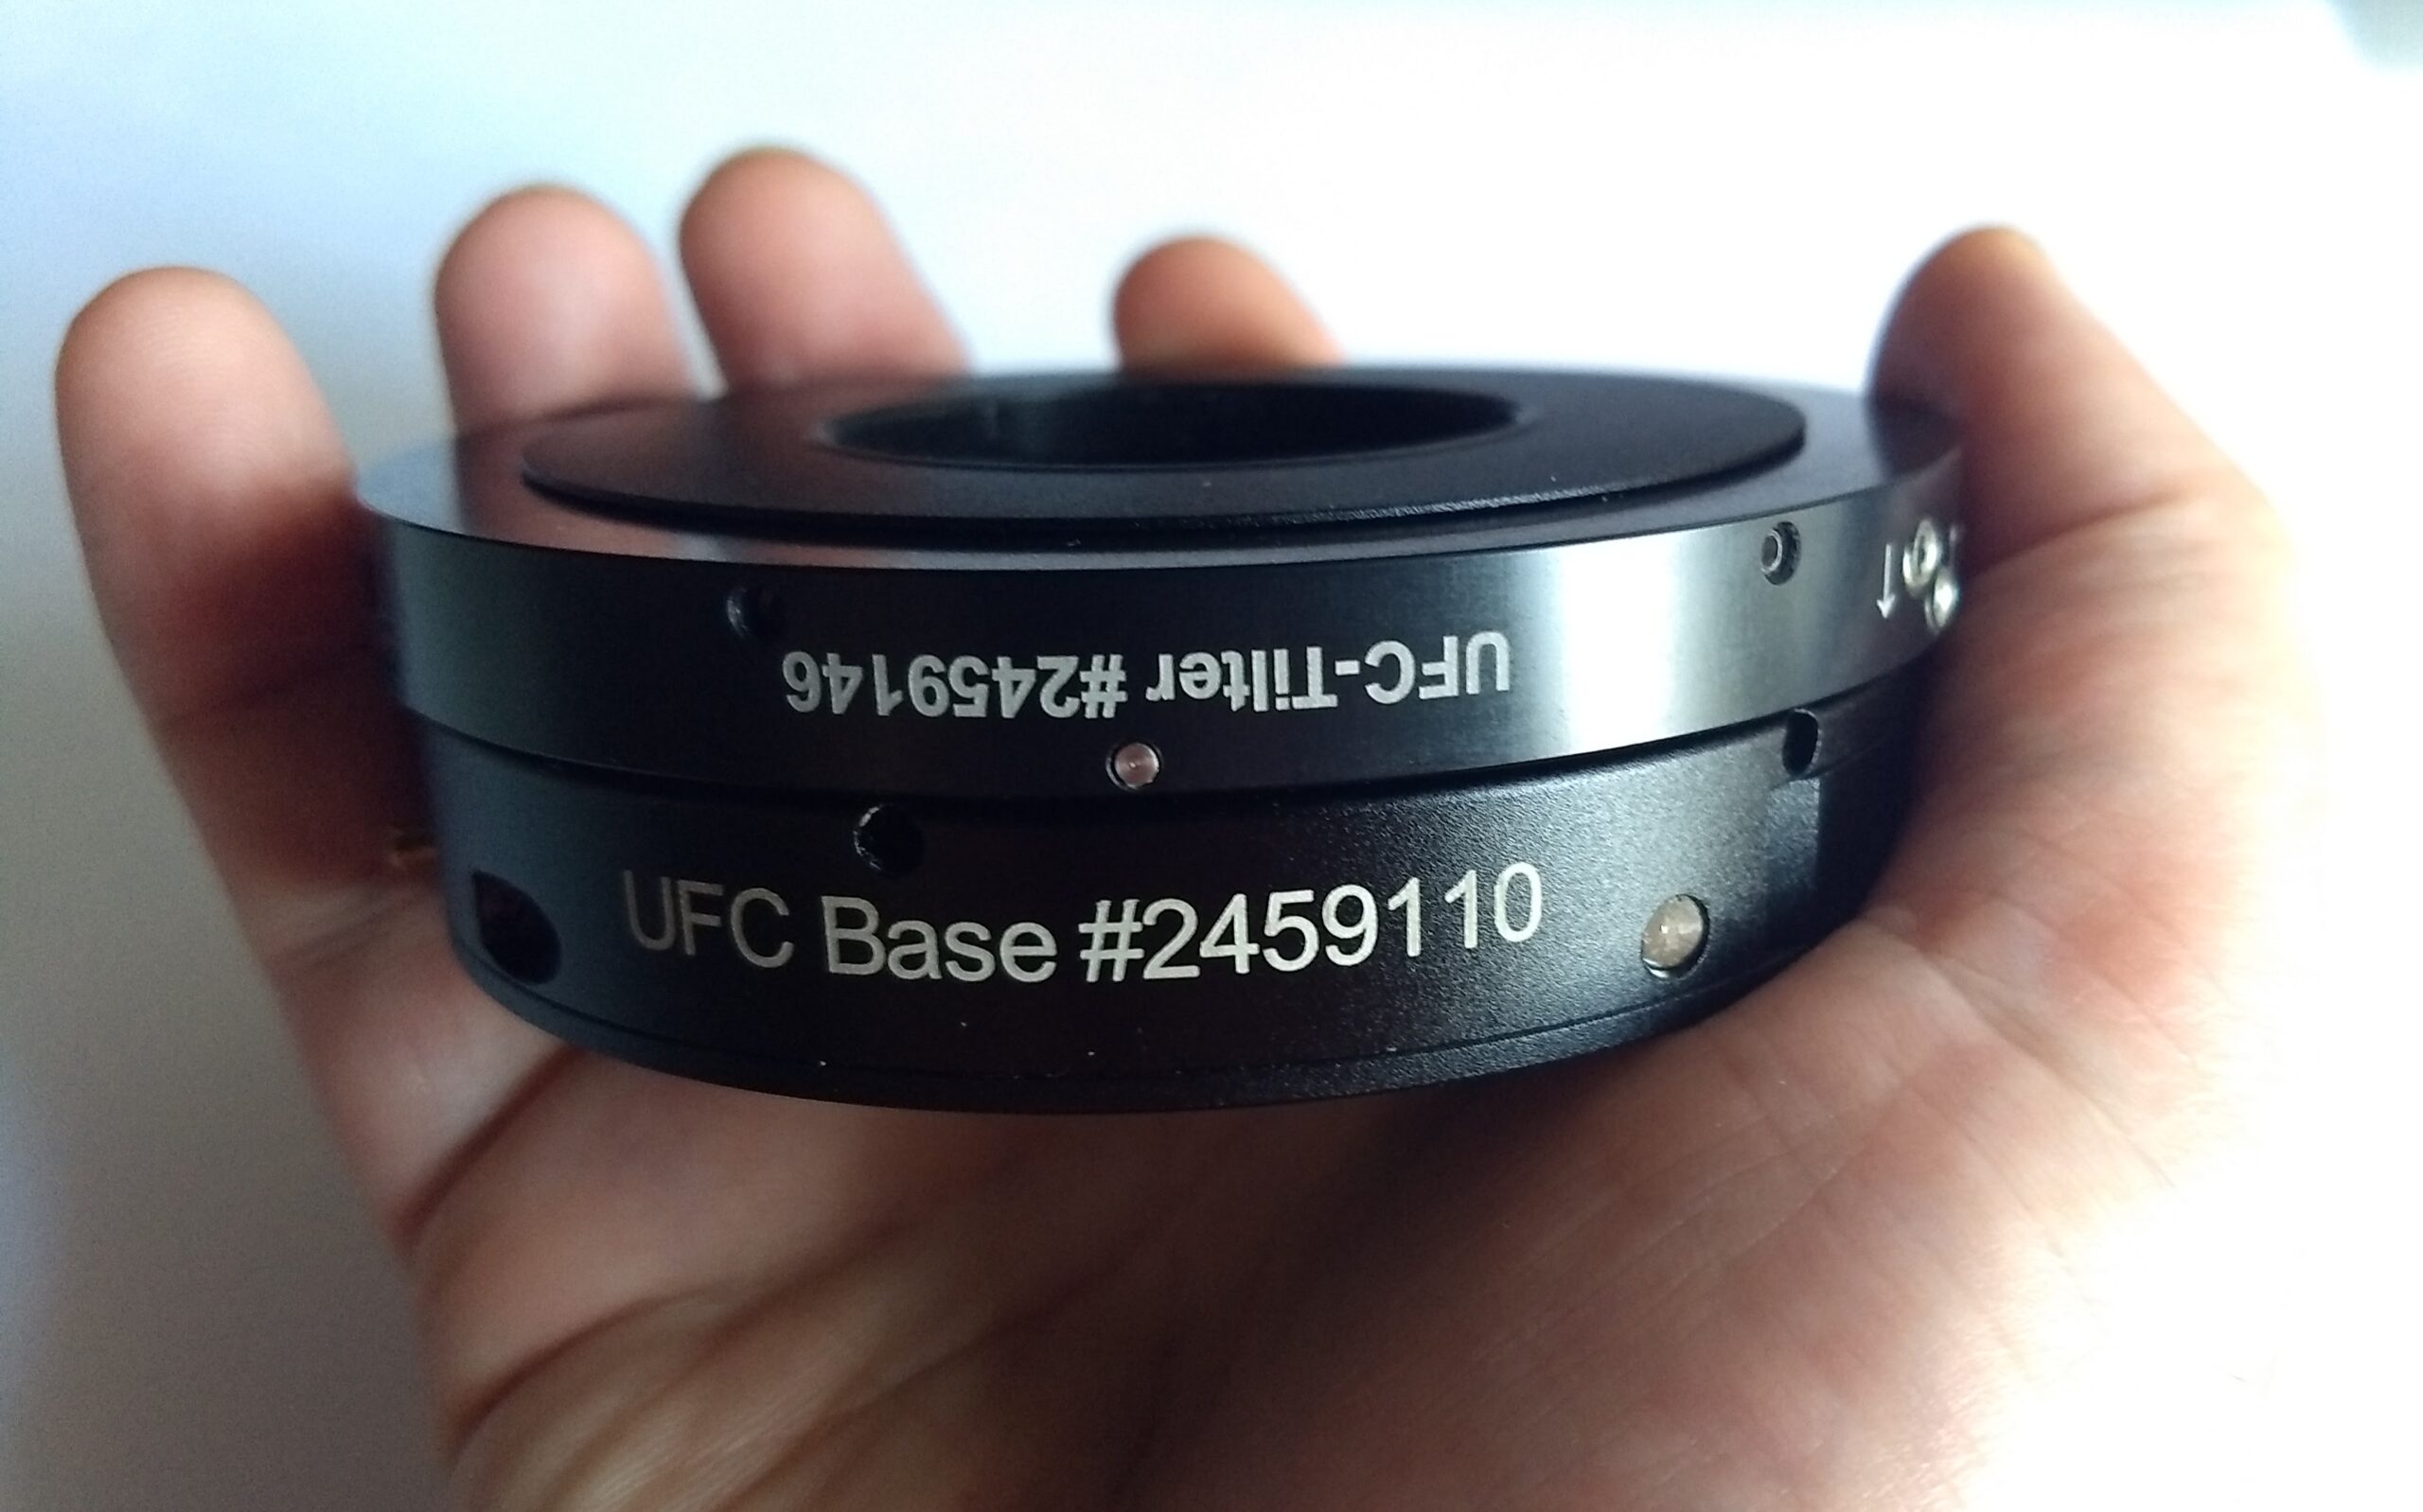
UFC Tilter with S70 T-2 Telescope-side Adapter attached to the UFC Filter Base Chamber
All the components that are used in the UFC Tilter are produced in our own machine shop in Mammendorf, Germany. This is in order to reach the necessary highest level of precision, to be able to adjust any corner of the chip in a backward/forward direction with ZERO lateral play during the adjustment procedure!
The Baader UFC Tilter product looks so very simple, but we know that "the devil is in the detail"..
Application of the UFC Tilter with a QHY Cooled imaging camera with fixed-length adaptors
Smaller-Sized Filters with Baader UFC-System :
[br]
[br]
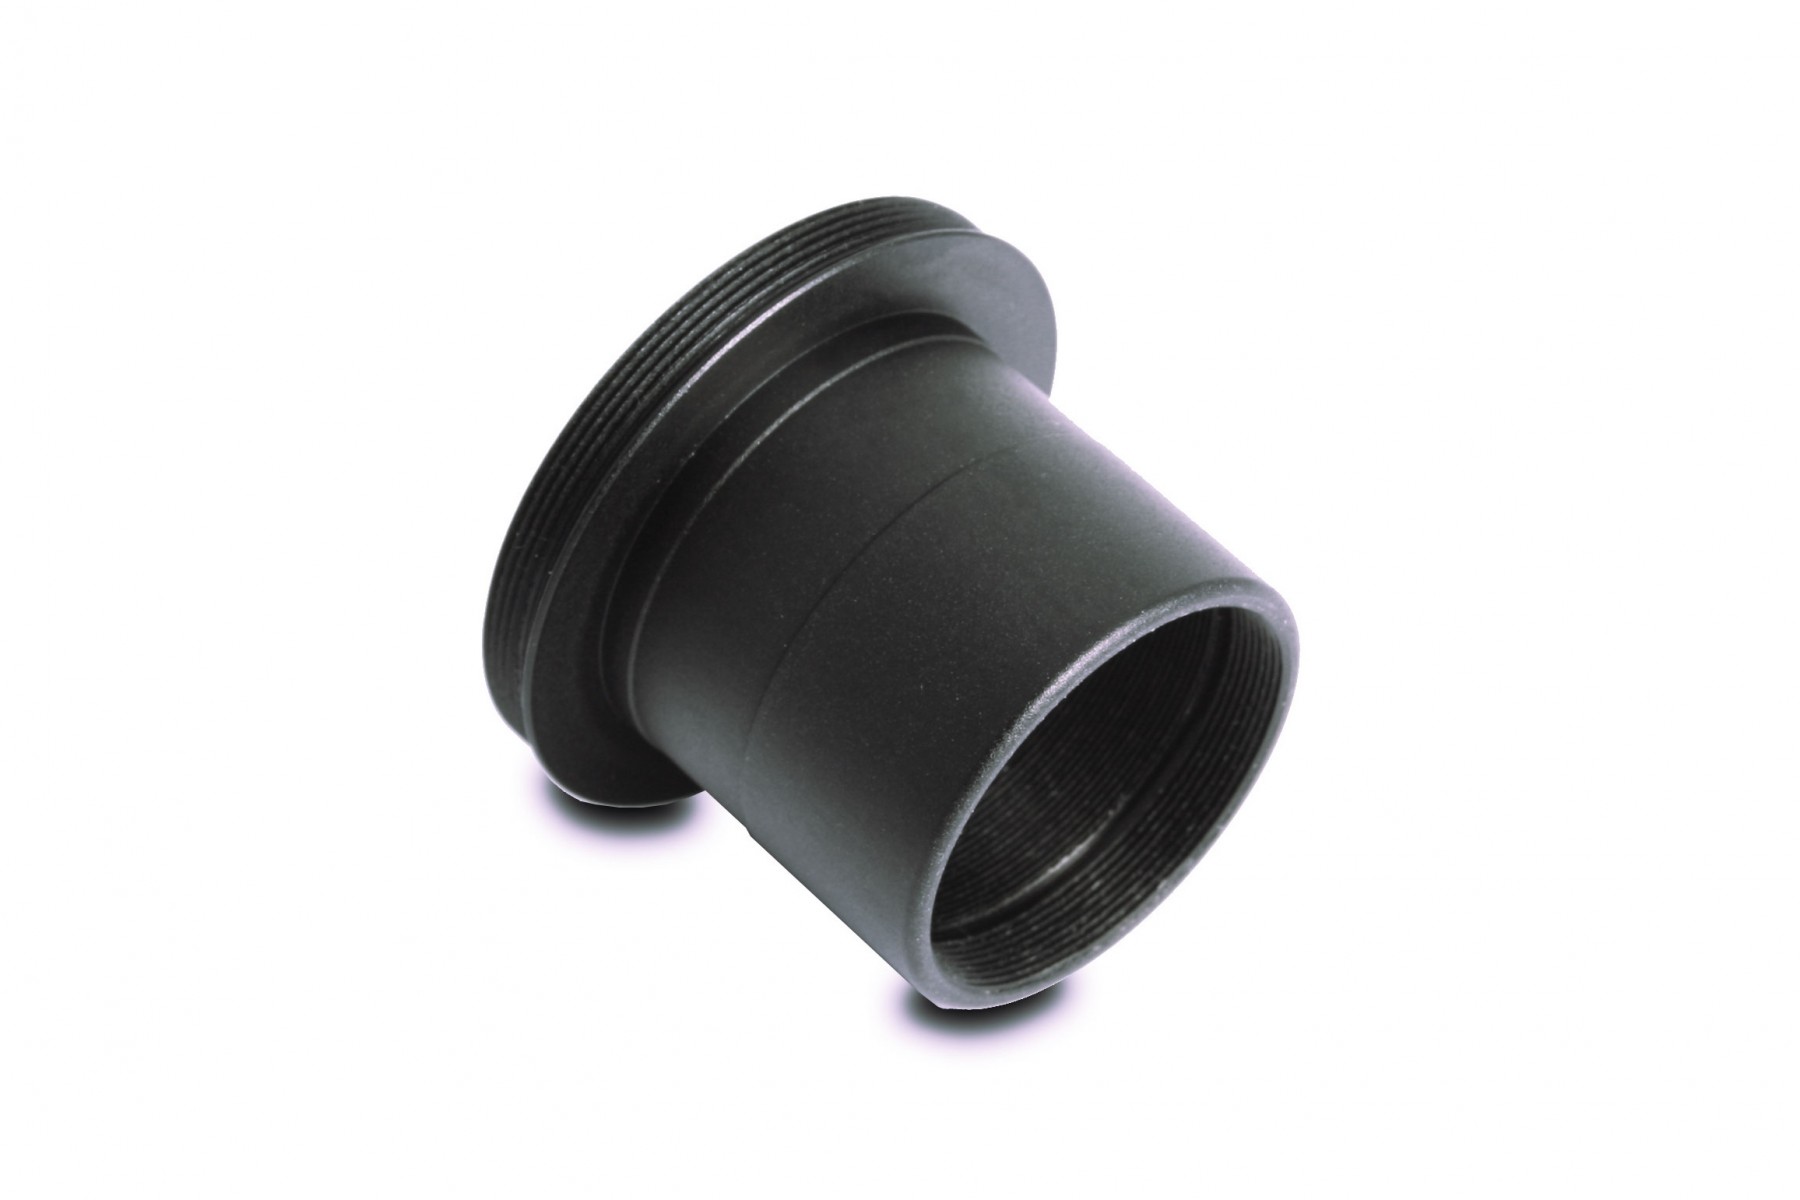
It may only be an adaptor but this little piece of anodised metal will let you use a range of popular astroimaging cameras with Baader Universal Filter Changer (UFC) on Celestron's RASA 8 telescope thus allowing you to swap filters quickly and easily.[br]
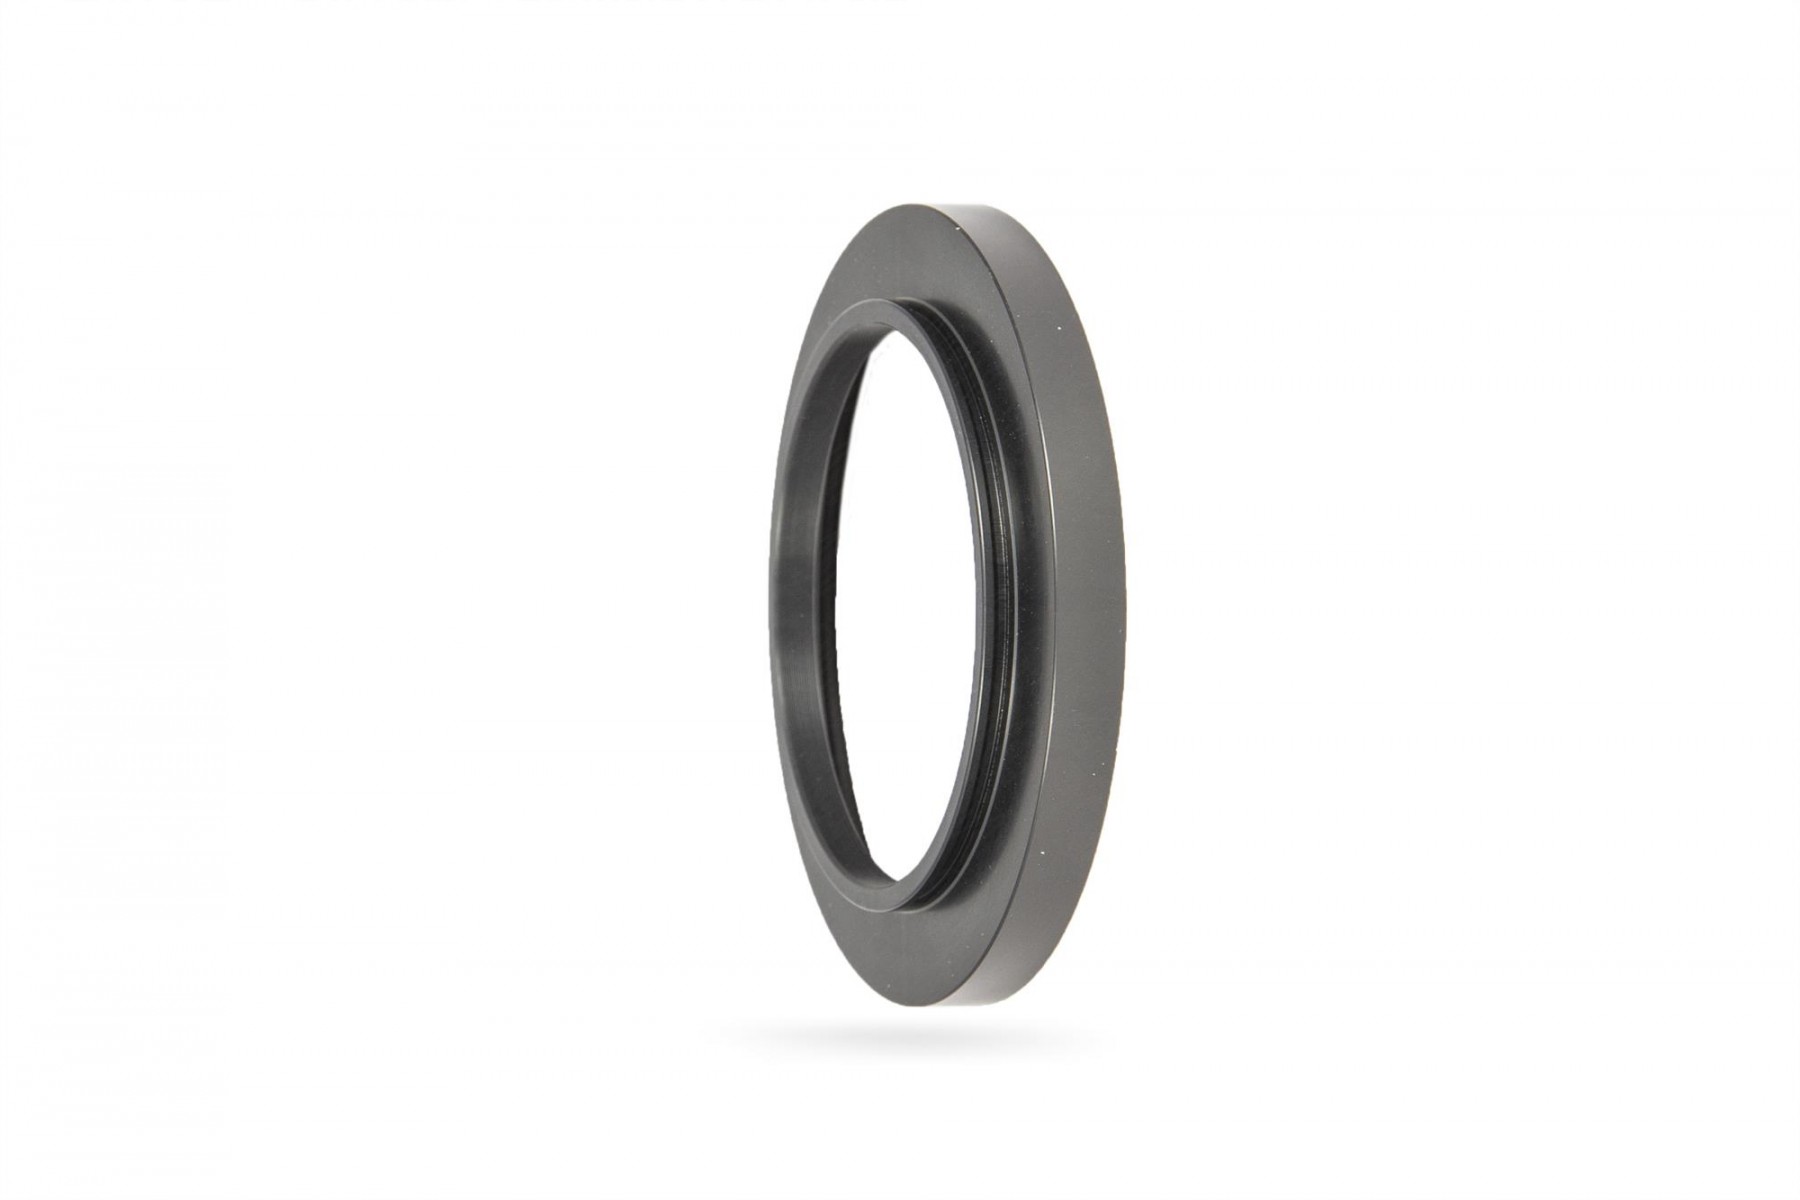
[product sku="2459136"], (UFC/Camera side view)
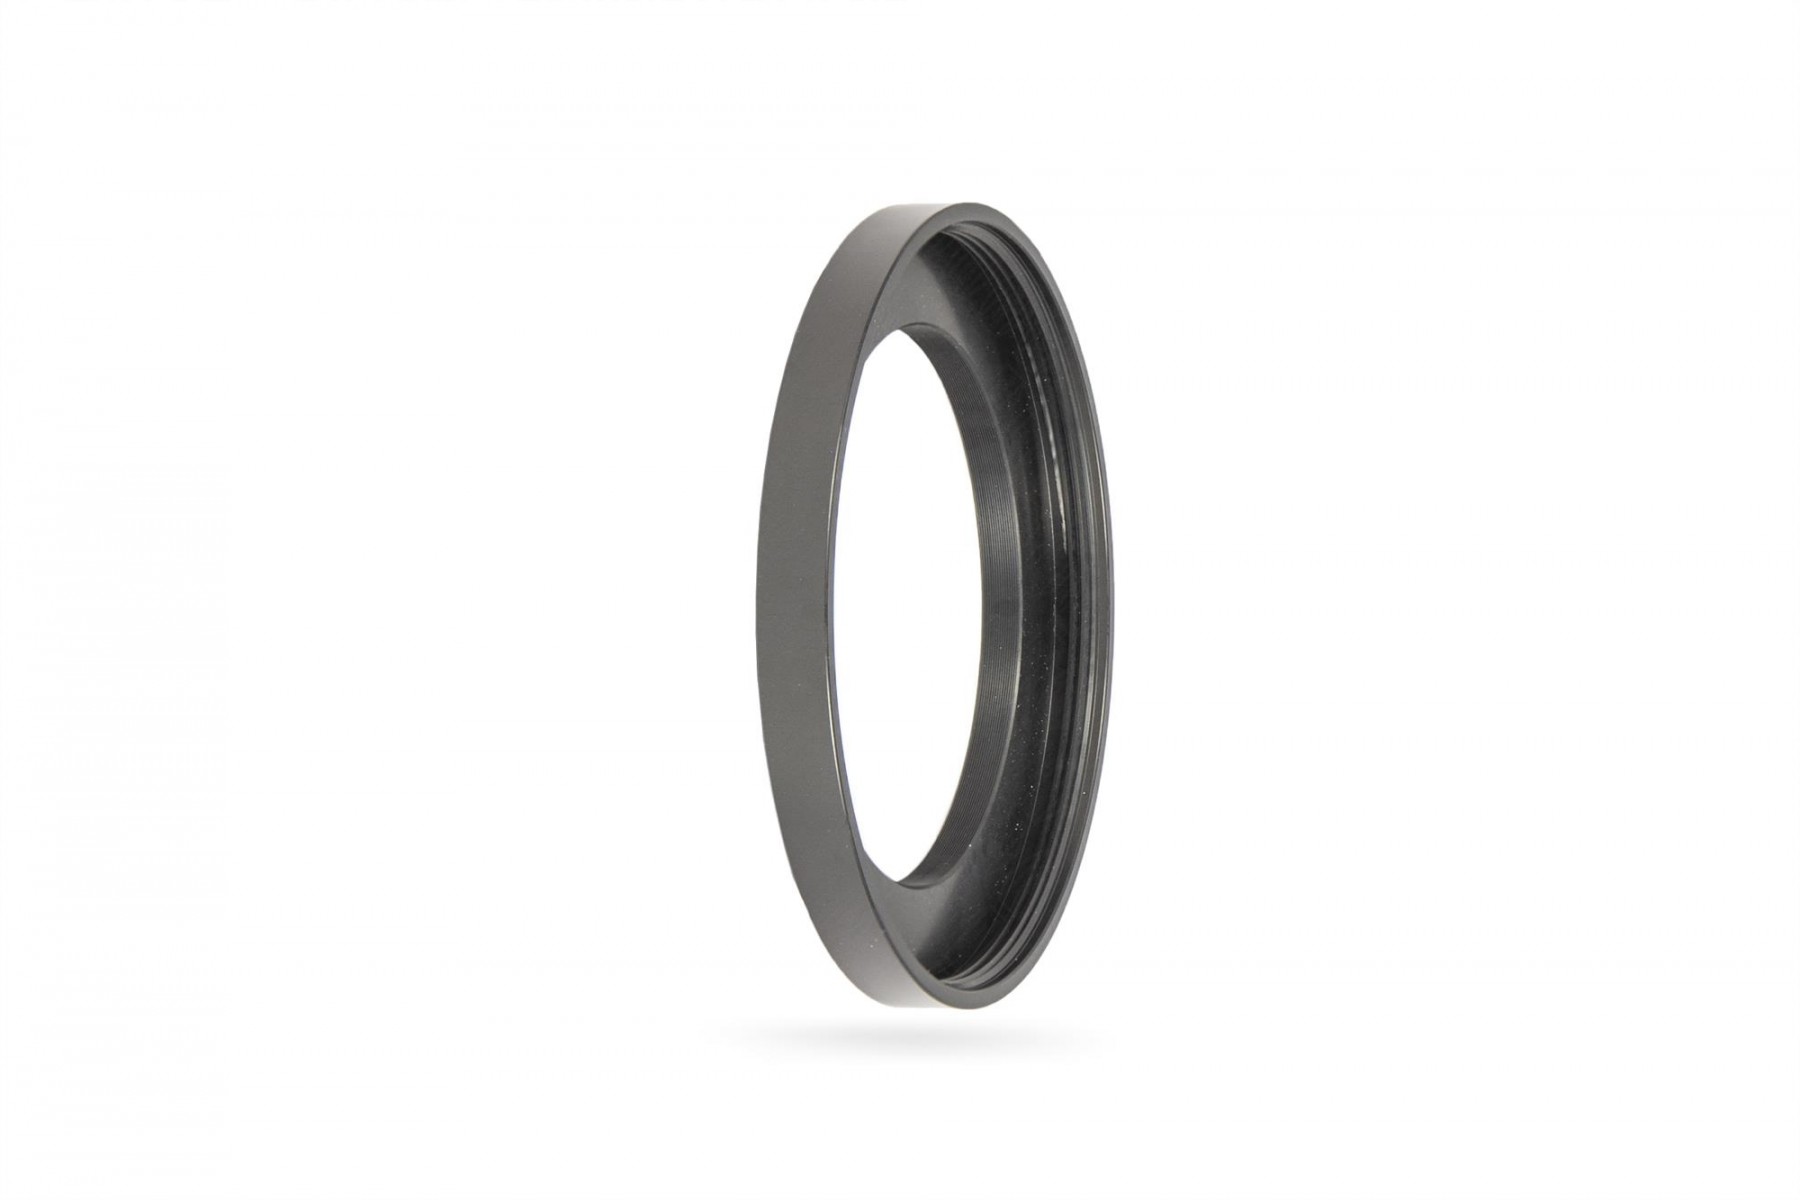
[product sku="2459136"], (Telescope side view)
[br]
[product sku="2459126"]
[product sku="2459135"]
Unlike the Baader UFC telescope adaptors for the 11″ RASA and RASA 36 that are mated to the corrector lens group cell face-plate and secured with the knurled retaining ring, this adaptor screws onto the male outer threads of the lens group housing itself. So you would remove the RASA 8’s retaining, the T-2 or C camera adaptor and then the clear filter, and then attach the UFC Base with its RASA 8 UFC adaptor in place. The adaptor has female M84 threads on the telescope side and uses Baader’s S70 dovetail on the UFC/camera side for secure fitment to both the RASA and the UFC Base.
[br]This S70 UFC adaptor itself only adds a minuscule 1.4mm to the optical path, but what is the overall optical length with the rest of UFC system in place? The UFC base is 13mm thick, and with the typical types of UFC camera adaptors (T-2/M48 etc) used being 2mm, the overall optical length is 16.4mm (1.4mm+13mm+2mm). The RASA 8 without any of the camera adaptors attached has a back focus distance of 29mm, this leaves 12.6mm so with a filter in place this configuration is suitable for use with a wide range of popular imaging cameraswith ~13mm backfocus.
Below shows an example set up using 2″ mounted filter slider and with a camera that uses a T-2 mount, and the new Baader RASA 8″ UFC adaptor.
An example RASA 8 UFC Set Up
By the way:
The only function, that still might be left to desire, is an easier way to reach the front adjustment hex-screws of the RASA 8. Due to the very short backfocus available, it is somewhat difficult to reach these screws and to "tweak" the star sizes in each corner of the image to absolute perfectness.
So - in order to even reach this goal (exchange filters AND effortlessly adjust the camera tilt), in February latest we will launch a separate product - only produced for the RASA 8: the FCCT (Filter Changer & Camera Tilter). This unit will feature 3D-printed filter sliders and be only able to accept filters in diameters of 31 mm / 36 mm / and 2"(47.4 mm) w/o cell mount. This is a revolution for the RASA 8 since it makes perfect adjustment of all stars in the field a joy. Already now the first imagers are using this solution as prototypes and the results are outstanding, see here: https://www.baader-planetarium.com/en/blog/rasa-8-extreme-images-michael-jaeger-with-ccd-camera-f2-highspeed-filter/
We've been asked a few times recently on how to set up the Baader UFC for use with a DSLR and a range of wide-field imaging refracting telescopes. So we thought we would write a short blog on some ways this can be done.
Let us start from the telescope side first.
All the enquiries we have had, the wide field refractors have 2" barrel focusers, so there is our starting point. The telescope side of the UFC Base (to which everything else in the UFC system is connected to) uses Baader's S70 dovetail adaptors to allow the UFC to fit to telescopes.
Looking at the UFC main diagram above Baader do a [product sku="2459128"] that allows 2"/SC male-thread accessories to be used. More about our UFC Telescope Adapters can be found in our blog: The UFC telescope-side adaptors.
[product sku="2408156"]
[product sku="2408155"]
[br]
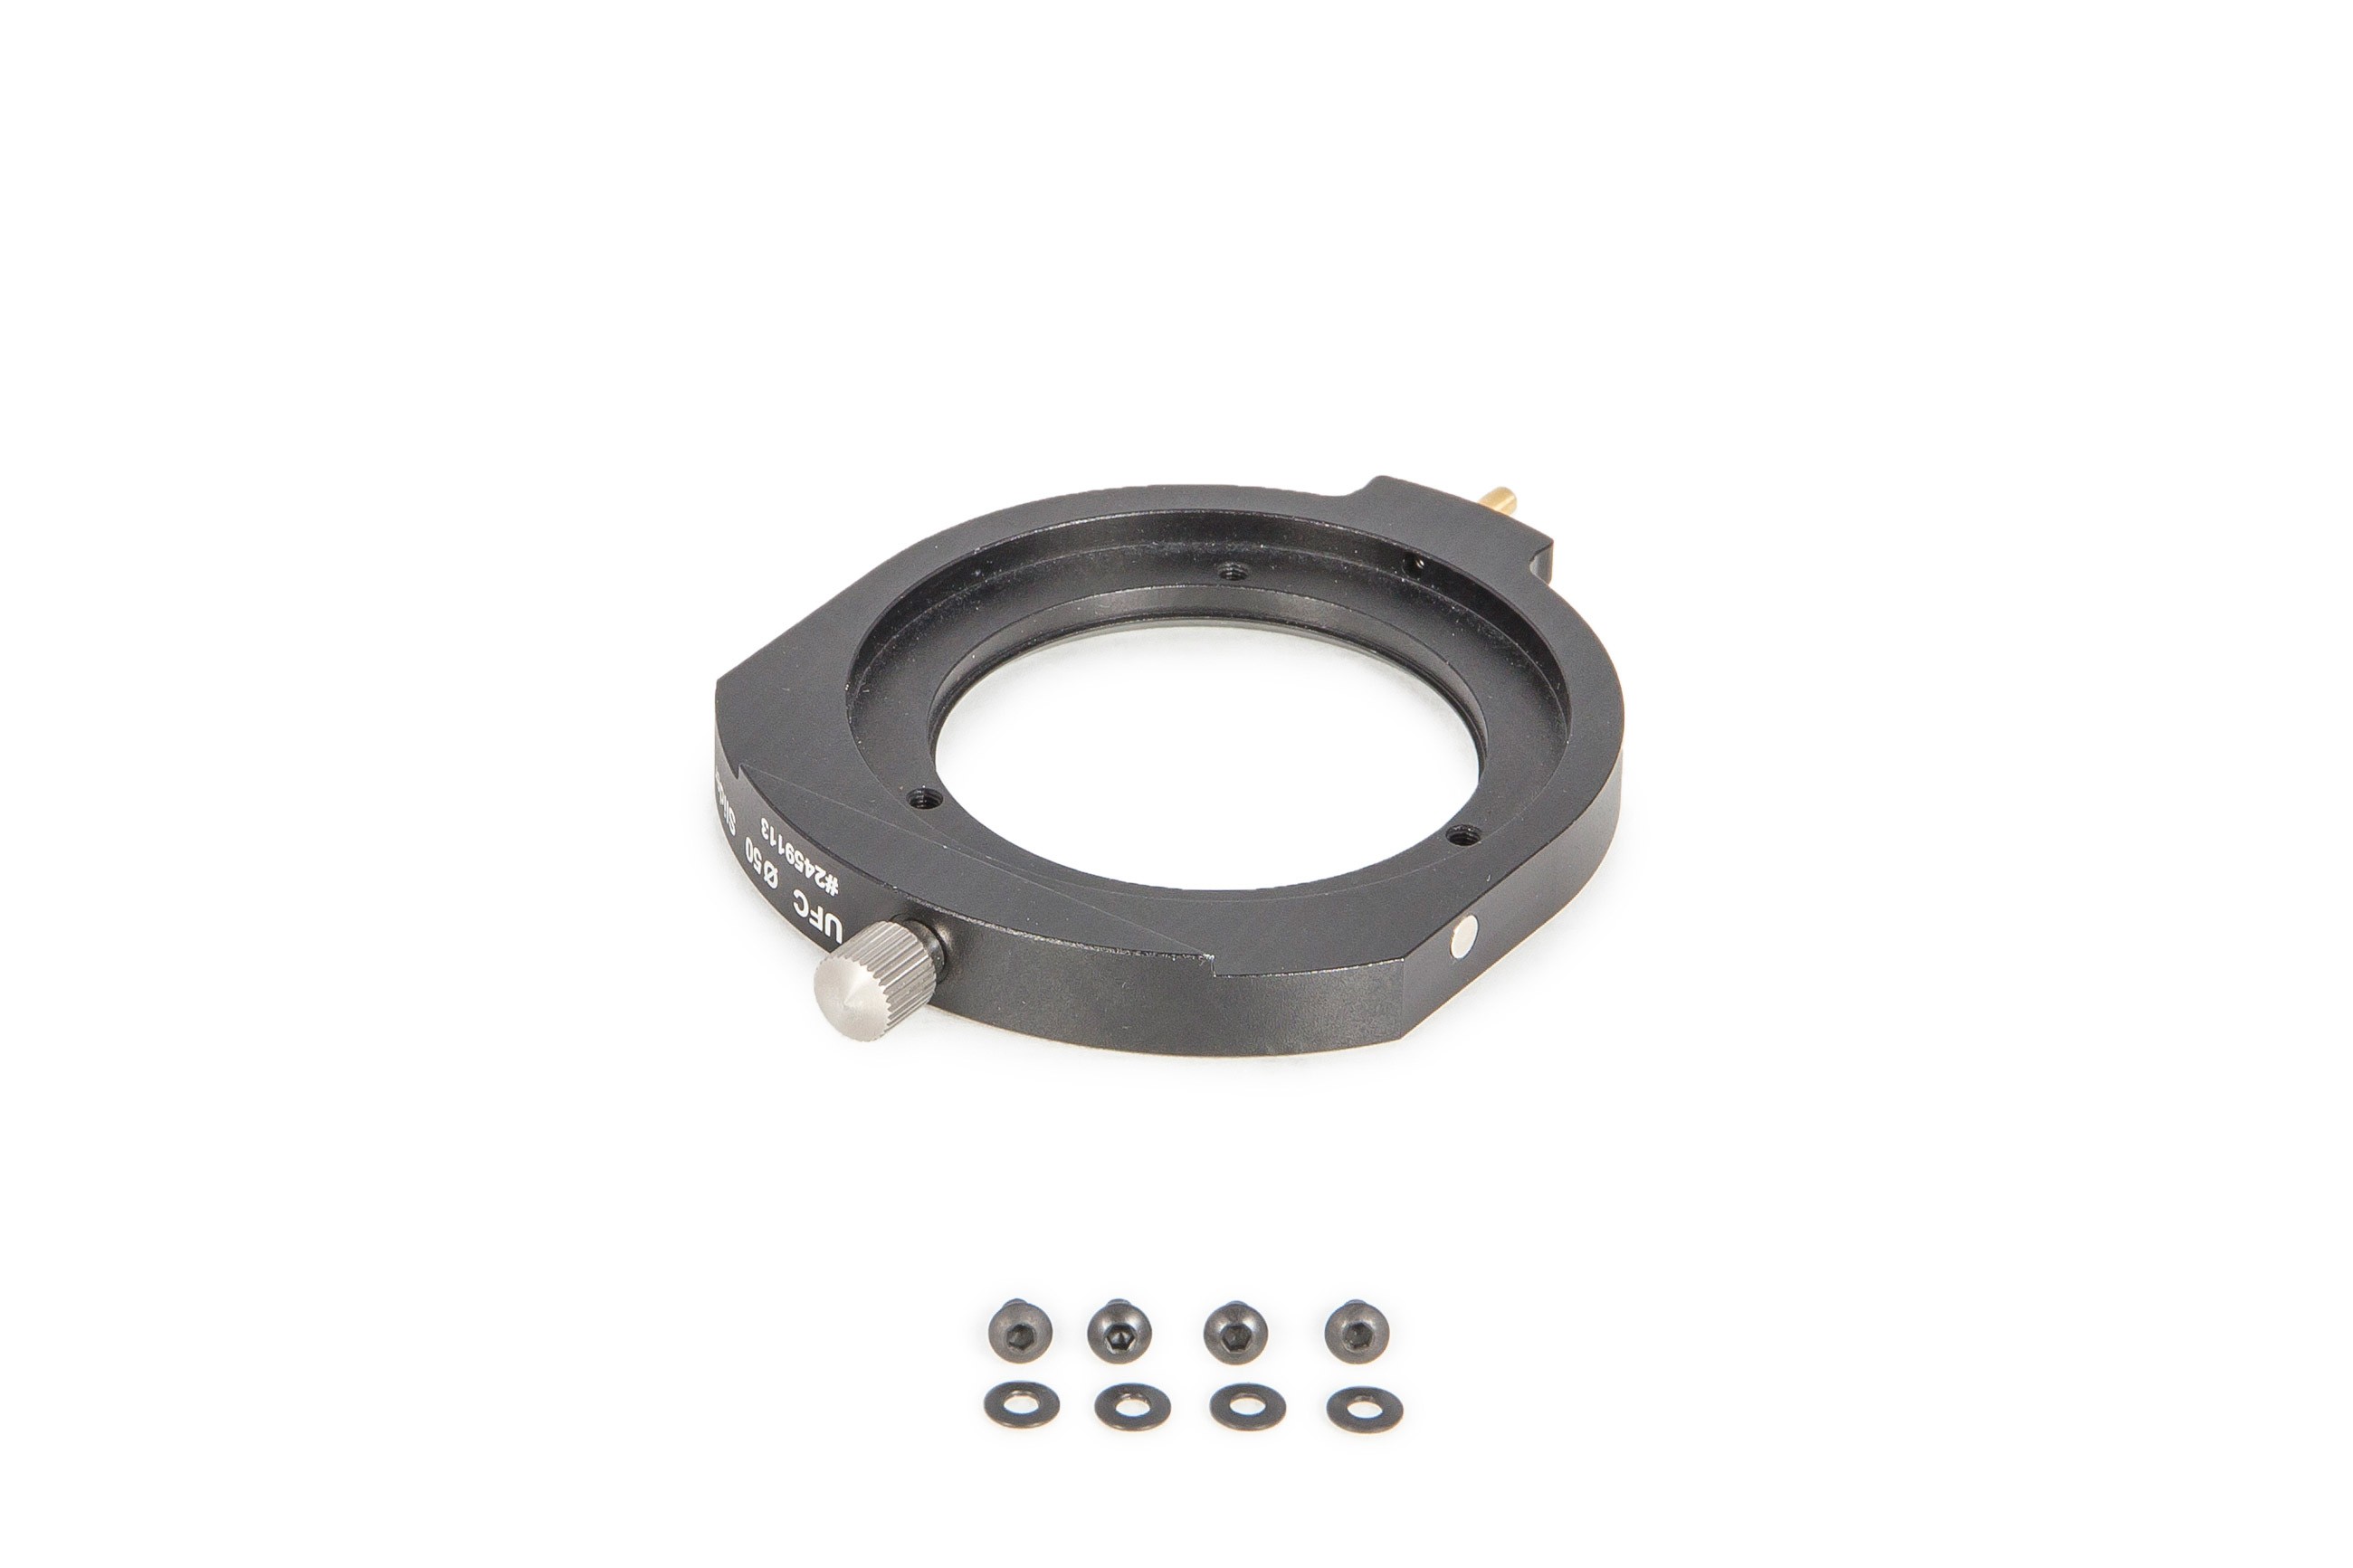
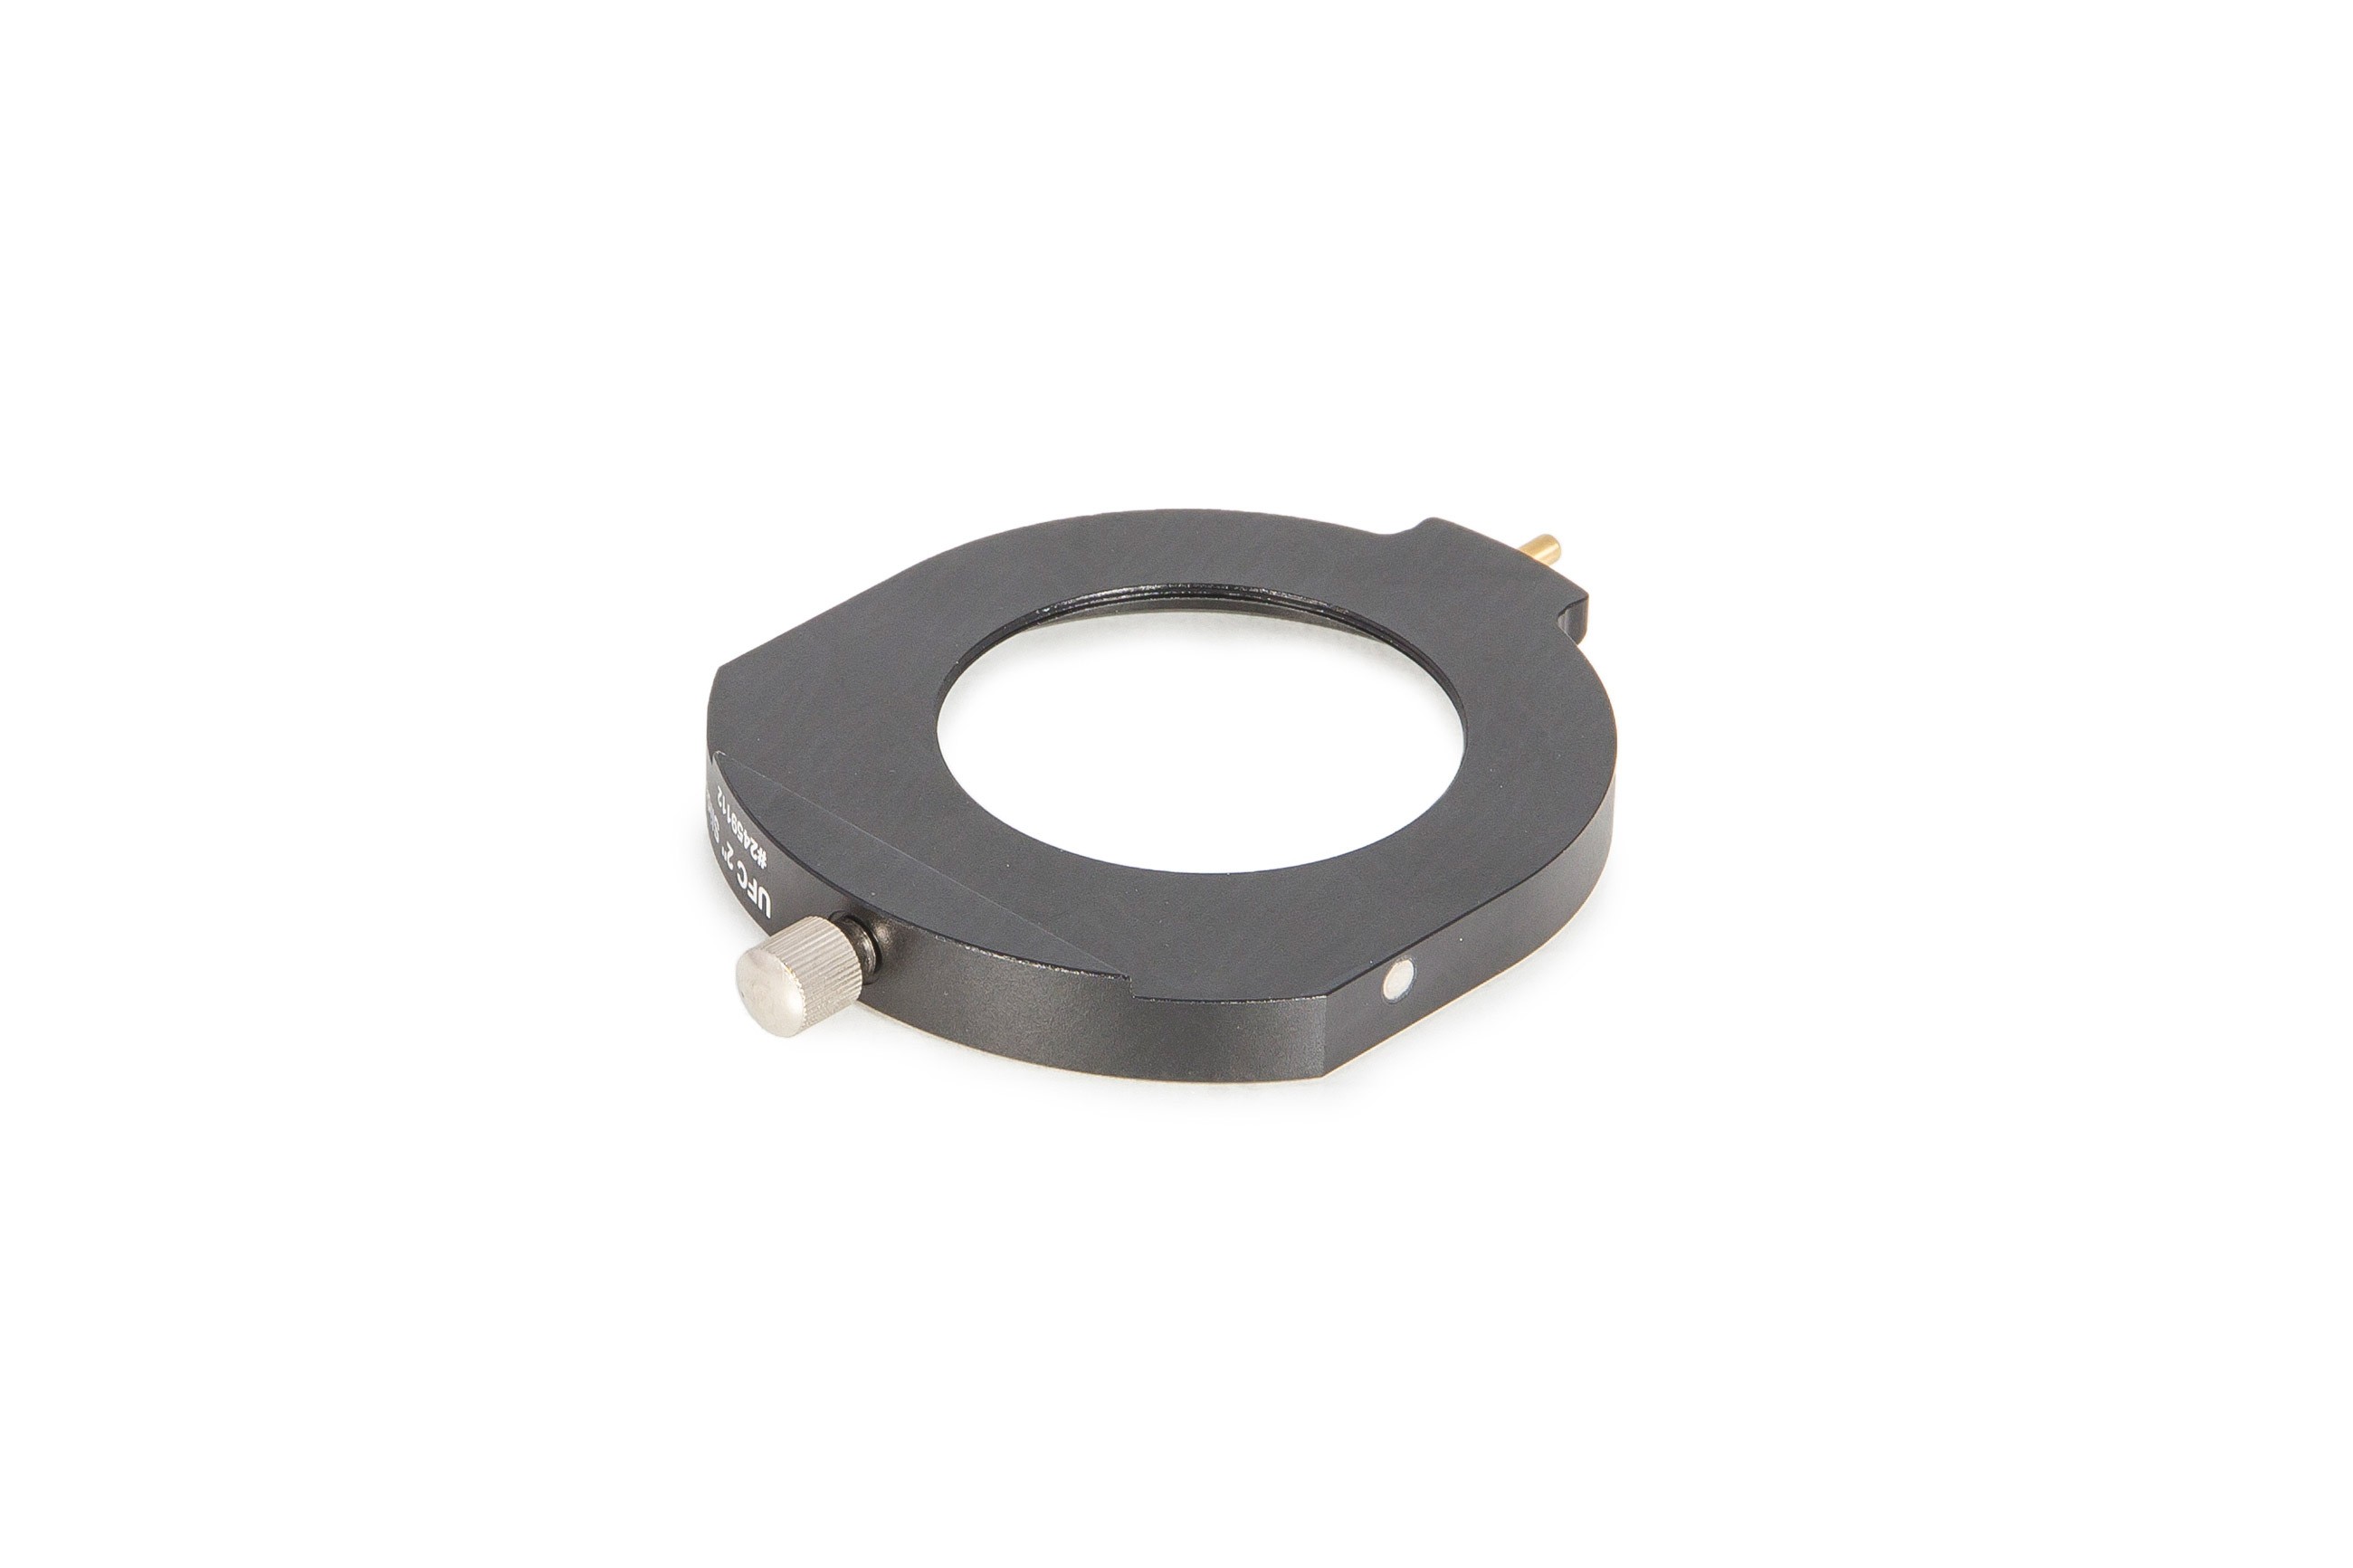
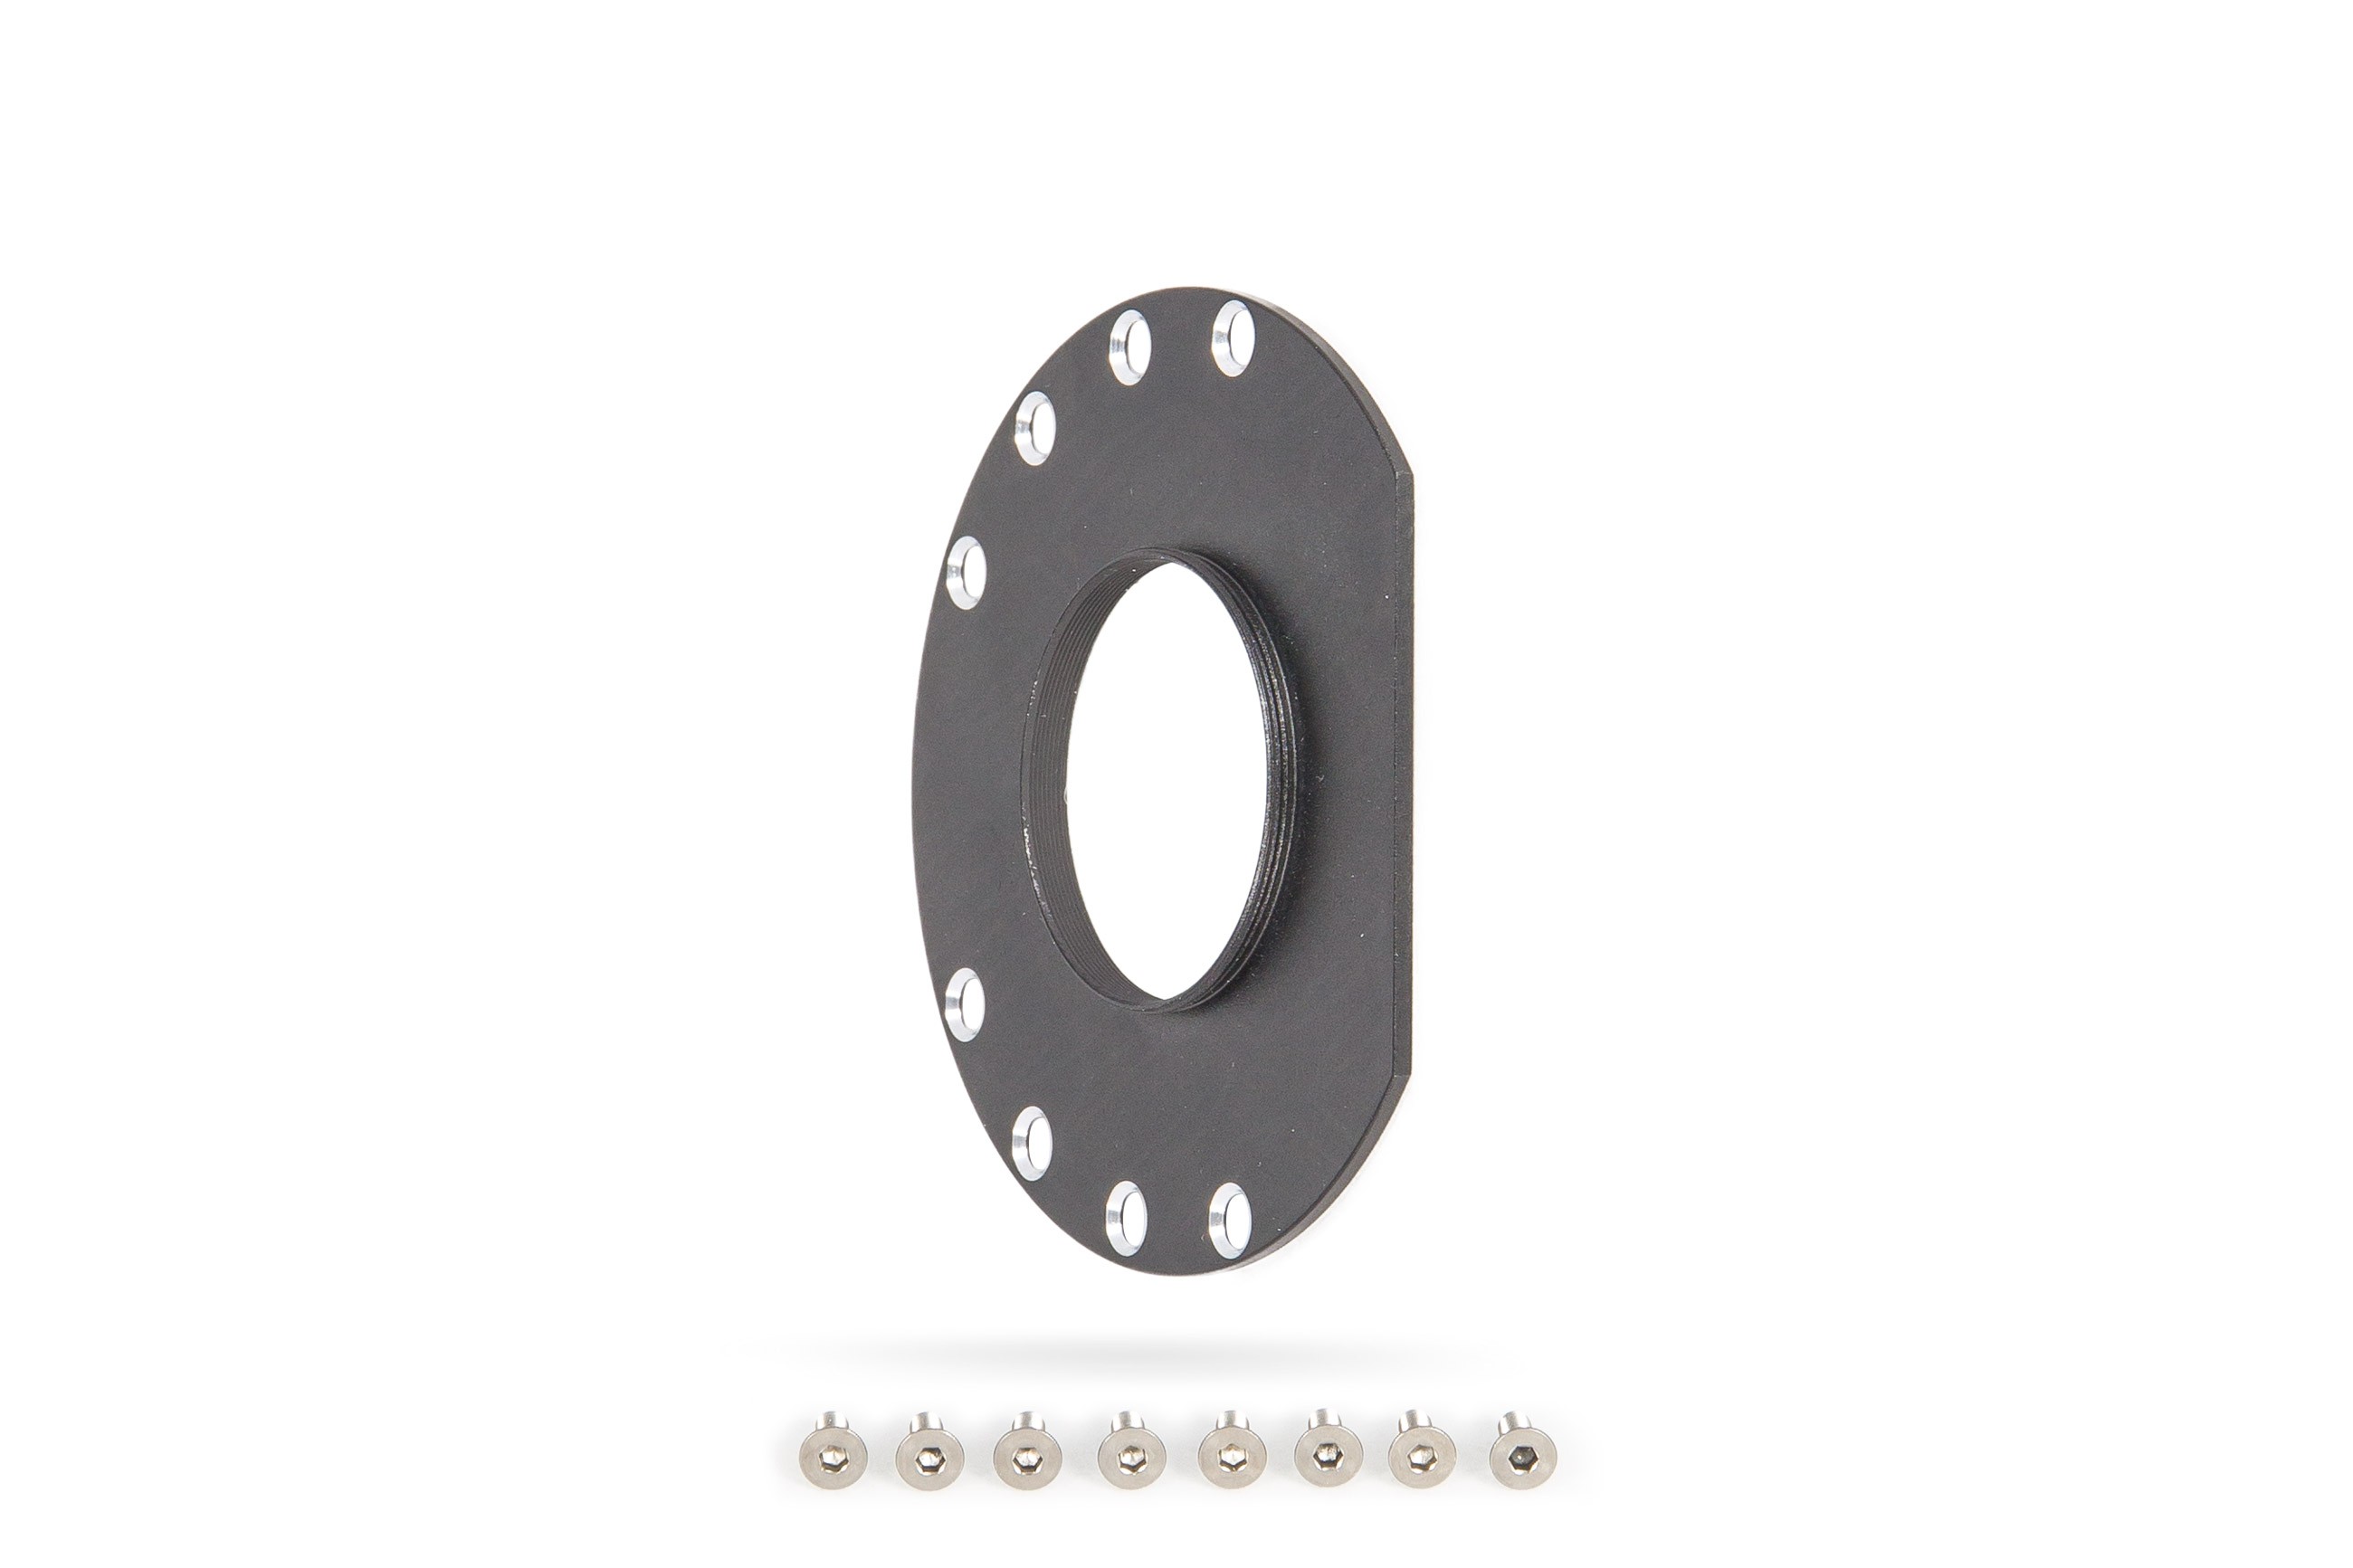
[product sku="2459113"]
It may appear, at first glance, that the Baader Planetarium Universal Filter Changer (UFC) is for use with larger 2″/50mm sized filters. Not so! You can use popular, and more often used smaller 1.25″, 31mm unmounted or 36mm unmounted filters too. So how can the filter slider drawer made for use with larger sized filters be used with smaller filters? Simple – with a step-down adaptor. Baader call these step-down adaptors AUX Filter Holders.
Apart from the UFC Base, and the associated telescope- and camera-side adaptors for your telescope/camera combination, you will need [product sku="2459113"]. It is to this particular filter slider that any of the AUX step-down adaptors attach to.[br]
We offer three AUX step-down filter holder adaptors for use with the D50.4mm slider:
[product sku="2459153"]: This adaptor is (female) threaded to accept the standard 28.5mm filter cell threads.
1.25″ UFC Aux Filter Holder (left) and inserted into the D50.4 Slider.
[product sku="2459151"]: This adaptor comes with three Allen-key socket screws and washers to securely clamp a 31mm unmounted filter in the AUX filter adaptor holder.
[product sku="2459152"]: As with the above AUX filter holder, this adaptor comes with three Allen-key socket screws and washers to securely clamp a 36mm unmounted filter in the AUX filter adaptor holder.
31mm/36mm Unmounted UFC Aux Filter Holder and inserted into the D50.4mm Slider
The 31mm and 36mm unmounted AUX holder have a small narrow “shoulder” on the inside of the unit to support of the filter once the filter is in place (otherwise the filter would drop or fall straight through the holder!).
The AUX filter holder is simply inserted into the UFC filter slider's circular opening and then it is secured in place using the three Allen key hex-screws that come with the filter slider. As with the 31/36mm AUX filter holder, the D50.4mm slider also features a small “shoulder” in the “base” of the filter opening to support the AUX holder in place (as well as to support 50.4mm unmounted filters when the AUX holder is not used).
The 1.25″/31mm/36mm filters can be inserted, removed or exchanged with the AUX holder either in place or with it removed from the UFC filter slider – its personal preference.
We've been asked a few times recently on how to set up the Baader UFC for use with a DSLR and a range of wide-field imaging refracting telescopes. So we thought we would write a short blog on some ways this can be done.
Baader UFC System chart - Overview diagram
Let us start from the telescope side first.
All the enquiries we have had, the wide field refractors have 2" barrel focusers, so there is our starting point. The telescope side of the UFC Base (to which everything else in the UFC system is connected to) uses Baader's S70 dovetail adaptors to allow the UFC to fit to telescopes.
Looking at the UFC main diagram above Baader do a [product sku="2459128"] that allows 2"/SC male-thread accessories to be used. More about our UFC Telescope Adapters can be found in our blog: The UFC telescope-side adaptors.
[product sku="2459128"]
[br]
[product sku="2408156"]
[product sku="2408155"]
We offer our [product sku="2408155"] or our [product sku="2408156"].
The image below shows the latter 2" nosepiece attached to the UFC S70 2"/SC adaptor. Using one of these will allow the UFC to be attached to a telescope with a 2" focuser.
UFC S70 2"/SC adaptor with a 2" nosepiece attached
[br]
[product sku="2459110"]
Moving away from the telescope side, we next encounter the UFC Base itself to which the telescope side and camera side adaptors attach and the filter slider is inserted into. You can read more about the UFC Base in part 2 of our series of blogs The UFC Base.
For the filter slider either the 2" mounted, 2" unmounted or 50x50mm square versions can be used depending on what filters you currently have or may want to purchase. Using smaller filters (with one of the Aux holders) will likely cause vignetting depending on the size [age] of your camera's sensor). More information on the UFC sliders can be found in part 3 of our UFC blogs: The UFC Filter Slider
[br]
Next we get to the camera side of the UFC Base.
There are three possible "routes" for attaching a DSLR camera:
[product sku="2459115"] to allow the use of standard T-rings
[product sku="2459116"] to allow use of wide (M48) T-rings for cameras with larger full-frame sized sensors.
Baader Protective T-ring with S52 dovetail (and T-2, M48 and 2" nosepiece) attachments.
So lets put all of this together. In the image below we have an example setup based on what we have written above. From right to left: we have:
A telescope with a 2" focuser
[product sku="2408156"]
[product sku="2459128"] - shown with 1 mm thick spacer ring to fasten 2" nosepieces that have a longer thread
[product sku="2459110"] with a [product sku="2459112"] ready to be inserted
[product sku="2459119"] - you can also use a [product sku="2459115"] for standard T-rings or the [product sku="2459116"] to allow use of wide (M48) T-rings
T-ring: in the example set up image below this is the Baader Canon EOS Protective T-ring (without any inserts) - (#2958550). You can use standard or wide T-rings providing you choose the appropriate UFC camera adaptor (see above).
Baader UFC example imaging set up for use with a 2" barrel focuser and a T-ring
In a future blog we will look at other ways the UFC can be used for imaging purposes, including how to set the UFC up for use with focal reducers/field flatteners.
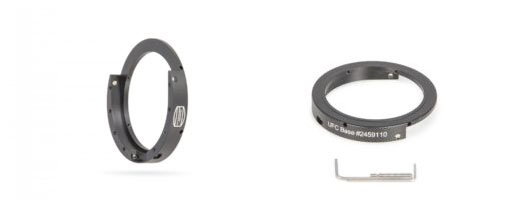
[br]Now that we have covered the main overview of the Baader UFC system in our previous blogs (parts 1-to-5), we thought it would be appropriate to give some examples of how the UFC system can be used. Firstly, this is not meant to be exhaustive as there are many combinations of telescopes and accessories. In this blog, we will consider an example of the UFC being used visually.
One of the simplest ways of using the UFC visually is with 1.25"/2" eyepieces and with a suitable telescope that uses a 1.25"/2" focuser (or 2" focuser with 1.25" adaptor). If we go back to our first blog (Overview of the UFC system), we said that although the UFC system looks complicated, its actually quite simple. At the most basic level, all that is required is a telescope side adaptor, the UFC Base and a camera/eyepiece adaptor. The image below is a simplified diagram showing the UFC system: camera/eyepiece side adaptors on the left; telescope side adaptors on the right, and in the middle is the UFC Base to which the telescope and camera side adaptors are connected. The three main versions of filter slider are also shown below the UFC Base.
Simplified diagram showing the UFC system: camera/eyepiece side adaptors on the left; telescope side adaptors on the right, and in the middle is the UFC Base to which the telescope and camera side adaptors are connected. The three main versions of filter slider are also shown below the UFC Base.
So what do we need for the example set up outlined above?
We need the UFC Base - see here for a full description on this component. This is the main component of the UFC system and it is to which all the UFC adaptors, and the UFC filter slider, attach to.
[product sku="2459110"]
[product sku="2459130"]
If we look at the telescope-side adaptors, on the right side in the image at the top, there is a [product sku="2459130"]. This is attached to the telescope side of the UFC Base befestigt and will allow Baader's Astro T-2 system to be used (or other T-2 threaded accessories).
By using the [product sku="2458105"] above, we can use Baader's 1.25" nosepiece with safety groove, from their (very large) Astro T-2 system. The nosepiece will now simply screw into the UFC T-2 telescope side adaptor thus allowing the UFC to be inserted into a 1.25" telescope focuser.[br]
Turing now to the eyepiece (/camera) side of the UFC Base
[product sku="2459115"]
Looking at the exploded diagram of the UFC system at the top, we can use the T-2 male threaded camera/eyepiece adaptor [product sku="2459115"] mit T-2 Außengewinde, links außen. This adaptor attaches to the UFC Base using eight Allen-key hex screws. As with the telescope side, we can now use an appropriate eyepiece holder accessory from Baader's Astro T-2 range.
We now have all the components for using the UFC with 1.25" eyepieces and a 1.25" focuser. Lets first "lay them all out" all together so we can see how they are all ordered.
Diagram showing layout of the UFC parts (filter slider not shown)
We have left out the filter slider in the image above so we can just see the UFC parts that attach to the telescope. You will need to select a suitable filter slider - see our blog on the filter slider.
[product sku="2458100"]
[product sku="2459110"]
[product sku="2459115"]
[product sku="2459130"]
[product sku="2458105"]
[br]Finally, below you can see an animated GIF that shows the components, with the Filter Slider, being assembled from the parts above to produce the final 1.25" UFC adaptor.
[br]
This blog continues our series on the Baader Universal Filter Changer (UFC) system, with this one giving an overview of the telescope-side adaptors. Attaching a UFC system to a telescope may be done for example, by using a 1.25" or 2" push-fit nosepiece to go into a focuser drawtube for visual or imaging purposes, or to a focal reducer or field flattener for imaging use.
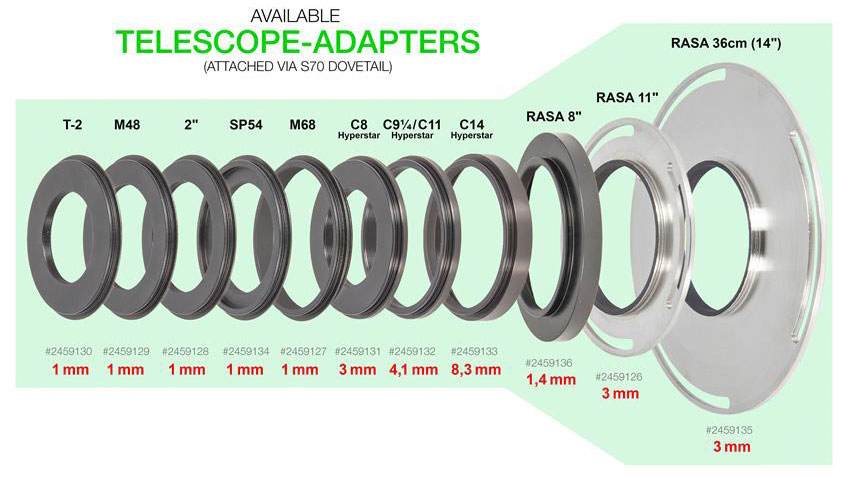
The image below shows the current range of adaptors, as well as the spacers (extensions), that are available that allow you to attach the UFC Filter Base (shown below left in the pink box) to a telescope. There are ten telescope adaptors and four telescope-side UFC extension tubes. Except for the two RASA adaptors, all the other eight telescope adaptor "bodies" are fully anodised matt-black. The two RASA adaptors have their inner central portion anodised black (where the light emanates from the RASA front lens group assembly) to stop any reflections.
Current range of UFC Telescope-side extension tubes and telescope-side adaptors (green box)
Looking only at the telescope side adaptors in the green box - see below - the following information given is:
Type of fitment that the telescope-side adaptor allows (e.g. T-2, M48 etc).
Baader product code.
The thickness of the adaptor contributes towards the overall thickness of the UFC system that takes up back focus.
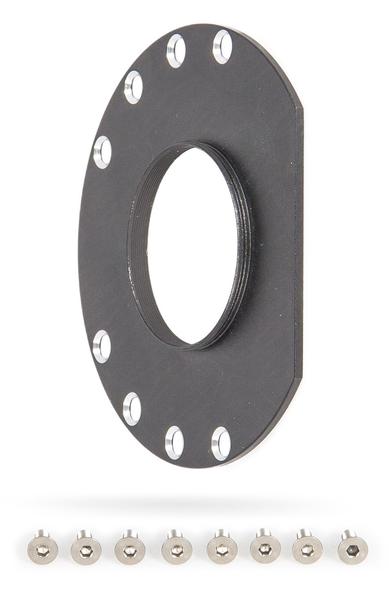
UFC Base with the S70 opening awaiting an adaptor to be inserted [product sku="2459110"]
All of the above adaptors fit to the telescope side of the UFC Base (see part 2 in our series here), and which is shown in the image below.
Every UFC telescope side adaptor features Baader's S70 (70mm diameter) dovetail on its camera side (i.e. the side of the telescope-adaptor that will face the camera once attached to the UFC Base). To attach one of these telescope-side adaptors to the UFC Base is simple. You simply insert the appropriate S70 adaptor for use with your equipment into the UFC Base's telescope-side S70 opening so that the adaptor is fully seated and tighten the six small hex-screws located around the UFC Base's edge (see here). These six screws when tightened clamp the telescope-side adaptor (and/or spacer) firmly and securely in place. The image below shows a T-2 telescope side adaptor fitted in the UFC Base.
UFC Base with a T-2 telescope-side adaptor in place
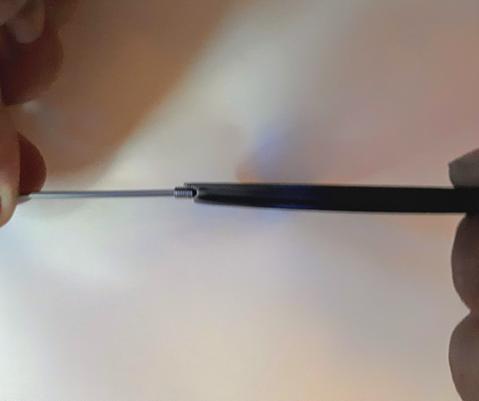
To see how one of these S70 adaptors are secured, the image on the right side shows a side - view of an S70 dovetail adaptor (in this case the T-2 model) showing the dovetail "channel" around the edge. Also shown is one of the securing hex-screws being held with the small Allen-key supplied with the UFC Base. The hex-screw is shown up against the S70 dovetail "channel" to show how the screw (and the other five screws) are positioned (when tightened inside the UFC Base) to hold the telescope-side adaptor in place.
UFC Base securing hex-screw in the S70 dovetail channel. The lower (smaller diameter) side of the adaptor is the side inserted into the S70 opening of the UFC Base.
Some points to note about the telescope-side adaptors:
The following adaptors have female threads in their central opening to accept male threaded accessories: T-2 (e.g. a T-2 to 2" push-fit nosepiece), M48 (e.g. to attach to a reducer/flattener) and 2" SC. The T-2 and M48 also have a small 1mm plastic spacer ring for attaching threaded accessories that may have slightly longer threads. The C8/11/925 Hyperstar adaptors also have female threads for attaching to the male thread on the end of a Hyperstar unit.
The SP54 and M68 adaptors have male threads. The SP54 adaptor can be used with the Baader SP54 Stepper Rings so that the UFC system can be attached to a DSLR or camera lens. We will cover this in a later blog.
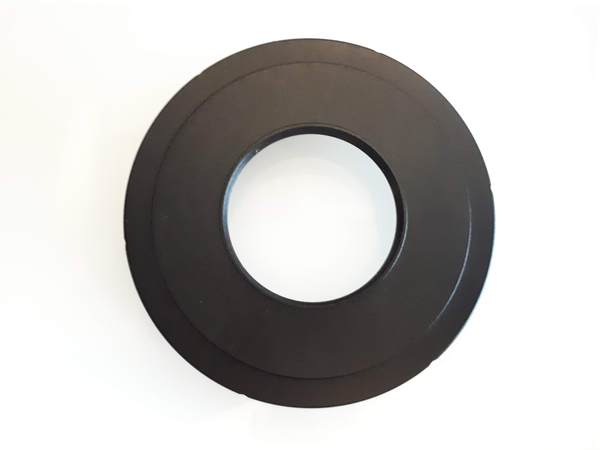
The RASA 11" and 36cm models are made to fit over the RASA's front lens group assembly and is held in place by the large knurled ring that is supplied as standard with the RASA. Machined into the adaptors are three elongated holes that are for access to the RASA collimation screws (with the adaptor in place).
In addition to the telescope-side adaptors, Baader also offer four UFC spacers (or extension tubes) that go between the telescope side of the UFC Base and one of the S70 telescope adaptor's. These spacers can be used when a camera that is attached to the UFC Base is required to be at a specific point in the optical path. For example, when a sensor is needed to be at a set distance from a focal reducer/field flattener or when a camera is being used with a Hyperstar System. The spacers are shown below.
The four extensions options include three fixed length adaptors of 5mm, 15mm and 40mm in width, and a VariLock variable extension tube that extends between 15mm to 20mm. All four extension tubes have an S70 camera-side dovetail for fitting into the UFC Base, and an S70 dovetail clamping side that also feature six small hex screws for securing a telescope-side adaptor (or another S70 extension tube).
In the next blog we will look at some example of the UFC system in use.
[br]
In this latest blog on the Baader UFC System, we will look at the UFC camera-side adaptors. At present there are nine (9) different adaptors that will allow cameras to be attached to the (camera-side) of the UFC Base unit. These are shown in the image below. The image shows the type of fitment to the camera (e.g. T-2, FLI etc), the product code and also the optical path length (thickness) of the adaptor (which is important when using the UFC system with e.g. focal reducer where the camera sensor needs to be positioned at a particular distance from the reducer - we will cover this in a later post).
All of the nine adaptors have the following common features:
made of aluminium
anodised matt-black
have countersunk holes
are attached to the UFC-base unit using 8 hex screws supplied with the adaptor for secure fitment (screws are flush fitting when fully tightened)
The image below shows the camera side of the UFC Base on which all the UFC camera-side adaptors are fitted.
[product sku="2459110"] camera side showing the 8 threaded holes for allowing the secure attachment of a suitable UFC camera adaptor.
Below is an image of a UFC camera adaptor showing the 8 countersunk holes in which the hex screws are inserted for securely attaching the adaptor to the UFC Base.
This image is representative of the T-2, M48, 2", M54 and M72 camera adaptors which feature a male camera attachment thread (for camera bodies which have a female thread)
UFC Camera adaptor
The image below shows the UFC camera adaptor (T-2 version) attached to the UFC base ready to accept a suitable T-2 threaded camera.
UFC Base with a T-2 UFC Camera adaptor attached
The following adaptors have male threads (on the camera-facing side) for attaching to cameras/camera accessories that have female threads:
T-2 (for most popular imaging cameras)
M48
2"
M54
M72 (e.g. for large format cameras - e.g. Starlight Xpress SX-46)
For the above adaptors, the camera or accessory simply screws onto the UFC camera-side adaptor.
It is worth noting that the although the T-2 camera adaptor may be considered for use with T-2 threaded cameras (as the name "T-2 UFC camera adaptor" suggests), the adaptor can in fact be used to attach a range of Baader's Astro T-2 system accessories. This includes such items as their [product sku="2458125"] or a Baader ClickLock eyepeice clamp. This allows the UFC system to be used visually too! We will discuss this further in a later blog.
The remaining four adaptors have different fitments and are worthy of pointing out.
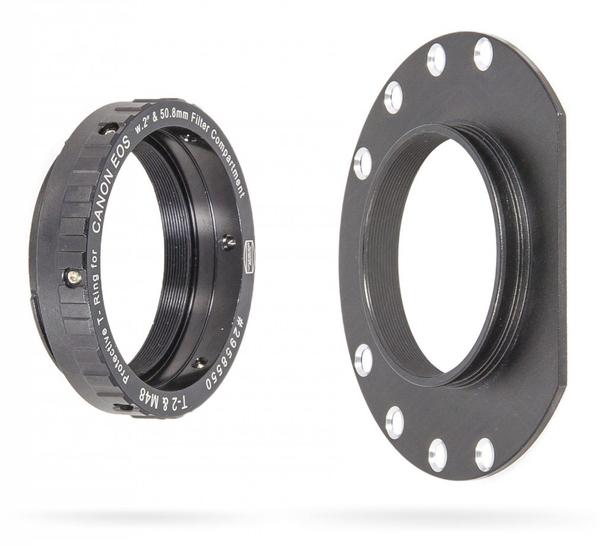
S52 Dovetail: This is for use with Baader Protective EOS or Wide T-Ringe with S-52-Dovetail, which feature a removable inner T-2/M48 insert. The T-rings are securely attached to the S52 UFC camera adaptor by tightening 6 small hex screws located around the edge of the T-ring which "grabs" onto the (male) S52 dovetail.
Protective T-Ring ready to be attached to the UFC S52 dovetail camera adaptor
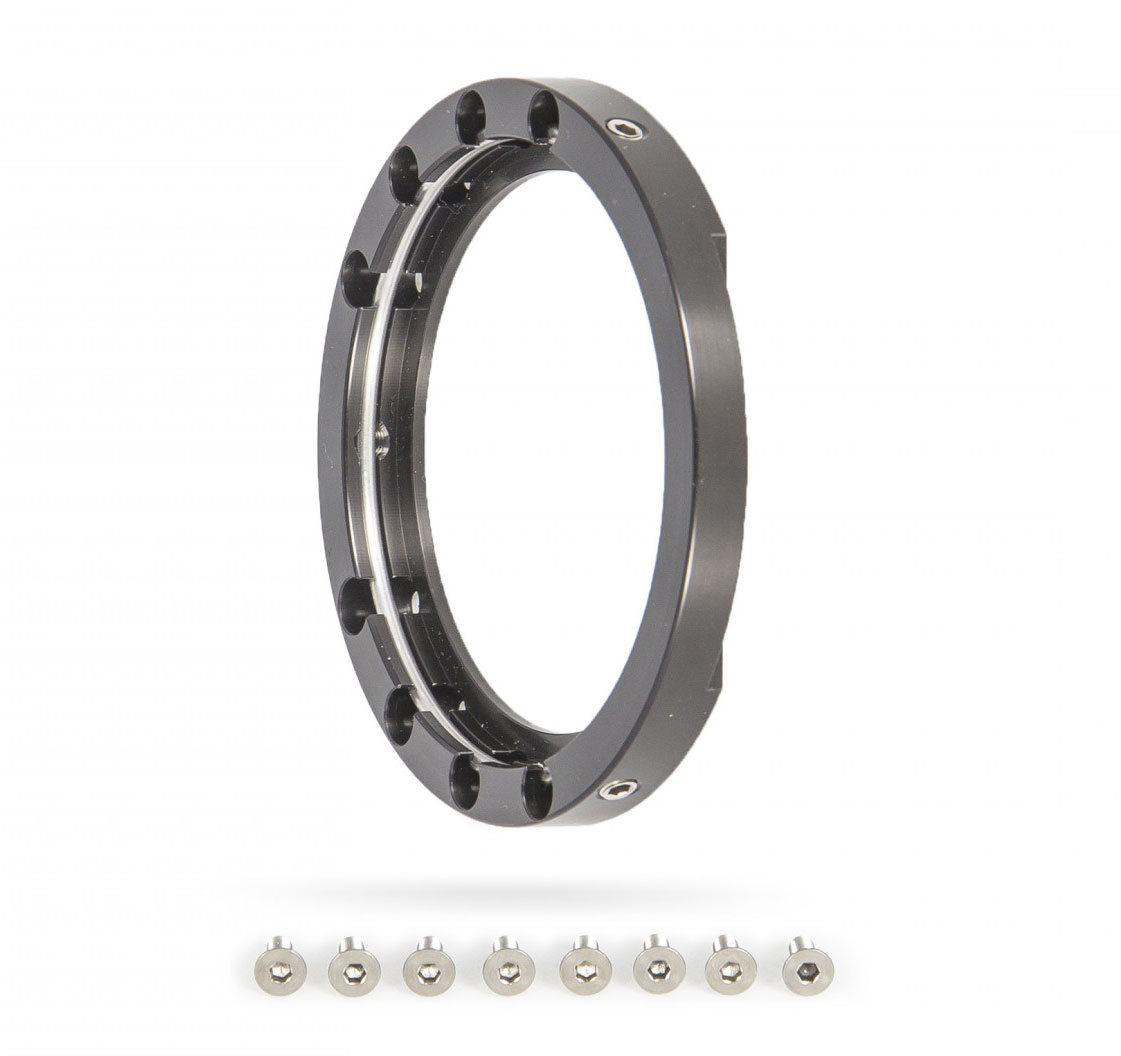
FLI: This adaptor is for use with FLI-ML and FLI-Pl cameras that have a dovetail style nose-piece (e.g. see below). This adaptor is also the thickest of the range at 10mm (compared to the typical 2mm for most of the other range). The camera is secured to the camera adaptor by tightening the three hex screws located around the outside edge of the FLI UFC camera adaptor (which "pushes"/contracts the inner split ring inwards to "grab" onto the camera dovetail nose-piece.
UFC Camera Adaptor for use with FLI ML/PL Cameras: [product sku="2459122"]
M68: this has M68-1 inner threads for use with e.g. Baader/Zeiss M68 adaptors. It also is the second thickest adaptor at 5.5mm (10mm for the FLI and 2mm for the rest of the range).
Baader M68 Adaptor with internal female threads: [product sku="2459118"]
[product sku="2459121"]
Stray Light Flange: This has no threads and is actually used when the UFC Base is connected to the front of a camera lens - it acts as a lens shade to minimise stray light. We will discuss how to attach the UFC to a camera lens in a later blog in a few weeks.
UFC System attached to DSLR camera lens with the stray light adaptor attached
[br]
Nächstes Mal werden wir uns die teleskopseitigen UFC-Adapter näher anschauen.


 What is APF-R?
 Visual Components: