Using the Baader FlipMirror II Star Diagonal (BFM II) at the Telescope
The Baader FlipMirror II Star Diagonal (#2458055 , € 228,-) is not only an accessory for professional users, but much more: It is a helpful tool for every amateur astronomer – especially for astrophotography.
First of all, the BFM II is designed to completely replace your standard star diagonal, so that you can keep observing as usual, just like with every good star diagonal. But the BFM II gives you much more options. You can create – from the beginnig, or step-by-step – your own system for photography and keep it always ready-for-use at your telescope. This will save you a lot of time and nerves. In the next months, we want to show some of the many options of this new product here.
In this article we will cover the adjustment options.


Adjustment options of the FlipMirror II star diagonal
The Baader FlipMirror II offers a variety of adjustment options. Usually you don't need to worry about them – the BFM-II is ready for use "out of the box" if you have the right connecting parts. But if at some point you want to use short, torsion-proof screw connections, you may be dissatisfied with the delivery condition: The beginnings of each thread are different, so a camera will most likely be aligned at an angle to the FlipMirror II. This does not only look strange, but can also cause the hot shoe of a DSLR to interfere with the housing of the FlipMirror II. And most of the time, you'll want to align the camera in such a way that the rows of pixels are oriented along the axes of the mount. Then the cardinal points are not skewed in the image when the shot is displayed with "north up" for better orientation, and the data of a spectrograph can be captured with highest resolution.
Most users will probably use the BFM-II with a 2" nosepiece, so that it can be easily rotated around the optical axis of the telescope together with the camera. Especially on fixed telescopes or when the backfocus is narrow, a screw connection with telescope or eyepiece extension is recommended. For the Baader Diamond SteelTrack® there are various short adapters with connecting threads available, which can replace the original ring clamp. This allows the alignment to be easily reproduced when cameras or instruments are changed to continue an observation on another night. With a plug/clamp connection, this usually only works in good approximation.
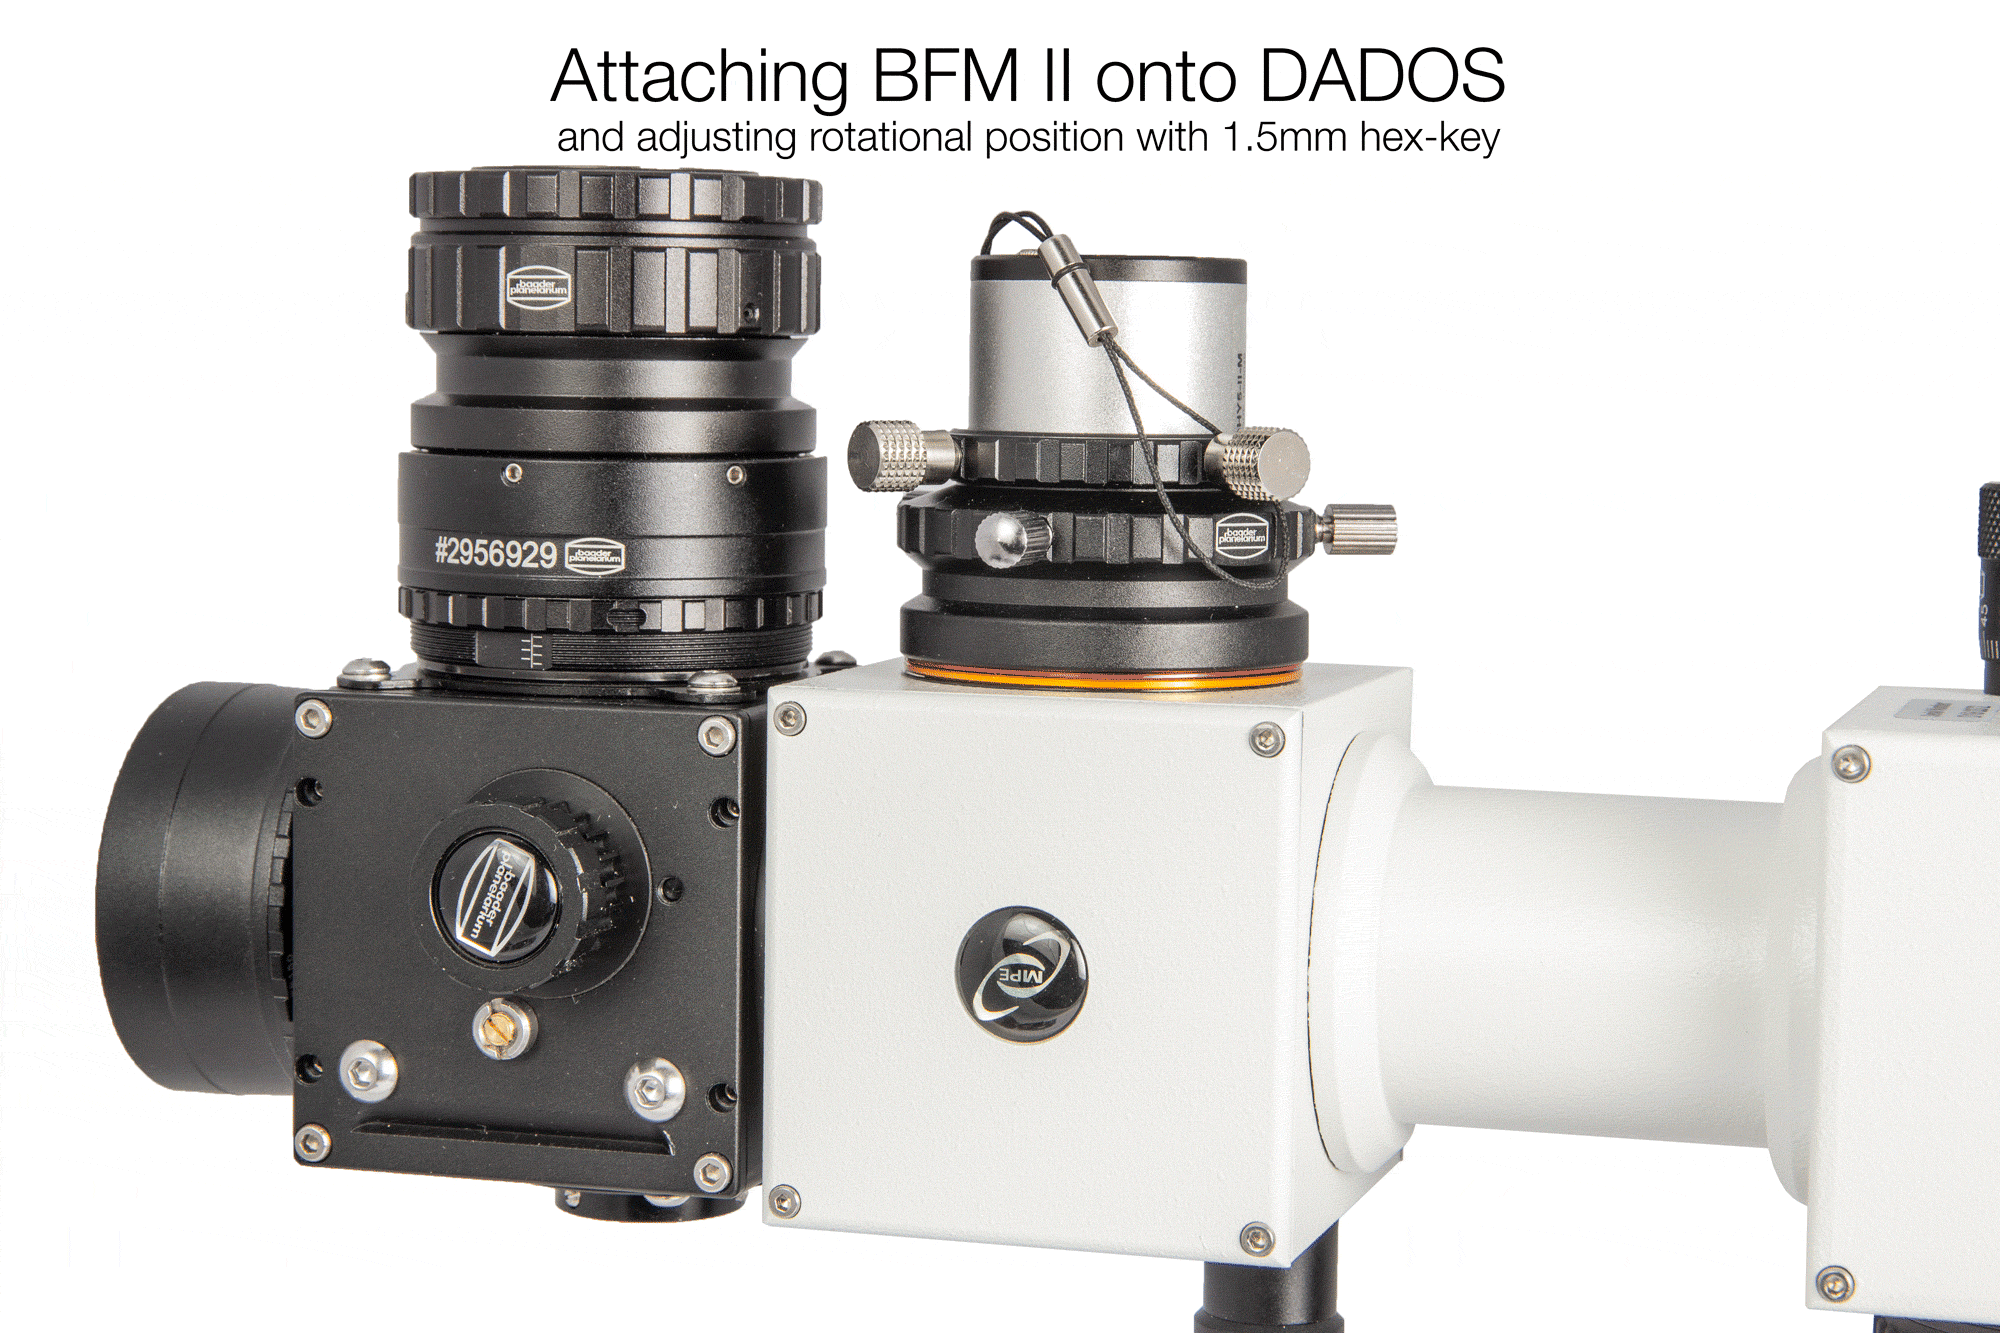
The connection threads are adjustable via the four grub screws. Thus accessories like here the DADOS spectrograph can be aligned flush with the housing, or the whole attachment can be rotated if it is firmly screwed to the telescope
The angle of rotation around the optical axis is always adjusted by the same method, no matter if you want to adjust the telescope side or the camera side connection. With the included 1.5 mm Allen wrench you can loosen the two S52/M48 insert rings, which are used to connect the BFM-II to the telescope or the camera. To do so, simply loosen the four countersunk grub screws holding the respective ring, turn it to the desired position, and tighten the screws again. You may "dig" into the material – after all, the ring should not give way when you unscrew accessories.
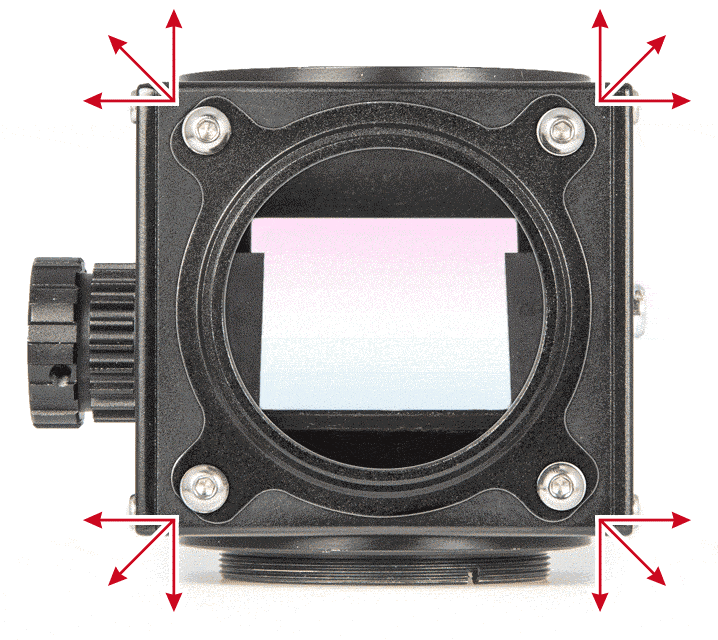
BFM II - View from above. The connection thread can be aligned using the screws.
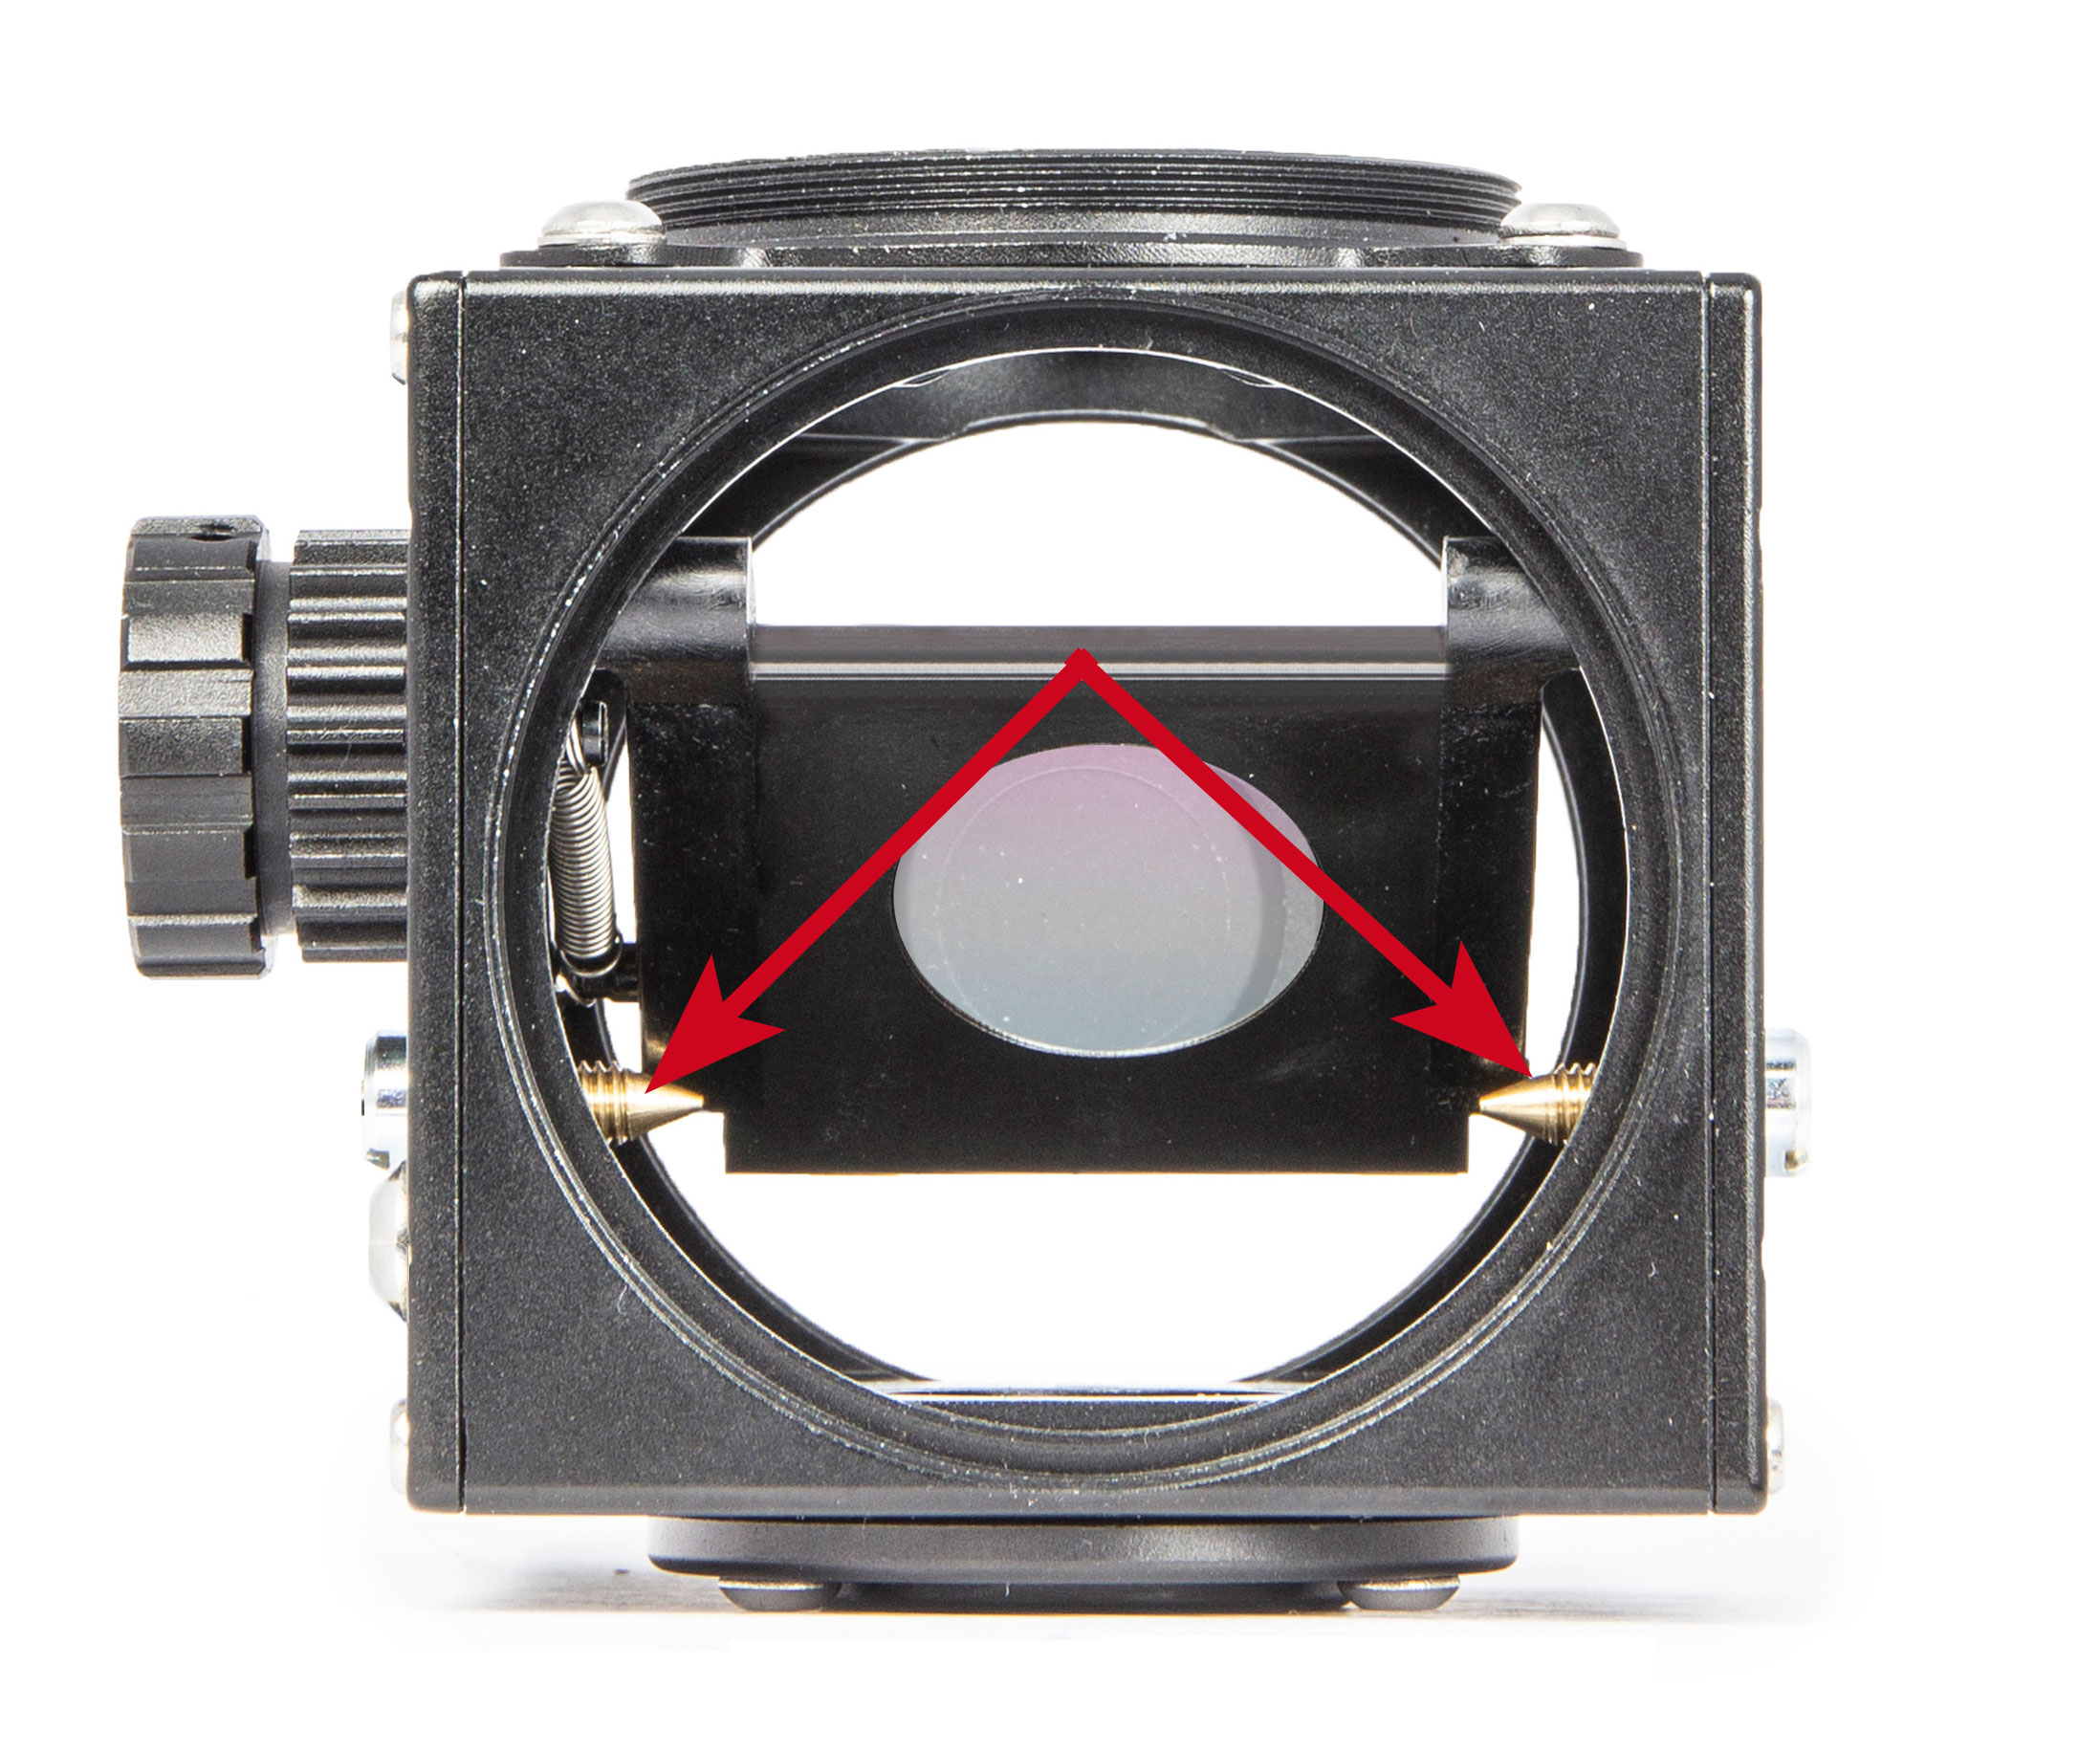
Similar to an extender, the upper eyepiece port can be moved a little bit in every direction to place a star which is seen in the middle of the camera sensor also exactly in the middle of the crosshairs. In this way you can easily compensate for a slight decentration of a crosshair or eyepiece. Such a decentration can occur, for example, if the tolerances between the eyepiece diameter and the eyepiece clamping are too large, or if the eyepiece is not always clamped in the same position.
Simply center a star on the sensor of the camera mounted on the rear (straight) port and then move the entire top connector until the star is centered here as well. Then fix the four adjustment screws - done.
The two pins on which the mirror rests.
The tilt angle of the mirror can also be adjusted if necessary. The spring mechanism presses the mirror onto the two conical brass pins. Using the tools provided, the two pins can be adjusted to move the image along the optical axis if necessary.
Normally these screws do not need to be adjusted, but if they do, make sure that the mirror rests on both sides.
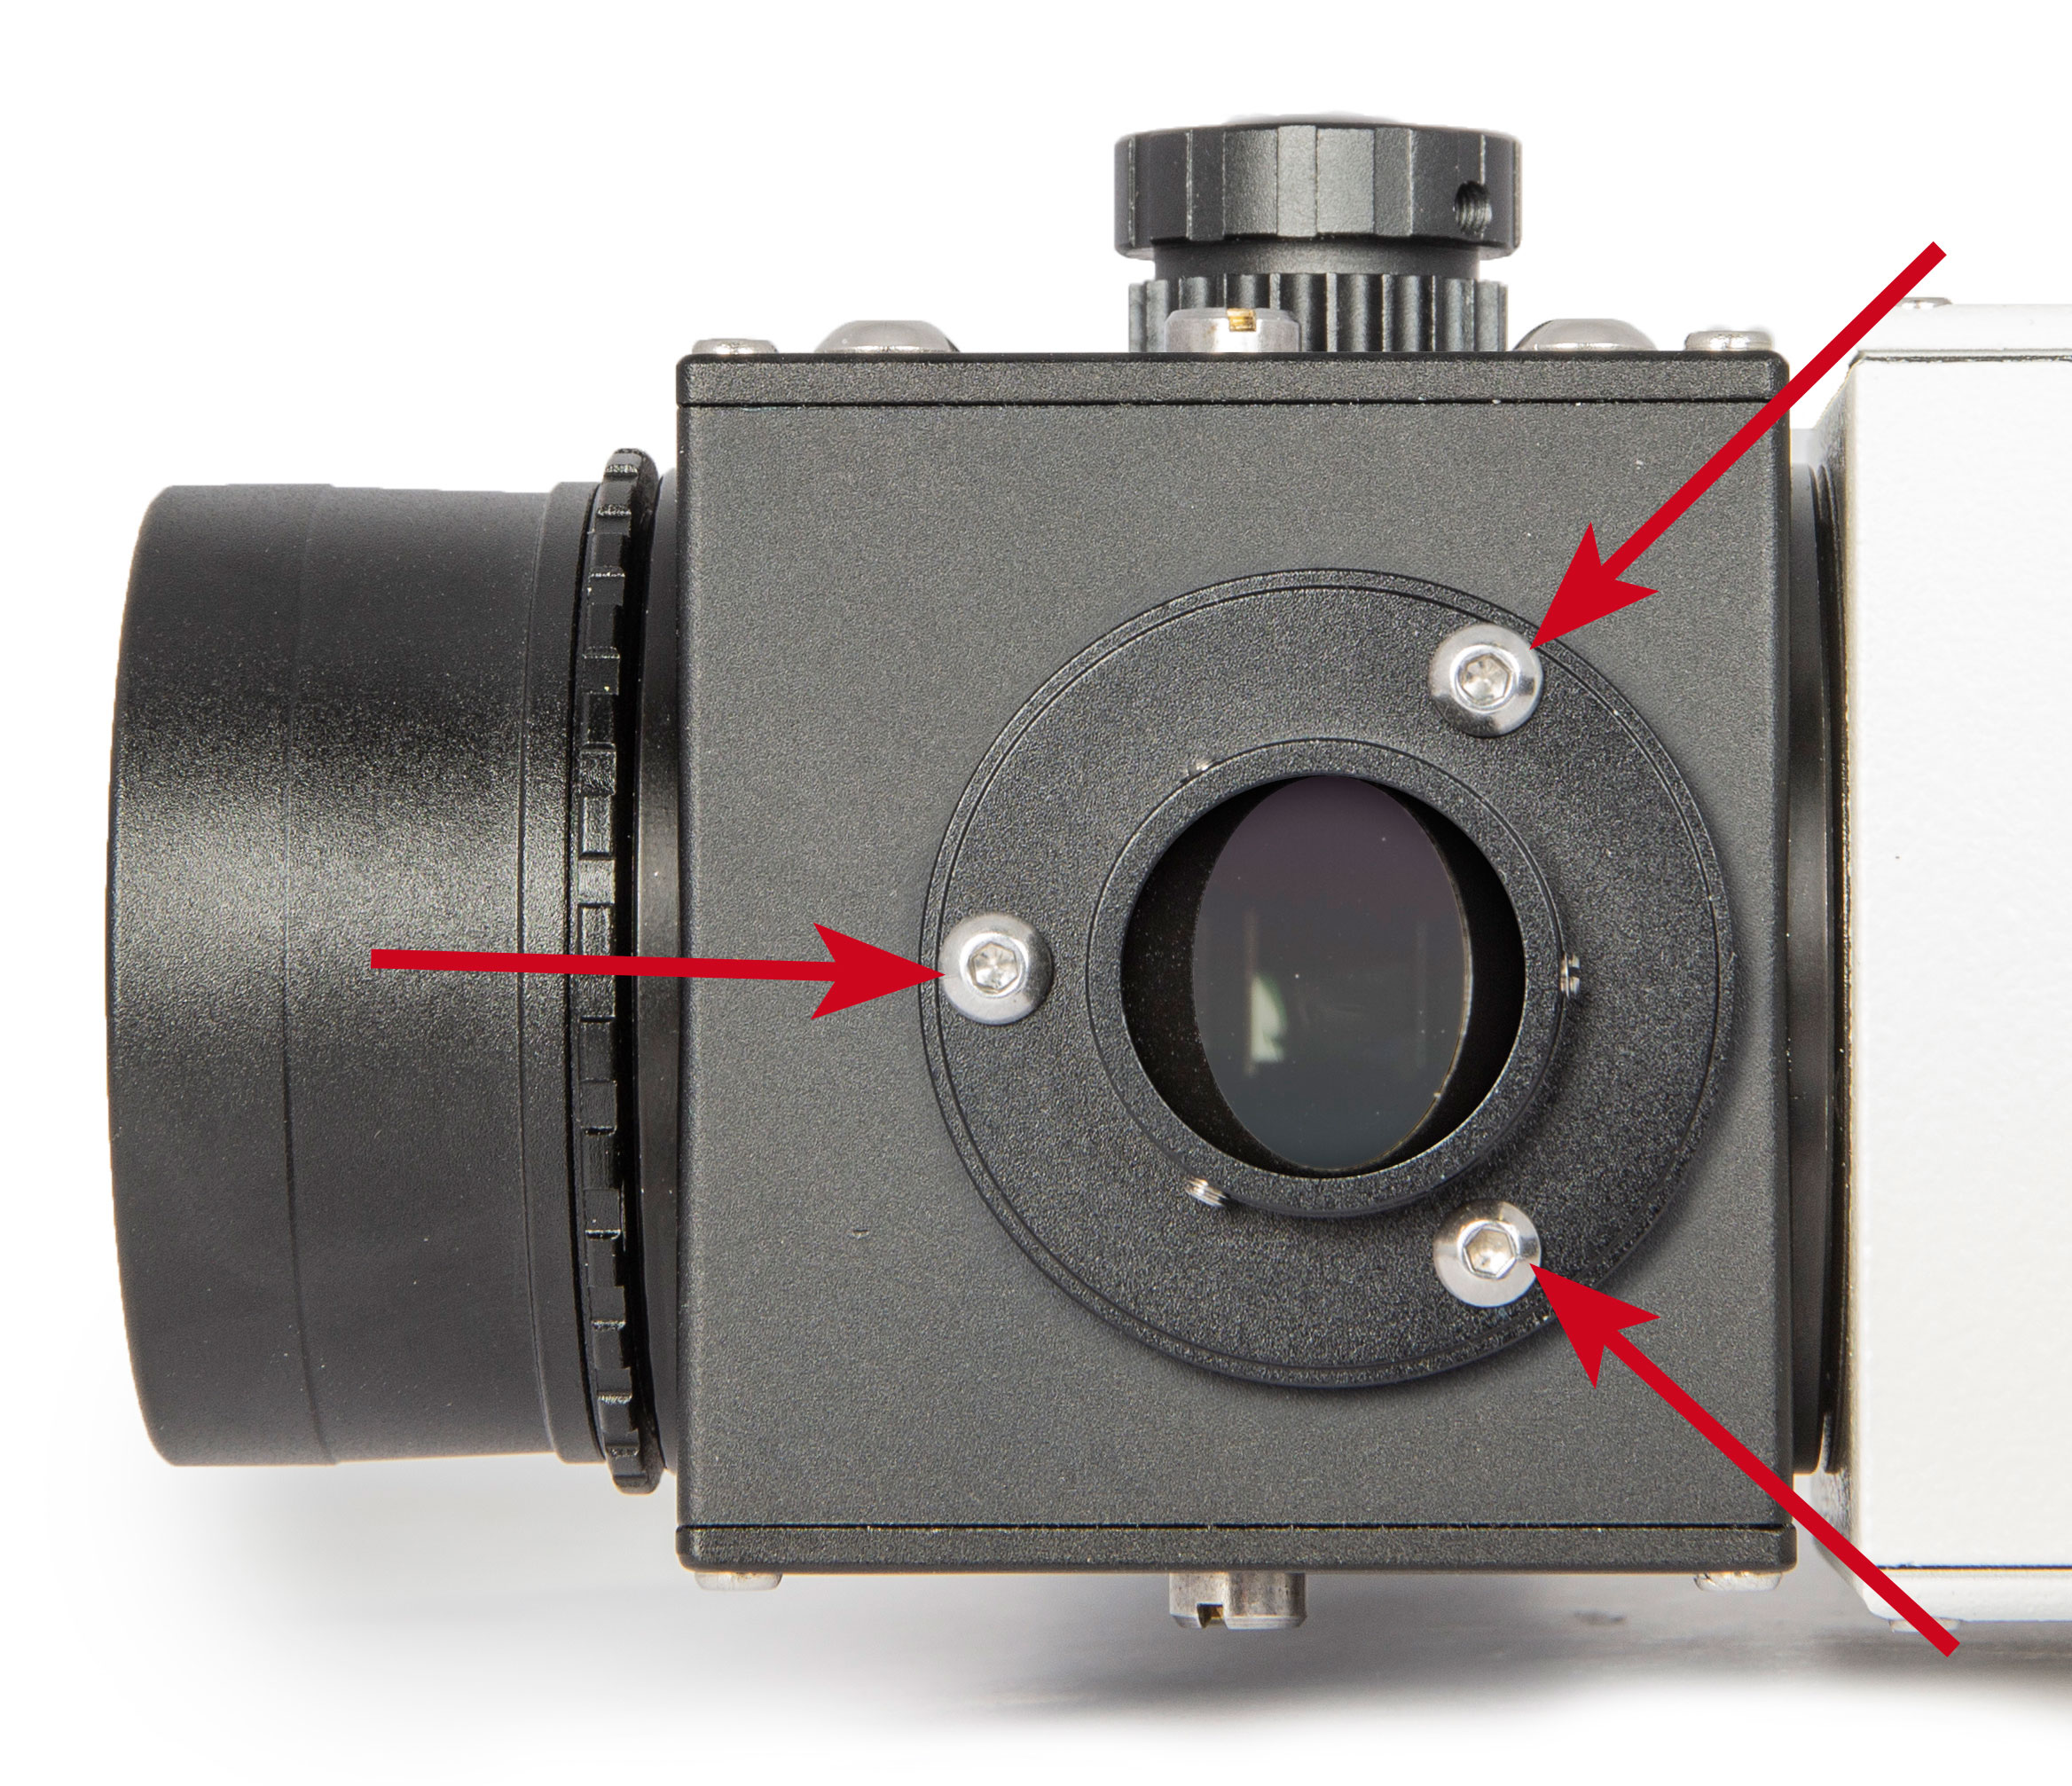
The adjustment screws for the lower port of the BFM II
Last but not least, the bottom (AUX-) port e.g. for an Autoguider can also be adjusted a little bit, in order to position the prism perfectly or to be able to adjust everything else as usual via the off-axis-guide. This is done with the three screws that attach the off-axis-guider to the FlipMirror II housing.
No Compulsion, but Possibilities
Don't get intimated by the adjustment possibilities of the FlipMirror II – it is pre-adjusted and many options are either intuitive or only interesting when it is firmly screwed to the telescope and camera. At the latest when you plan such a professional setup with the shortest possible overall length, you will appreciate the possibilities that simpler models with fixed eyepiece clamps cannot offer.
About the author: Alexander Kerste
Alex is a studied biologist and works as a freelancer as an author, consultant and translator. After his studies and the publication of the Kosmos Starchart-Set in 2004, he was a regular freelancer for Astronomie Heute and the yearbook Der Himmel for the Spektrum-Verlag in Heidelberg. He is in charge of the Beginner courses on www.Astronomie.de and is a voluntary active member in the Robert-Mayer-Observatory since 1993. Since then, he has published a number of books on Celestron-Telescopes as well as Digiscoping and Astrophotography. One of his books on Astronomy with binoculars is also freely available at freebook.fernglasastronomie.de. In addition he supervises the Northern lights and star tours from Hurtigrute – these were also published in a travel guide, further articles can also be found on his blog kerste.de.